

Any geometric body consists of a shell, i.e., the outer surface, and some material filling it (Fig. 42). Each geometric body has its own shape, which varies in composition, structure and size.
The composition of the shape of the geometric body is a list of surface compartments composing it (Table 4). So, the shape of a rectangular parallelepiped consists of six compartments, surfaces (faces): two of them are the bases of the parallelepiped, and the remaining four compartments form a closed convex broken surface called the lateral surface.
Figure 42. Geometric body: 1 - shell; 2 - compartments of the surfaces forming the shell of the body
Shape structure geometric body - a characteristic of the form, which shows the relationship and the location of the surface compartments relative to each other (see Fig. 44).
These characteristics are interconnected and to the greatest extent determine the shape of the geometric body and any other object.
In shape, simple geometric bodies are divided into polyhedra and bodies of revolution.
Plane is a special case of the surface.
Polyhedra - geometric bodies, the shell of which is formed by compartments of planes (Fig. 43, a).
Facets - compartments of the planes that make up the surface (shell) of the polyhedron; edges - line segments along which faces intersect; the vertices are the ends of the ribs.
Body rotation - geometric bodies (Fig. 43, b), the shell of which is a surface of revolution (for example, a ball) or consists of a compartment of a surface of revolution and one (two) compartment of planes (for example, a cone, cylinder, etc.).
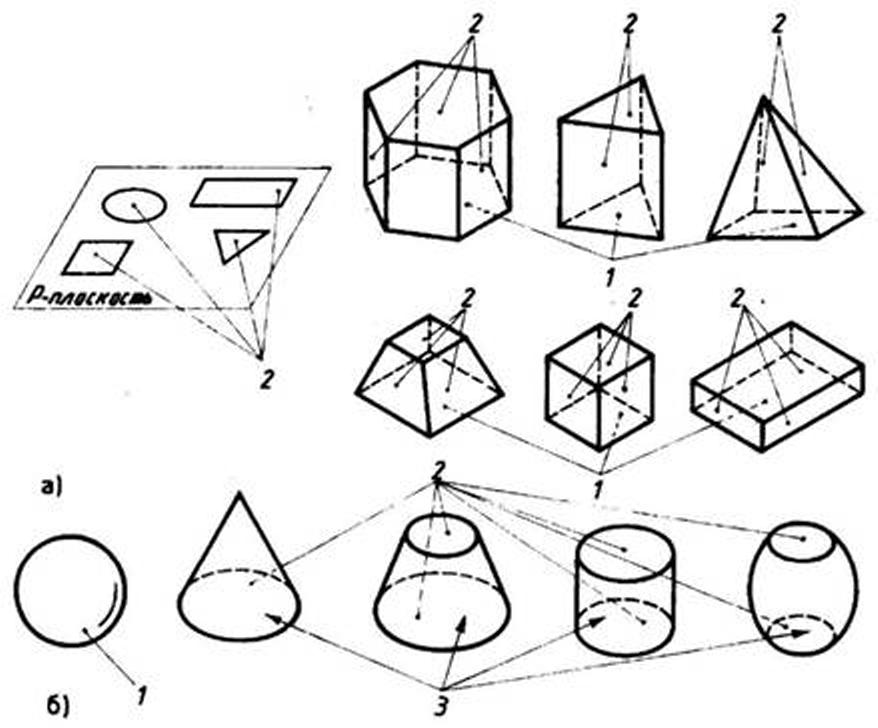
Fig. 43. Polyhedra (a) and bodies of revolution (b): 1 - shell of a geometric body;
2 - compartments of the planes; 3 - compartments of the surfaces of rotation
4. The composition of simple geometric bodies


![]()
The structure of the shape affects the appearance of the geometric body. Let us consider this as an example of straight and inclined cylinders (Fig. 44), the compartments of the bases of which are located differently relative to each other.
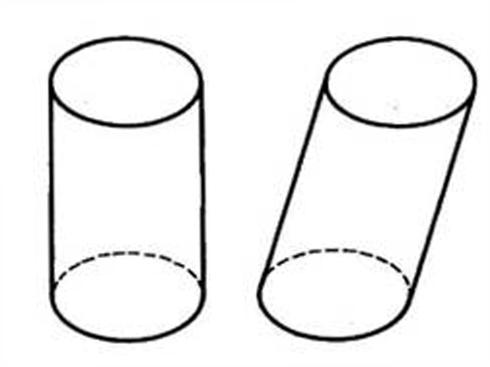
Fig. 44. Structural differences in the shape of the cylinders
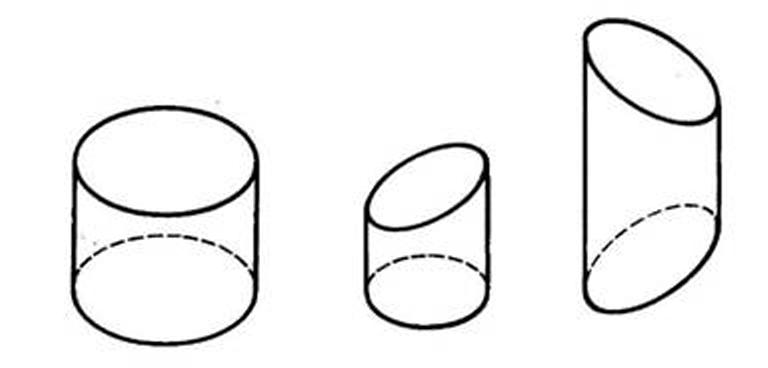
Fig. 45. Changing the shape of the cylinders
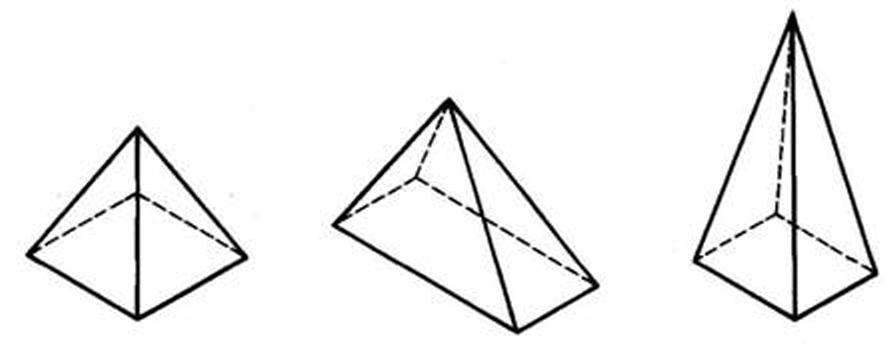
Fig. 46. \u200b\u200bQuadrangular pyramids of various shapes
Comparing the images of the cylinders in Figure 45, we can conclude that a change in the position of one of the bases leads to a change in the shape of the geometric body.
Changes in the height, width, length, diameter of the base, the axial angle of inclination, the position of the bases relative to each other significantly affects the shape of geometric bodies. For example, consider quadrangular pyramids of various shapes (Fig. 46).
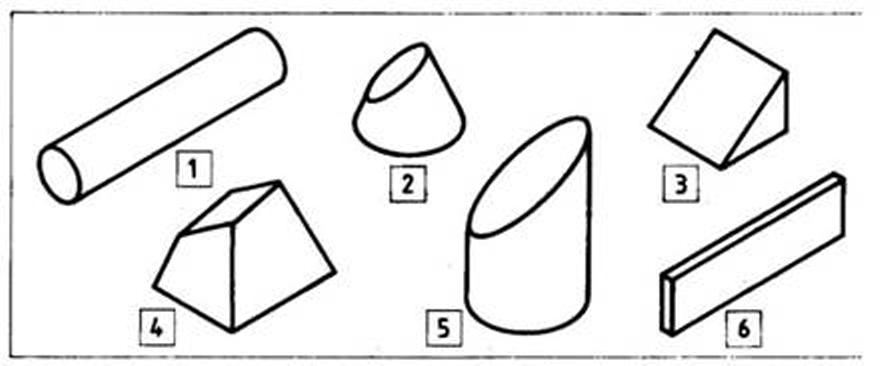
Fig. 47. Geometric bodies
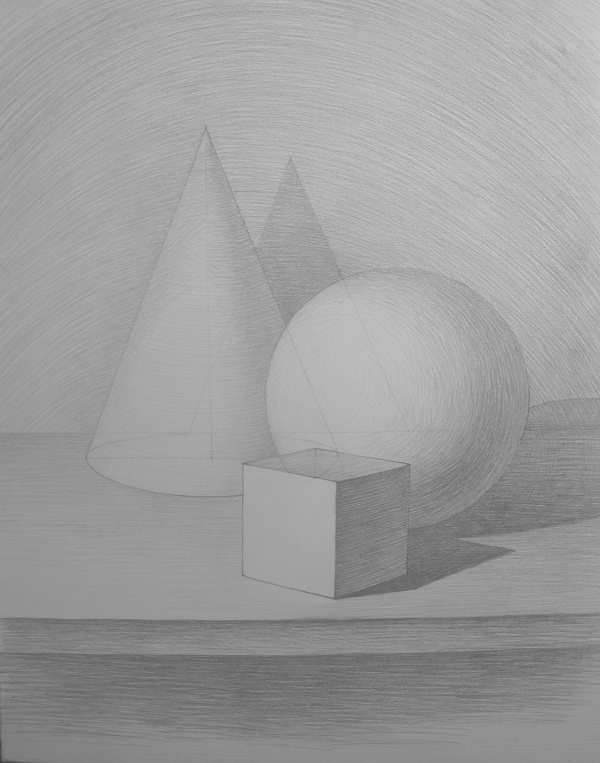
Still life with geometric shapes - we know how to draw geometric shapes individually from this page, we also learned how to use the eye and perspective skills to build volume shapes. Good. And now we will take two or three figures with you, place it on the subject plane and make a drawing. Most likely, when you made models of geometric shapes, they turned out to be of different sizes, different. For a still life with geometric objects, we will need figures that are preferably different in size, so that they would not have the same volume or mass in the composition. So interesting and harmonious.
I take a ball, cone and cube. The cone is a little the same size as the ball, but it is directed upward, and if the ball is a static figure, then the cone is dynamic, it is he who sets the format — the still life in the sheet will be placed vertically. Well and the third I will take a cube. He will be less than the other two figures, which will give variety in the "assortment".
Look at the photo on the right. Here is my still life. My subject plane and figures are white, and by this, we will consciously assume that the wall will also be white. We will do this so that we are not disturbed by additional tones in the picture. Now we will not write, but first of all analyze and transmit in the sheet what we already know. And by this moment we should already know the basic laws of drawing. And knowing the basic rules and laws in the drawing, after the construction stage you can often not resort to the help of nature, since it can give you a lot of reasons in order to distract your attention from the main one, we consolidate knowledge.
Also on this fragment of the picture you can see how the shadows will behave. The most active is the falling shadow from the cube. All shadows that will be removed into space will lose their activity, BUT! will still remain shadows. Do not forget about it. Now let's look at all the work:
Here is a still life you can get.
Let's analyze a little more. See which side the lighting is on? Not difficult to determine by cube. Its side face is lit most of all. So the light source is located more on the side than on top. That is why the subject plane will already initially have a darker tonality than the wall in the background. The only area is the lightest on the subject plane, closest to us, in front of the cube. There is even a reflex from the white illuminated plane of the cube. But still, the tonality will be stronger than on this side of the cube. And the overall tone of the subject plane will be darker than the tone of the wall. That's about how you can "play" in a stroke and tone, creating space in the sheet.
By the way, reflexes are present both on the shadow side of the cube and on the ball — they reflect from the object plane. See? But this only adds liveliness and realism to the picture, and as before the shadow remains a shadow - the reflex should not have a tonality equal to the tonality of the illuminated surface. When you look at this area for a long time in nature, it often seems like this to you, but in fact you just need to give your eyes a rest, and then look at the whole picture, scattering your eyes and analyzing everything in general.
Now the area closest to us is the kink of the object plane, it receives enough light so as not to make it darkest, but perhaps we would need to highlight the area under it (under the table) as the darkest. But we will not do this, since our main action is not taking place under the table. I believe that it is enough how actively the fracture of the subject plane is shown and how much is allotted in the sheet for the place of the shadow located under it. The importance of this site, we have passed, and here it is enough. And also notice how the stroke lies in this place: also, obeying the general order, the stroke devours the already created mood of the composition in the horizontal direction of the lines. And although the tablet is rotated vertically, the figures are also supporting the vertical, but this vertical nature does not spoil our verticality, on the contrary, it balances and gives order and static. Everything is balanced, harmonious and perfectly coexists with each other.
That's about how we build the space in the sheet. Work, you will succeed. A good beautiful still life with geometric figures is worth a little work on its creation. So gradually we will learn how to learn how to draw, then to draw anything.
First stage. Determining the size of the ball, the fulcrum and the plane on which it is located.

Second phase. Clarification of the diameter of the circle of the ball, determination of the boundaries of light, halftones and their own shadow, reflex and incident shadow.
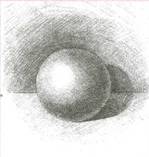
The third stage. The transfer of volume by strokes superimposed in the shape of a ball. It is necessary to pay attention to the smoothness of tonal transitions on a spherical surface.
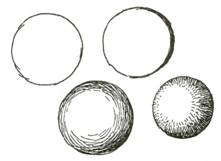
166. Turning a circle into a ball
See how simple it is to turn a circle into a ball using various hatching techniques or just by thickening the outline on one side.
Words do not have such power as a few hours of practice in drawing these objects. You can try to portray some simple things and geometric bodies.
When choosing objects, take an egg or a solid ball as sphere-like models, a cardboard box can be a cube. Pyramids, cones and prisms are also easy to make from cardboard. But do not limit yourself only to white models, try to portray light and dark, matte and shiny objects.
Light, shadow and partial shade play a significant role on the shape of the subject. The artist, painting a living model or still life, often experiments with light sources.
Use them consciously in order to best convey the features of the shape and texture of objects, try to illuminate them from different angles.
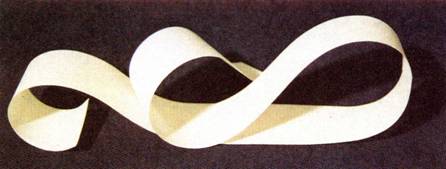
167. Paper tape
The contrast of light on dark or dark on a light background is greater, the closer the light source. Items that are fully lit from all sides look flat.
See how the shape is perceived differently depending on the change in direction of the light source.
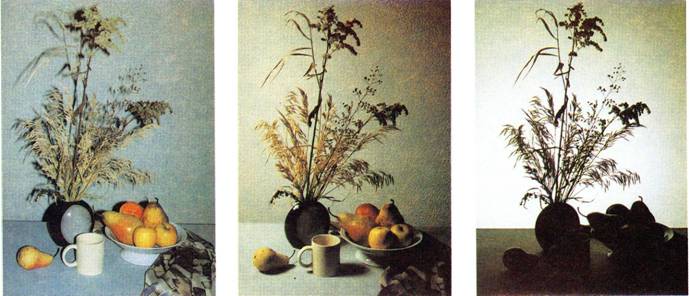
168. Still life under different lighting
Consider figures 169 a, b. Smooth hatching of one tone does not convey the three-dimensional shape of objects. Applying strokes in the shape of objects, taking into account light and shadow, turns flat silhouettes into volumetric things.
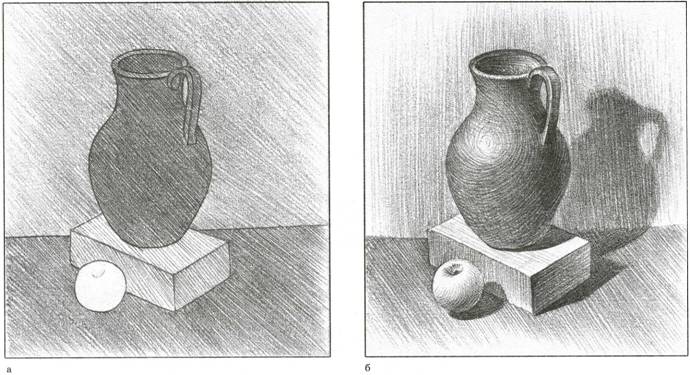
169. Still life: a - planar tonal solution, b - volumetric tonal solution