

Even ancient artists, drawing the human body, established the basic rules for the relationship between the individual parts of the body and the entire figure as a whole. Knowing these rules makes drawing a person much easier, but it is important to remember that each person still has its own characteristics.
When drawing a person, the head size is taken as the unit of measurement.
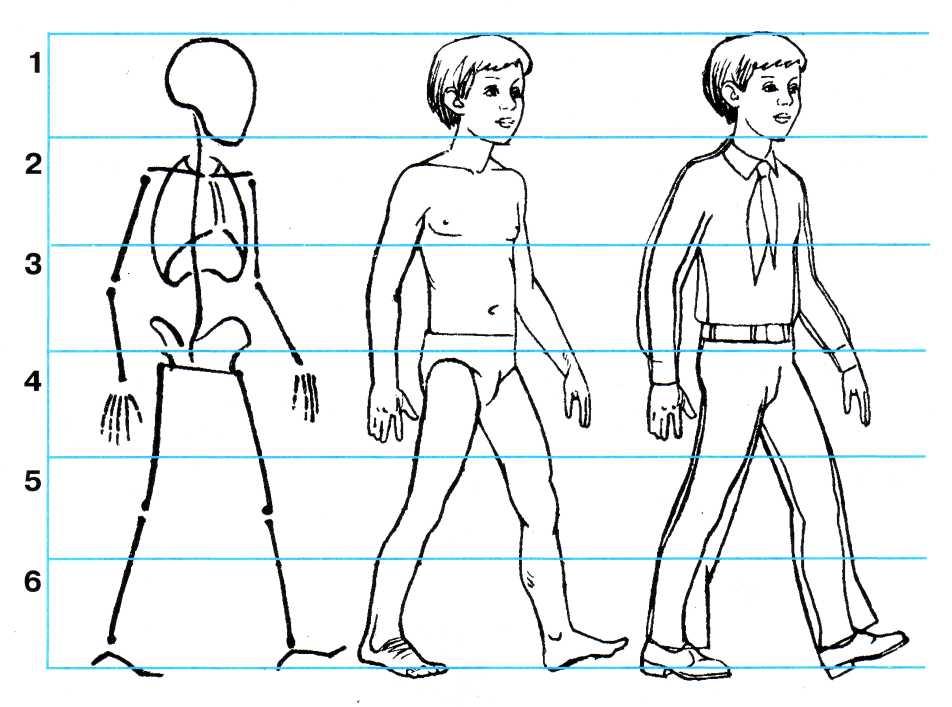
In an adult, the size of the head fits in the height of the figure 8 times. The teenager - 7 times. In a baby, the head size fits in the height of the figure 4 times, in a schoolchild - 5 times.
Hands reach the middle of the thigh, elbows are at the waist level, knees are in the middle of the leg.
In an adult, the head fits 3 times in the length of the arm, and 2 times in the shoulders. The width of the pelvis of a man is one and a half heads, and women are about 1.25. The length of the legs is four head heights. The body with the head equals half the height of the figure.
The height of the head is equal to the length of the brush with the wrist. The fingers of the downcast arm are at mid-thigh level. The height of the foot is equal to the height of the nose, and the length of the foot is the length of the forearm. The height of the body is equal to the length of the arms extended to the sides. The height of the head in men is half the width of the shoulders, and in women - the distance between the convex points of the chest. The width of the hand is approximately equal to the length of the middle finger. Waist circumference is equal to two neck circumference.
When drawing female and male figures, pay attention to the difference in proportions in their image.
Proportions of a female figure
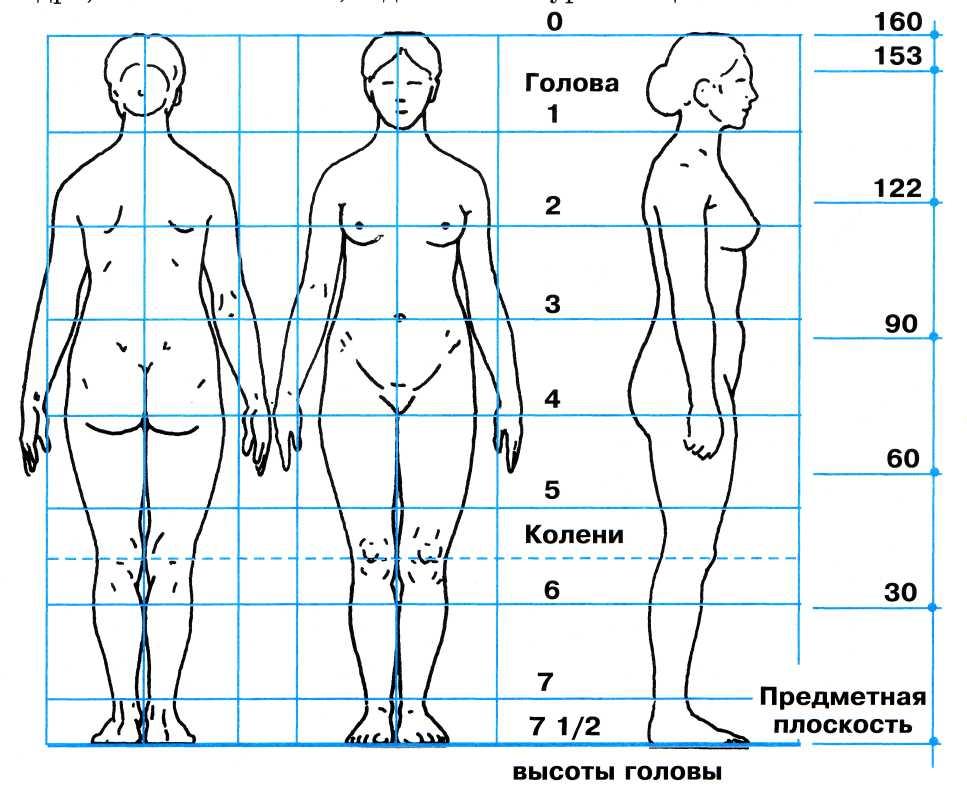
The proportions of the male figure
The first division is the entire head, the second is the middle of the chest, the third is the waist, the fourth is the upper thigh, the fifth is the middle of the thigh, the sixth is the lower leg, and the seventh is at the ankle level.


The proportions of the figure of a teenager
The first division is the entire head, the second is the middle of the chest, the third is the waist, the fourth is the thigh, the fifth is the upper part of the knee, the sixth is the middle of the lower leg.
You need to start drawing with the definition of proportions. To do this, note the height and width of the image and clearly follow them. Without this preliminary measurement, the figure in the drawing process may not fit on the sheet.
How to make a man
In order to correctly portray a person in motion, you need to make a moving model of his figure from thick paper.
Cut fragments of a man’s body from colored cardboard.
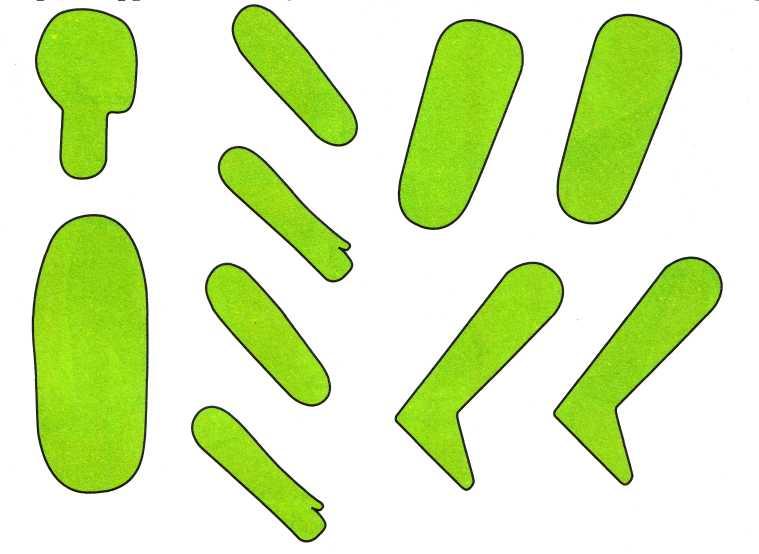
Where circles are drawn, the figures are connected with a button, a nut and a bolt or thread so that the parts remain movable.
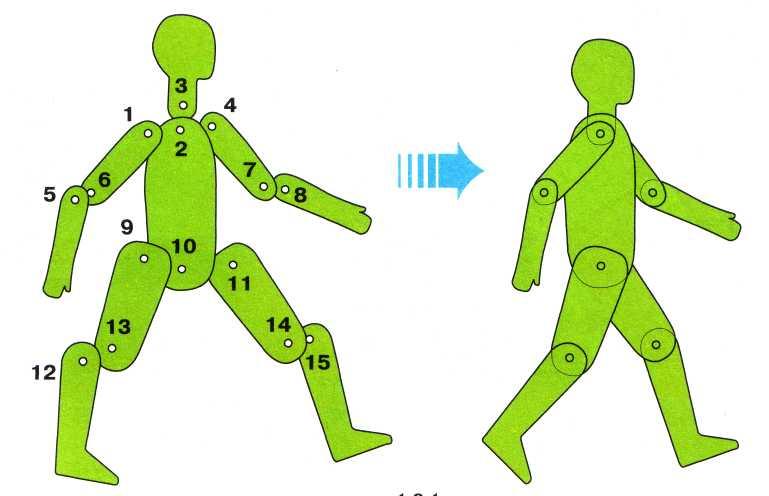

And you can do the same with stripes of paper. It is necessary to divide a square piece of paper vertically into three parts and then another, as shown in the figure.
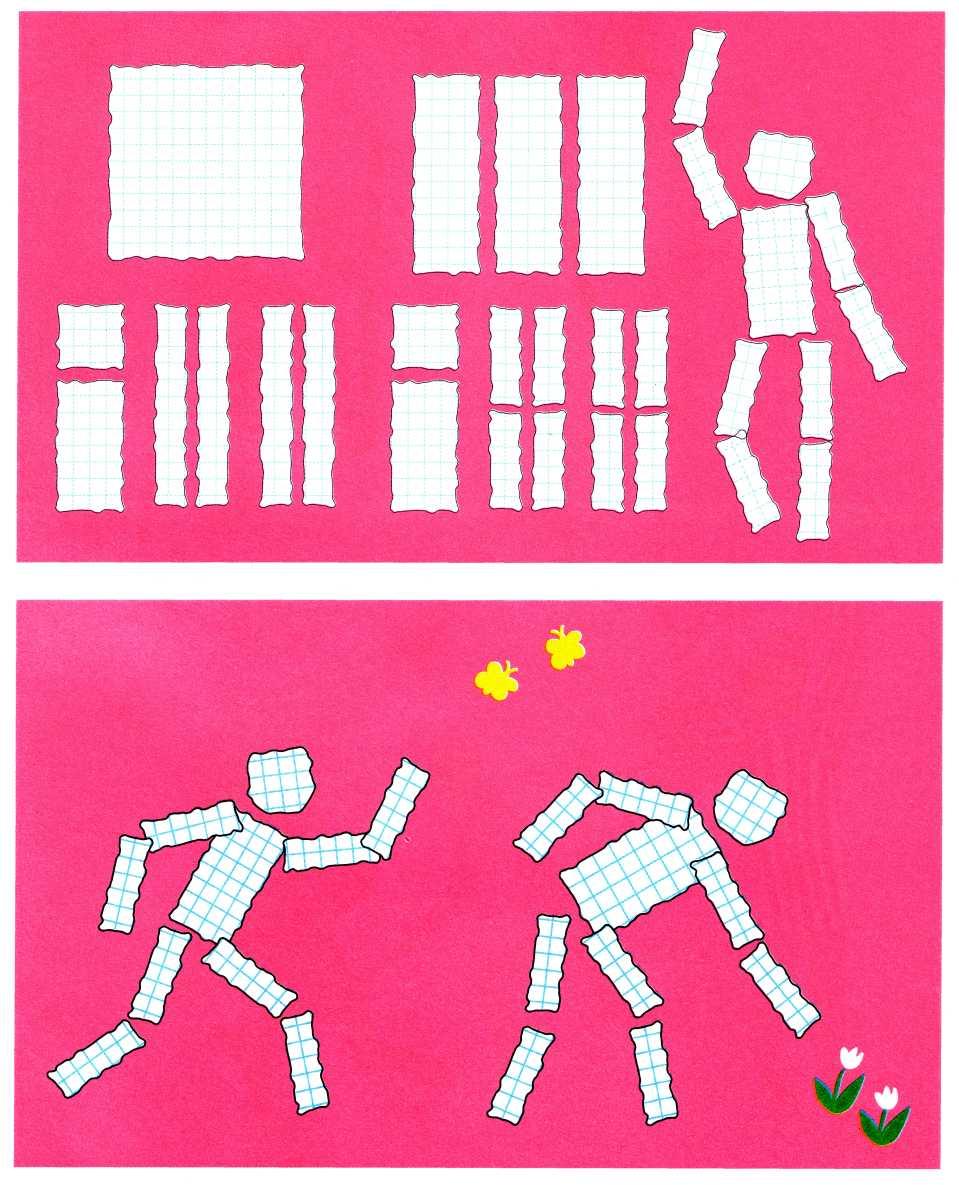
You can also make an application from the colored pieces separated in the same way.

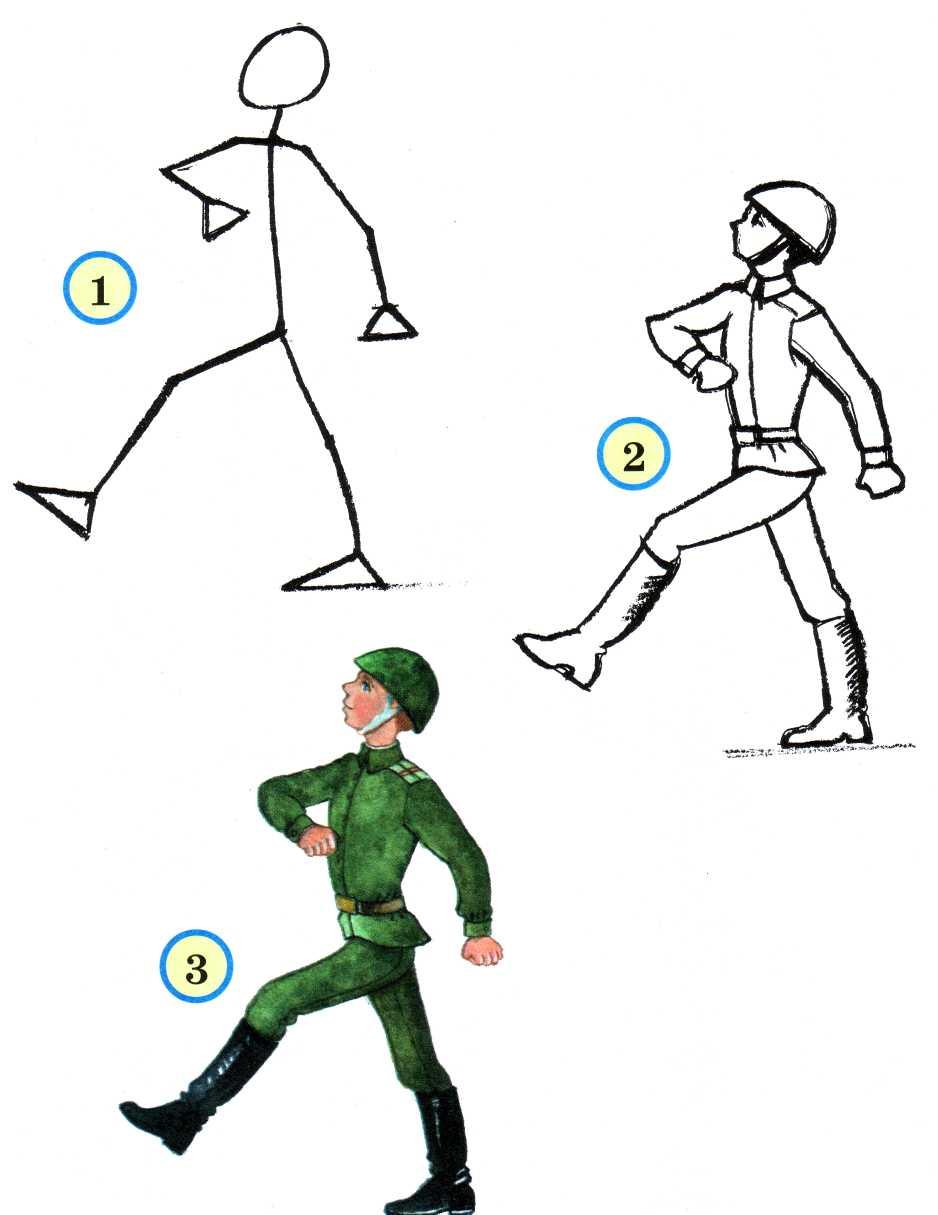
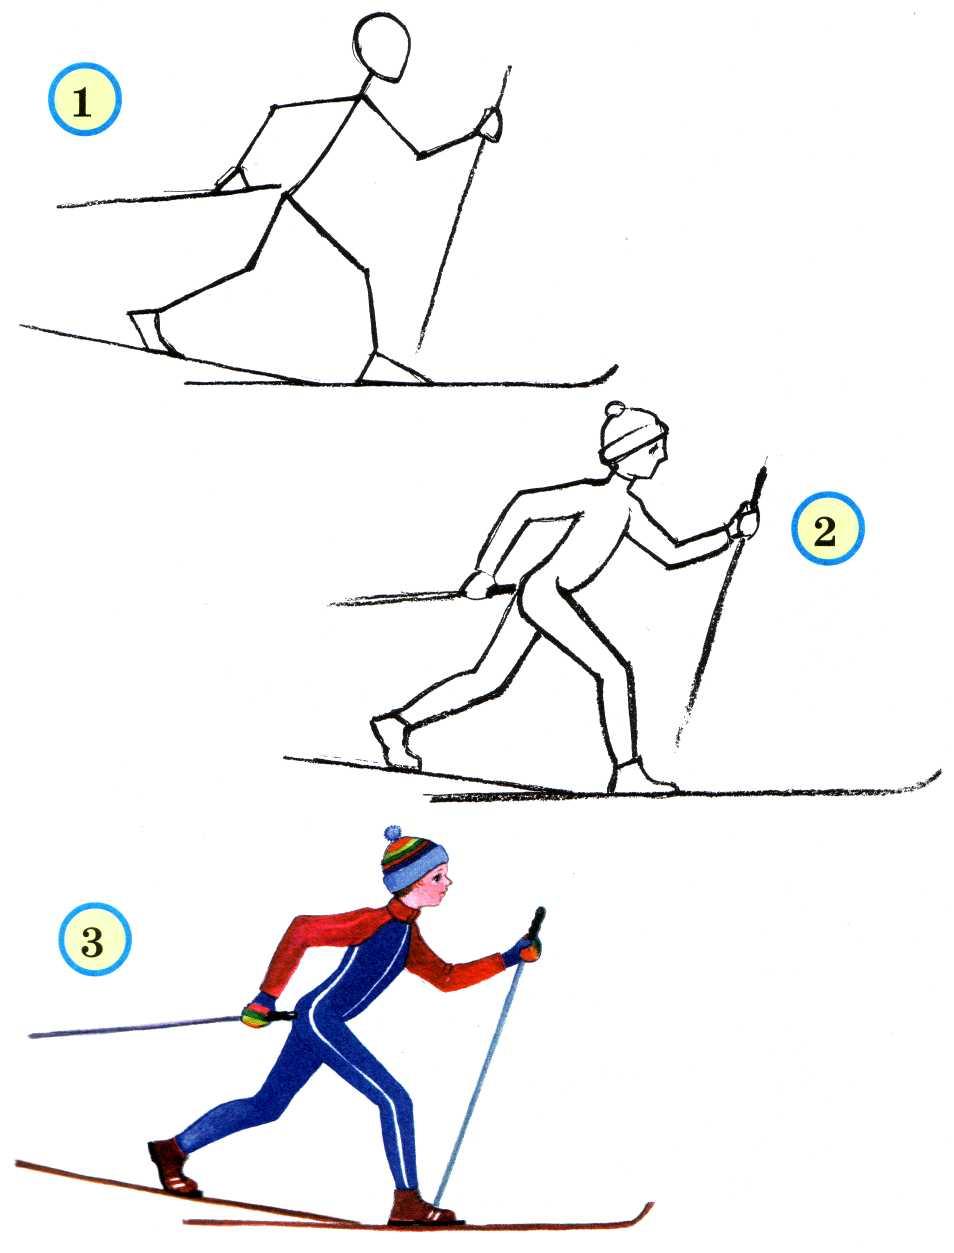
Pay attention to the sequence of the image of the girl with the flag,

marching soldier
running skier.
We draw human hands. The length of the straightened palm is slightly less than the width of the forehead.
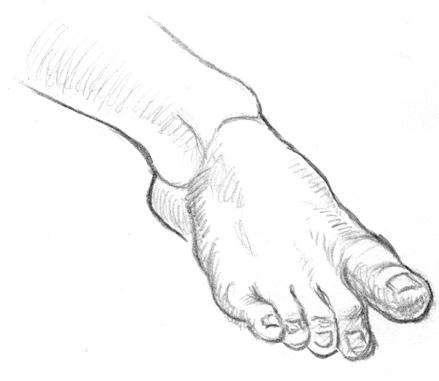
We draw the legs of a man. The length of the feet is equal to the length of the head.
The human anatomy and proportions of his body are directly related to each other. In practice, to depict a person, it is necessary to know his anatomical structure.
Body proportionsThe canons determine the size of each part of the body, and compliance with them allows you to draw a human figure so that it looks harmonious (Fig. 17.12).
Fig. 12/17
Our perception of the proportions of the human body is based on the principle of the proportional ratio of its various parts. The classical rules for an ideal figure prescribe that if the head length is taken as the unit of measurement, then the height of a person should be equal to eight units for men and 7.5 for women. Individual proportions of a person may differ from canons depending on the growth and structure of the body. Thus, the height of an adult should be equal to 7–8 lengths of the head, and the growth of a child and adolescent should be equal to 4–6 lengths of the head. If the arms extend along the body, the elbow will be at the level of the pelvis, just below the waist. The length of the entire arm from the tip of the clavicle to the tip of the middle finger is equal to half the distance from the tip of the clavicle to the foot. The total length of the neck and head is half the length of the arm.
Torso drawingYou can easily draw a person’s torso if you imagine it in the form of a rectangle, on top of which is another rectangle (head). The whole composition must be divided into four parts, the upper rectangle representing the head should have a length equal to% of the length of the entire rectangle. The remaining three parts (a larger rectangle) represent the body and may contain anatomical anchor points, as shown in the figures. The main body proportions are the same for the front, back and side views.
The length of the grid for drawing the torso in front is four units (the unit is equal to the length of the head) (Fig. 17.13).
The proportions of the female torso are identical to the proportions of the male. Anchor points differ only in size and location.
The lower quarter of the mesh when viewed from the front is equal to the distance between the upper edge of the pubic symphysis and the navel.
The next quarter represents the distance from the navel to the lower chest. The element located above includes a neck and a line of shoulders. The upper element corresponds to the size of the head (Fig. 17.13, a, c).
The mesh for the rear torso should include the upper edge of the buttocks, the contour of the shoulder blades and the line of the spine (Fig. 17.13, b, d).
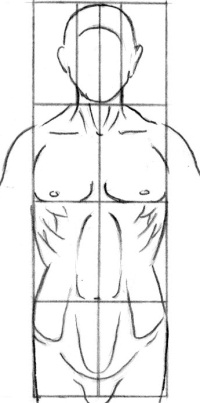
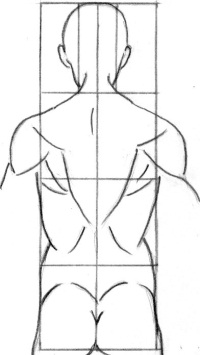
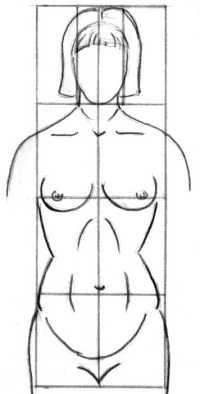
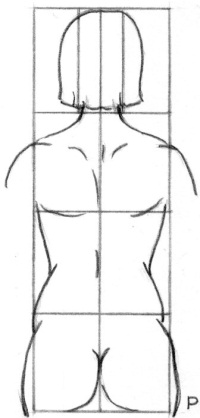
Fig. 17.13
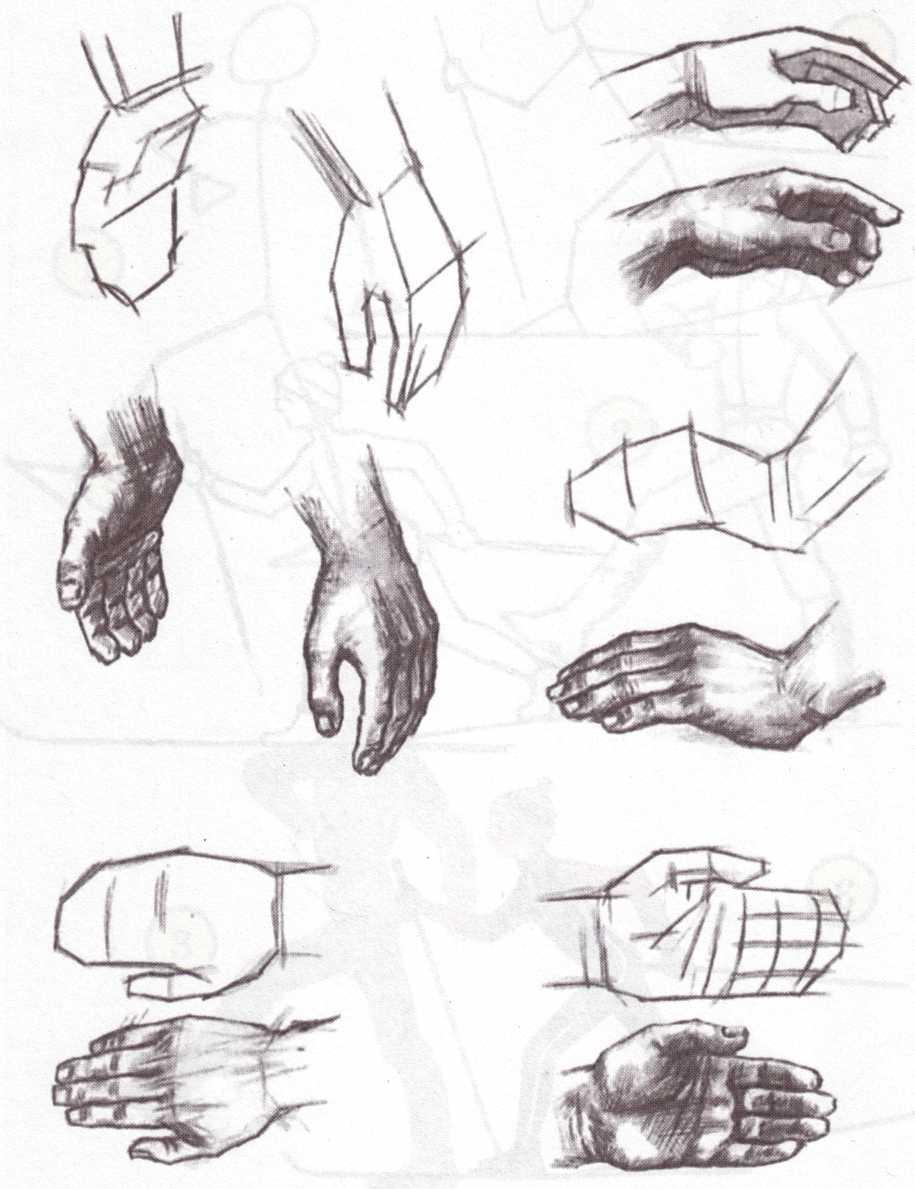
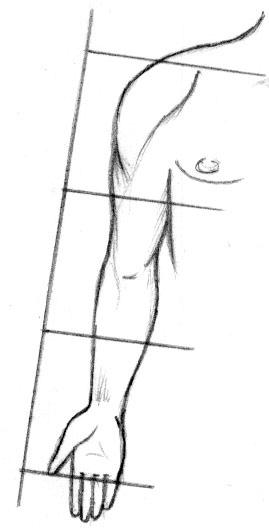
Hand drawingIf you depict the arm and forearm in front, they will not be straight, but slightly bent at the elbow and wrist. It should be remembered that the shoulder is slightly longer than the forearm, and the forearm is slightly longer or approximately equal to twice the length of the hand.
To display the main reference points when drawing a hand view from the front, back and side, you can use a grid consisting of six elements (each equal to half the length of the forearm) (Fig. 17.14).
a)Basic anatomical landmarks and reference points for the image of the hand in front
![]()
b)Basic anatomical contours and reference points for the back view of the arm
in)Basic anatomical landmarks for the side image of the hand
Fig. 17.14 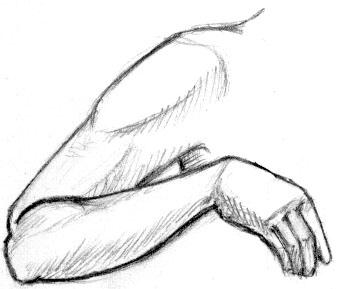
Fig. 17.15
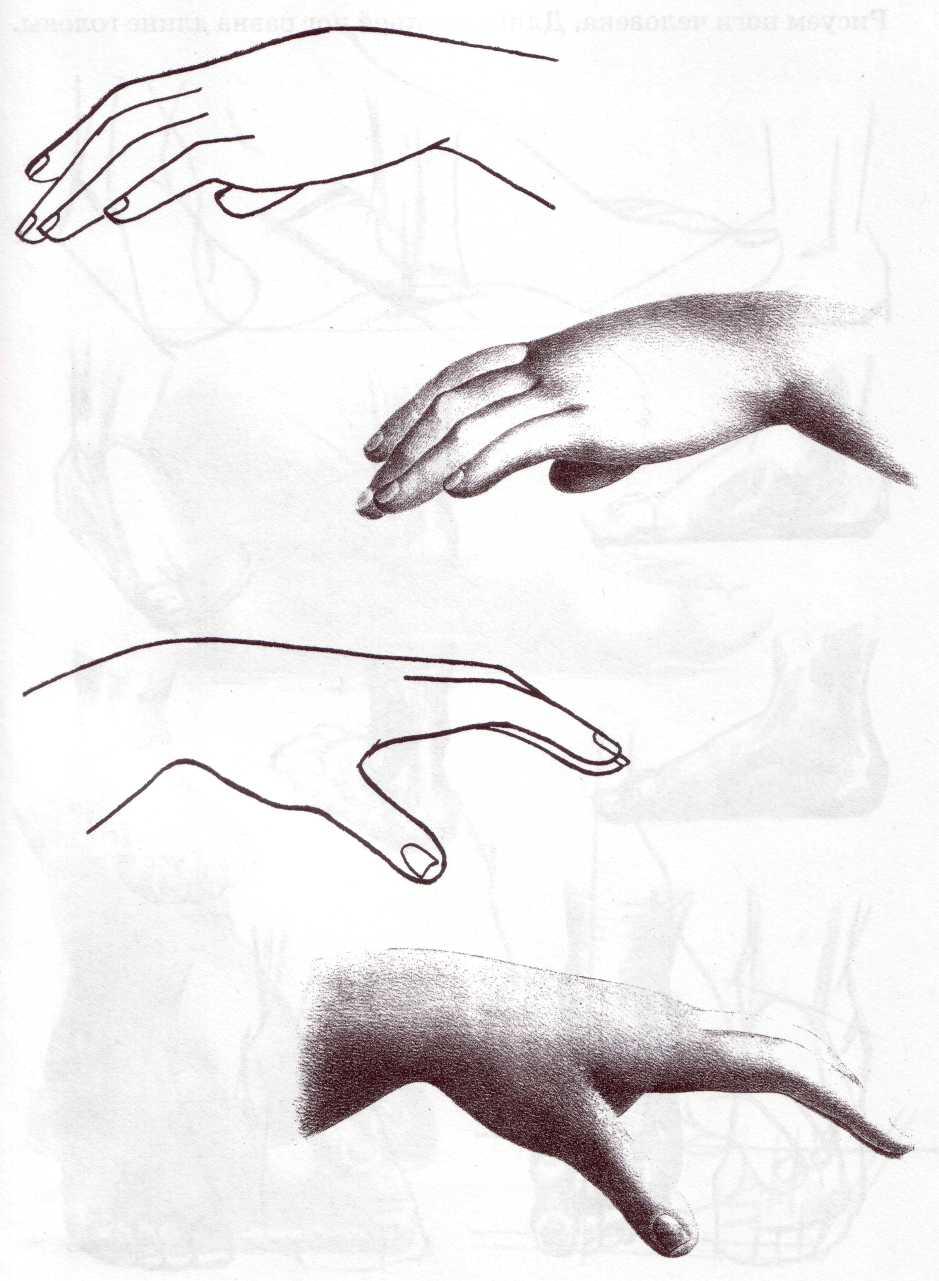
Hand drawingHands due to their location and constant movement themselves may be the subject of the image. The brush can take the largest number of positions, since it consists of five fingers, each of which has three joints. In portraits, through hand gestures, the artist conveys the psychological state of a person.
Ideally, the total length of the hand (from the base of the thumb to the tip of the middle) is twice its width (Fig. 17.16).
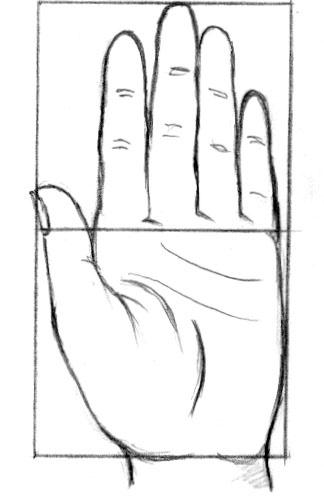
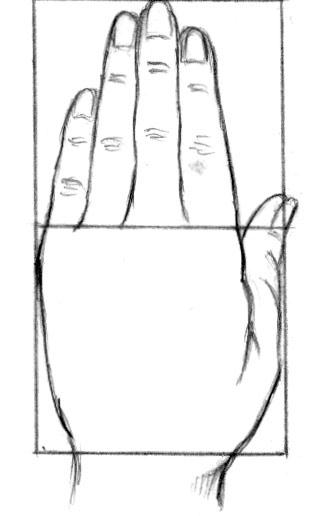
Fig. 17.16
The middle line of the rectangle (which divides it into two equal square) will coincide with the border of the first five phalanges of the four fingers with the lower border of the last phalanx of the thumb on the back of the palm and with the base of the fingers on the palm. From this it follows that the length of the middle finger is equal to half the full length of the brush. The ring and index fingers are the same length and slightly shorter than the middle, and the little finger reaches about the last joint of the ring finger. Proportions of the back of the hand.The middle line of the rectangle is at the border of the metacarpus and phalanx of the fingers.
The proportions of the palm.The middle line of the rectangle is at the base of the fingers.
Interphalangeal joints are located in the form of almost concentric circles relative to the palm (Fig. 17.17).
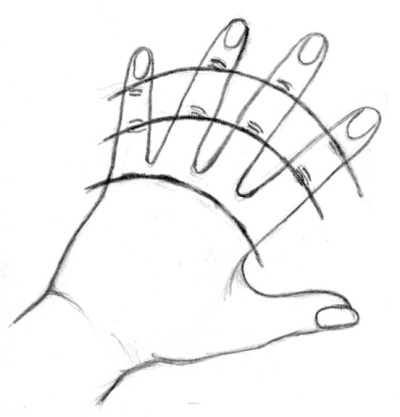
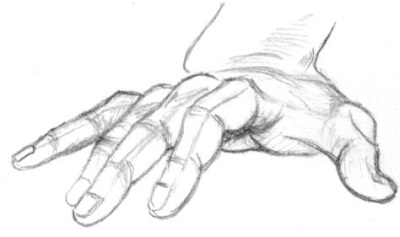
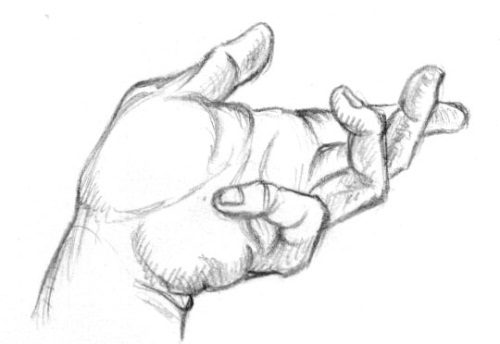
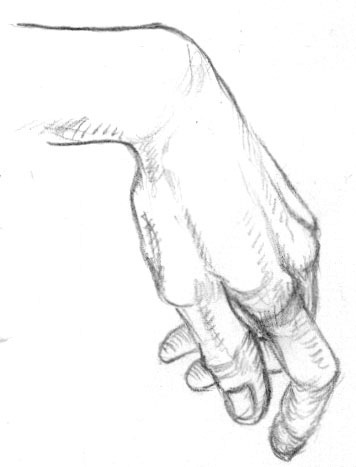
Fig. 17.17
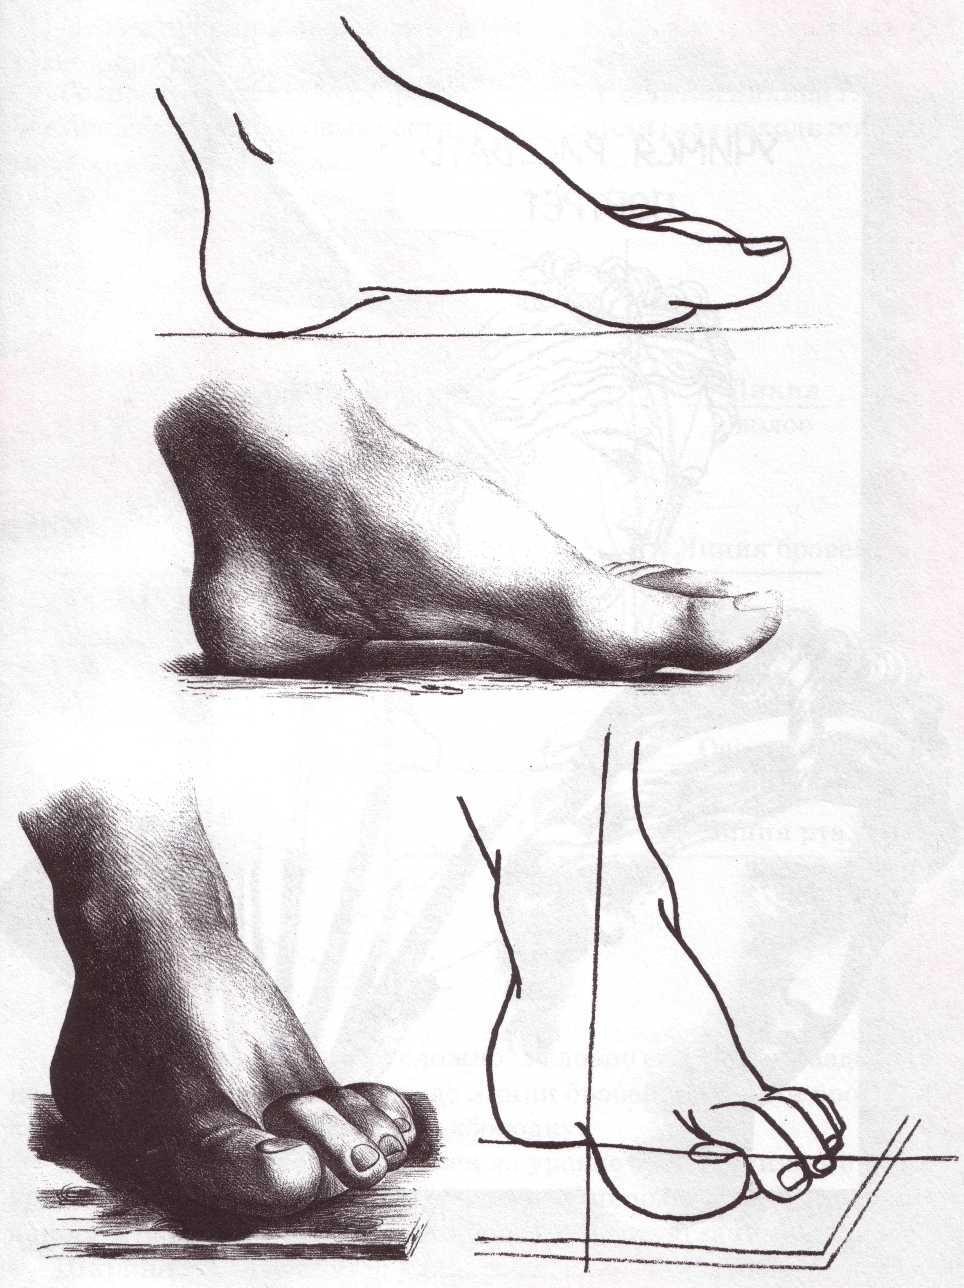
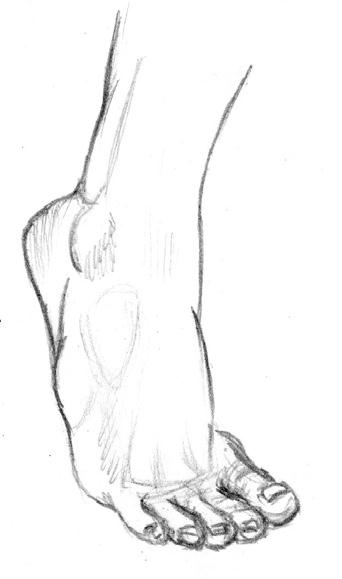
Leg drawingWhen drawing legs, one should remember that the direction of the axis of the legs does not coincide with the direction of the axis of the calf. The thigh is slightly inclined to the central axis of the body, and the calf is directed vertically downward. The standard module for the foot mesh is equal to half the length of the thigh (Fig. 17.18).
a) Front view of the leg
b) Rear view of the legs
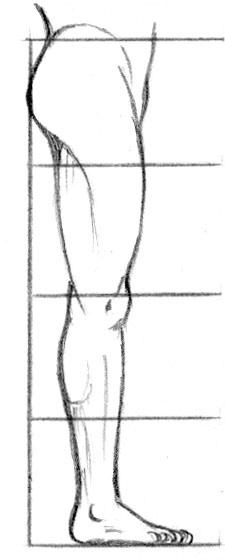
in) Side view of the leg
Fig. 17.18 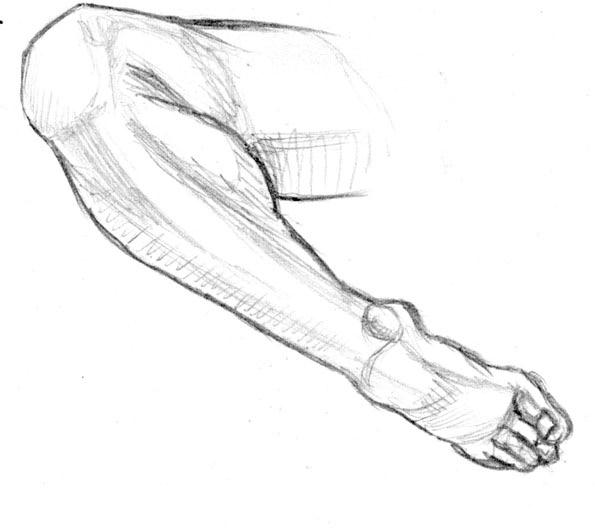
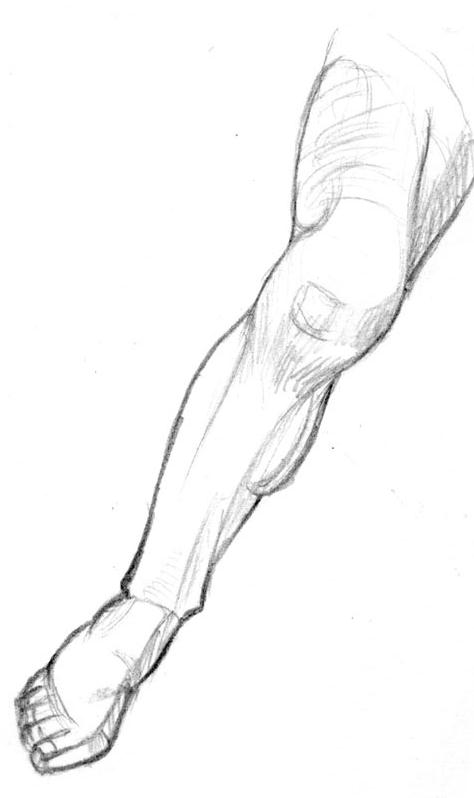
Fig. 17.19
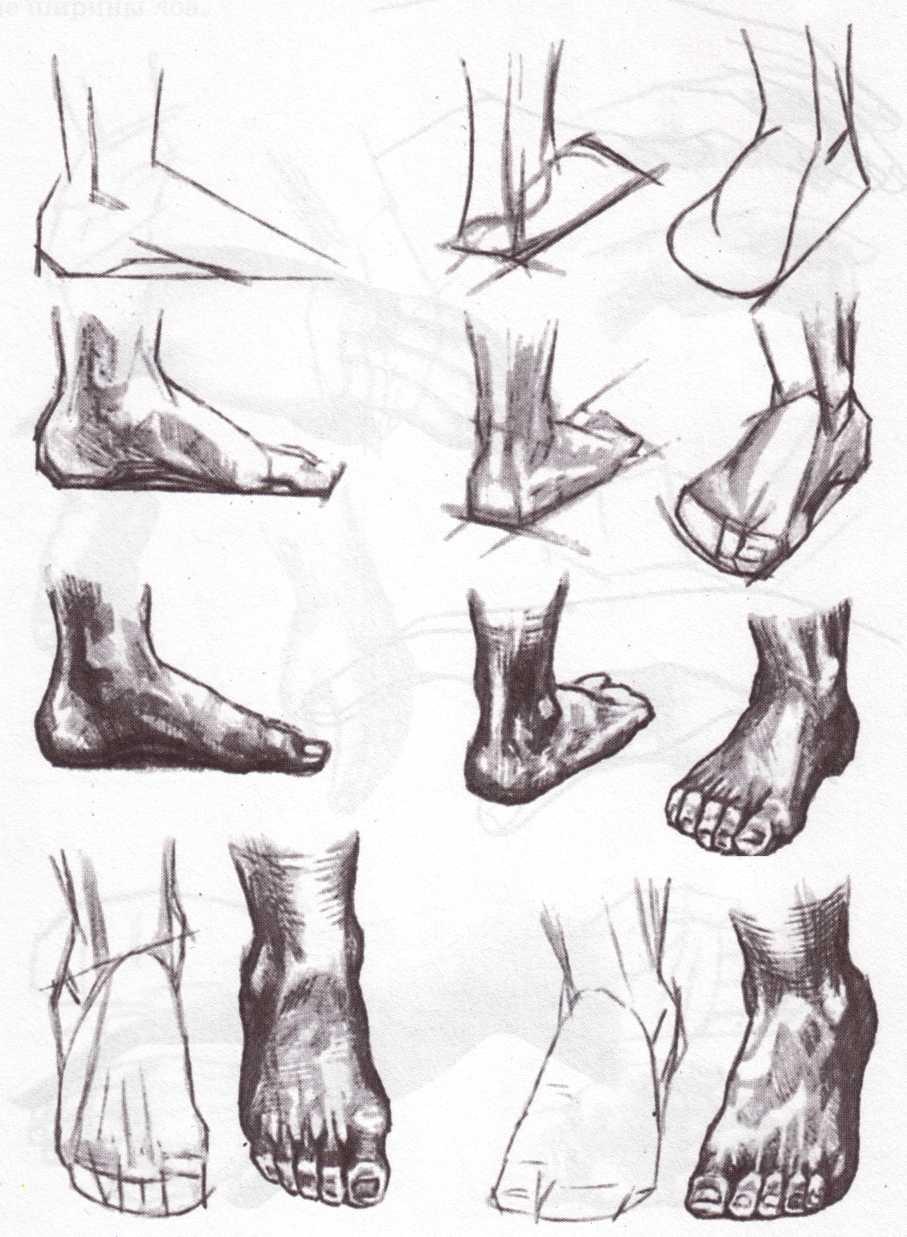
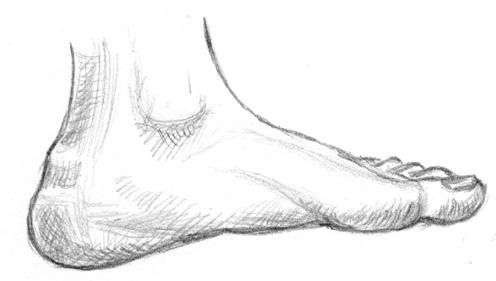
FeetFeet are much easier to draw than hands, as they make much less movement. By learning how to draw the feet correctly in four basic ways (internal profile, external profile, front view, rear view), you can easily portray them with any pose of a person (Fig. 17.20).
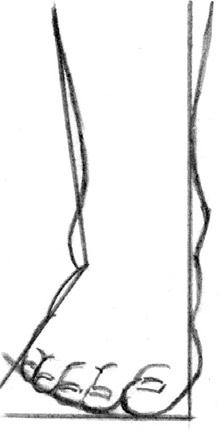
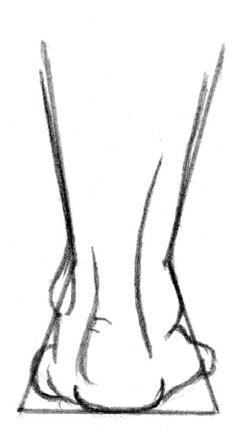
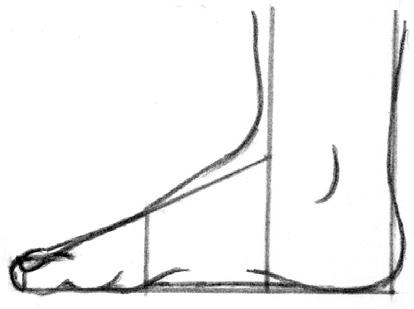
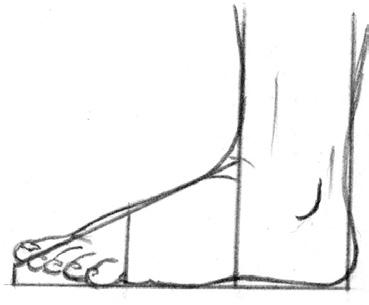
Fig. 17.20
The side view of the foot (from the inside or outside) can be depicted using a rectangular triangle in which the heel will be located in the right corner. This triangle can be divided into three equal parts, each of which is equal to the width of the ankle. The front part will determine the area of \u200b\u200bthe fingers, the middle will correspond to the sole of the foot, and the back to the heel (Fig. 17.20, c, d). If you look at the foot in front, it will look like a triangle, the base of which is a curved line along which the fingers are located (Fig. 17.20, a).
Seen from the rear, the proportional mesh of the foot will be determined by two partially coincident triangles (Fig. 17.20, b)
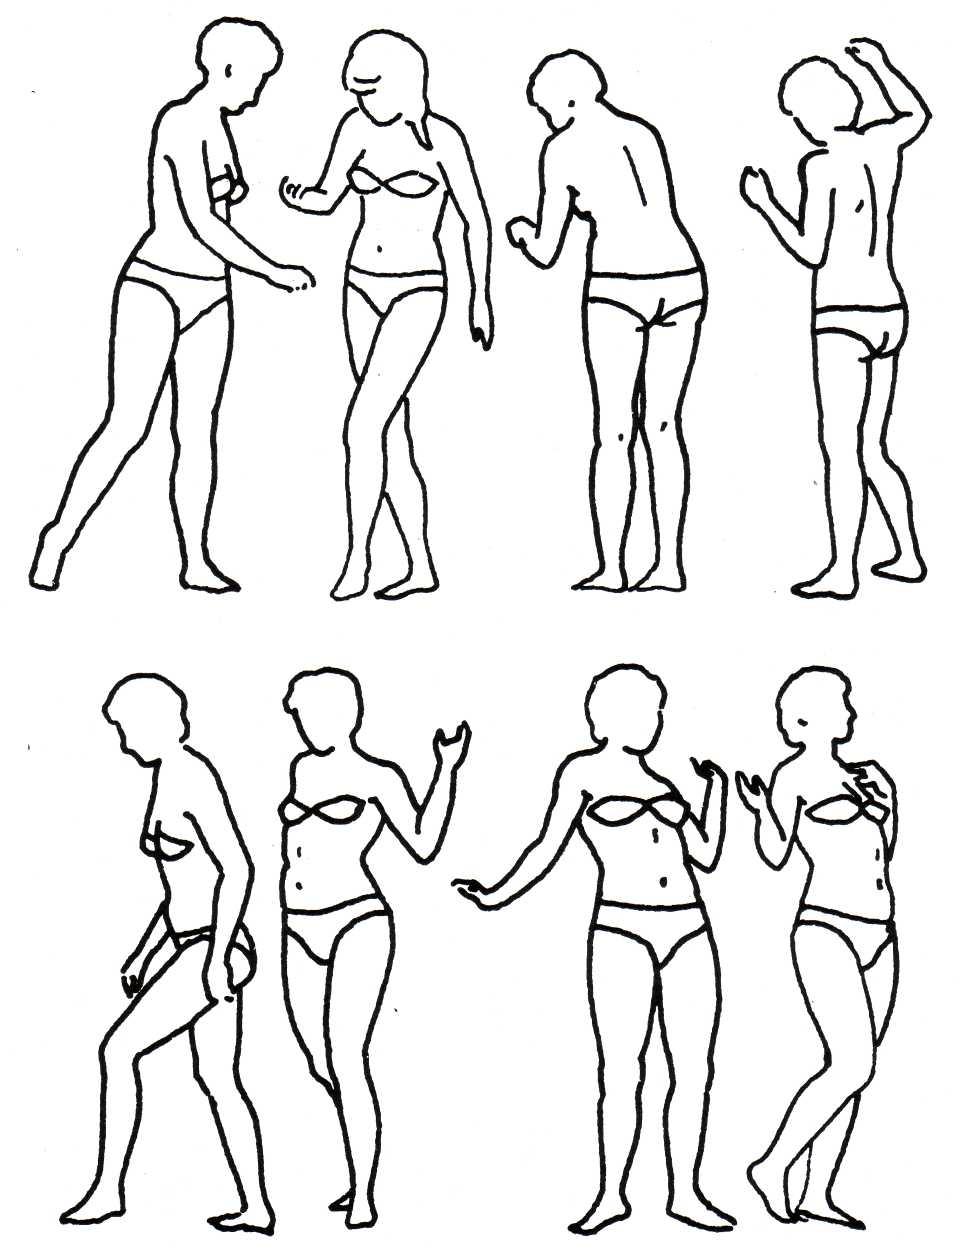
The desire to capture yourself or the appearance of another person is characteristic of the artist. In short-term or long-term drawings, it is important to convey the plasticity of the body, its design features, proportions and characteristic features.
A person in terms of shaping is a complex object.
One can imagine that the head is a ball, the neck is a cylinder, the chest is a barrel, the arms and legs are also cylindrical, etc. The skeleton largely determines the shape of a person’s body and movement. This is a wireframe. Schematic wire drawings help you understand how to best convey the characteristics of a variety of movements. Practice drawing such people.
Only constant training of the arms and eyes in the process of depicting a human figure can lead to success. During the training period, drawing is recommended ~ I wait for a free minute to devote to sketches and sketches from the field: in transport, in the library, in the cafeteria, with family and friends. It's better
at the same time, do not bother strangers with staring at them, Sketches must be performed inconspicuously for the model to catch the naturalness of poses and movements. When a person reads, watches TV, sews, works on a computer or is busy with another business, he often retains a certain pose for a long time or repeats the same movements, which greatly facilitates the image process. Drawing people from different points of view will allow you to collect interesting material for subsequent work. When observing people, try to understand how the movement begins, how the balance is maintained even with a sharp change in the direction of movement. As an experiment, try sketching dancers and athletes with charcoal, felt-tip pens, brush and ink, and watercolor on tinted and brown paper. Try to convey the nature of the movement with quick strokes. This gives freedom to improvisation. For educational purposes, it’s useful to make silhouette drawings of people of various professions,
Long study drawings of a human figure from nature show the beauty of the body structure, especially the modeling of forms using light and shadow.
The human figure is one of the most complex objects of the image.
The basis of an active approach to the drawing of a human figure is construction "by movement". The pronounced movement of the main forms and the dynamics within the form are determined. The image in the drawing movement, rhythm, contrast and
subordination of forms - mandatory tasks in the study of nature. The desire to work wholeheartedly involves not only identifying the correct proportions, characteristic features of all volumes, but also the ability to skip something along the way, and to emphasize some details. With this approach, a great need is developed to draw not just
Human figure drawing sequence
Starting the picture, try to fit the model into some geometric figure. Think about the nature of nature, try to convey its qualities in the picture. Do not forget about the expressiveness of the pose.
Light lines draw the general shape of the figure, draw axial lines in the direction of movement. Pay attention to the position of the head in relation to the body, the proportions of the figure, the nature of the general form.
Proportional relations and directions must be observed not for the sake of geometric constructions, they must correspond to the originally marked expression. Representing a person, it is necessary to betray the real proportions that we see in reality.
Then refine the outline, draw details, designate chiaroscuro. Complete the drawing, strive to work on its different parts at the same time, ignore them among themselves to maintain the integrity of the image.
The correctness of a particular stroke will be evaluated by its correspondence to a given movement, mood, and artistic image.
Answer the questions and complete tasks
Tell us about the features of each stage of the figure of a person.
What determines the shape of the body and the movement of a person?
What educational tasks do sketches and sketches of a human figure solve?
4. Tell us about the possibilities. various kinds hatching when depicting a human figure.