

Already painted +42 I want to draw +42 Thanks, great lesson +57
In this step-by-step tutorial, you will learn how to draw a sad girl with ears.
You will need:
- Simple HB pencil
- Eraser
- Paper

How to draw a sad anime girl with ears
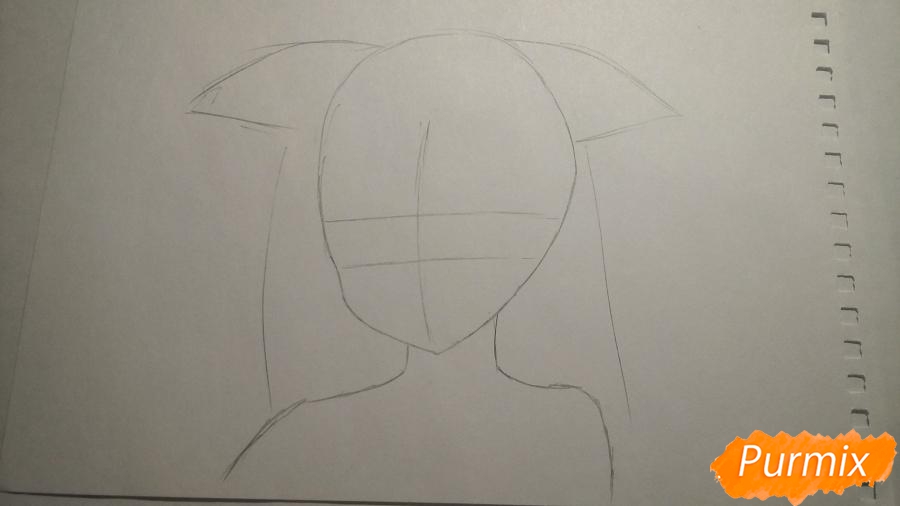
We draw the contour of the head and body. We mark the auxiliary lines for the future drawing of the eyes, nose and mouth. Sketch the ears and hair.
We draw a bang and the main hair is spun. A little detail of the ears.
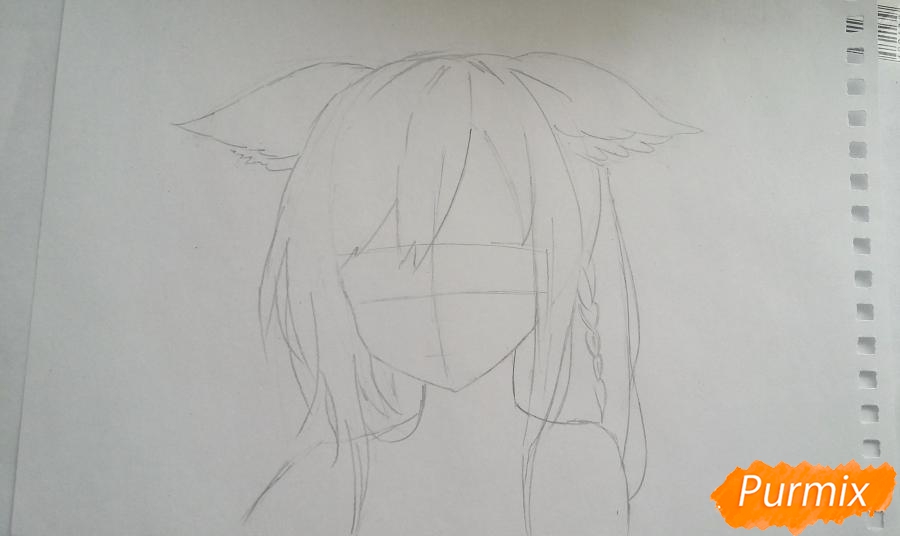
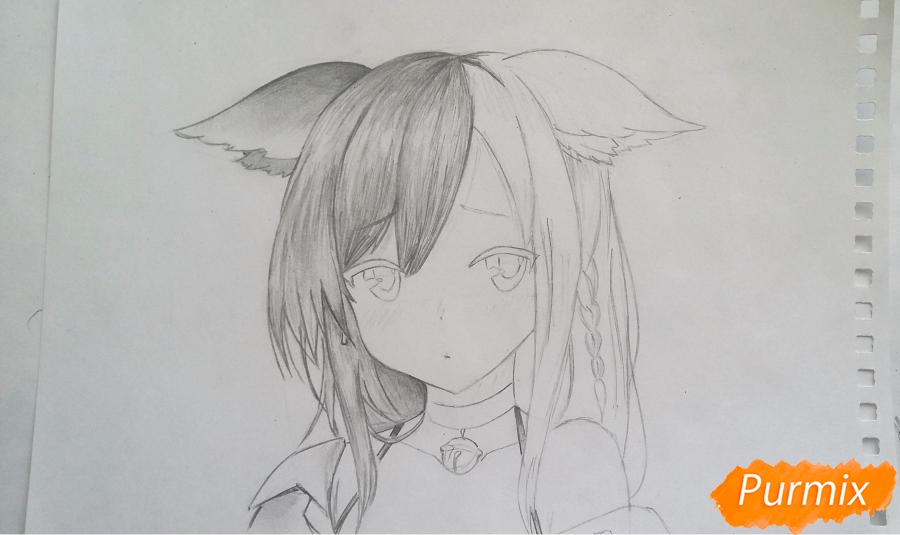
Using auxiliary lines, draw an eye contour. We mark eyebrows.
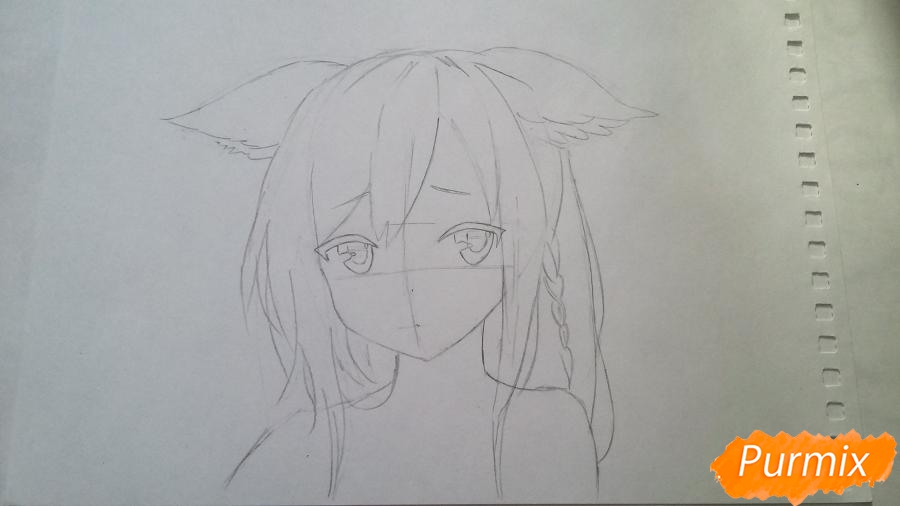
We mark the nose and mouth. Add more strands to the hair. Draw the fur in the ears more clearly. Do not forget about the clothes. Weak touches mark the future location of the shadows.
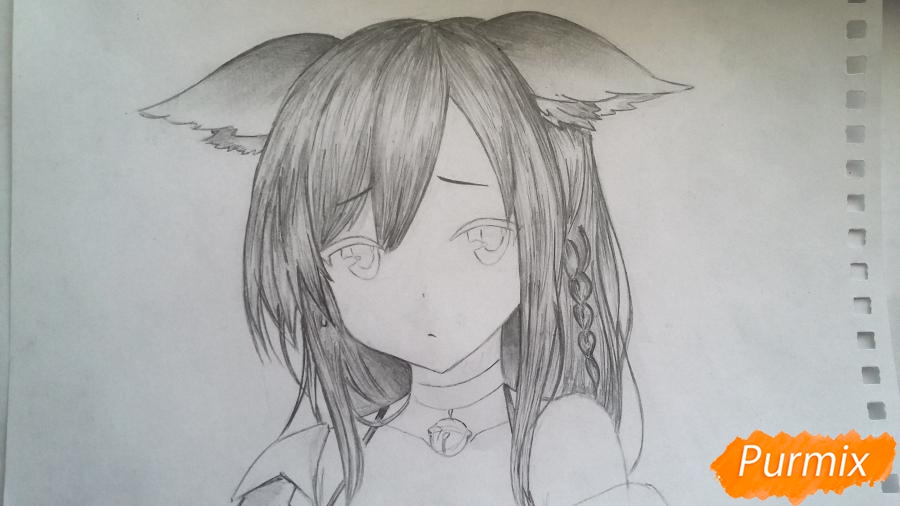
We start coloring hair. Where we noted the shadows, color darker, and add highlights to the leaf. We color the eye with a gradient from top to bottom. Color the straps and one shoulder of the shirt. We pay attention to the drop on the strands in the face.
Finish with hair and ears.
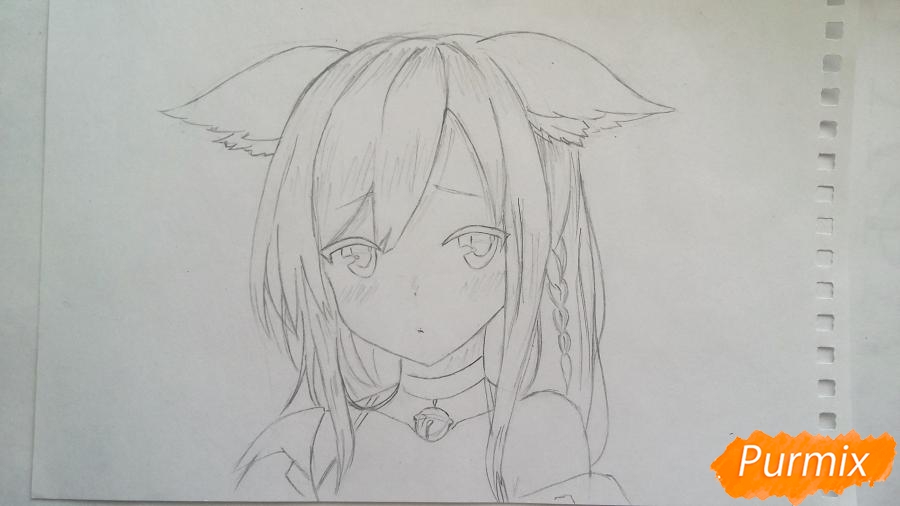
Colorize the second shoulder of the shirt. Add shadows to the body and color the bell on her neck. We begin to fill the eye color.
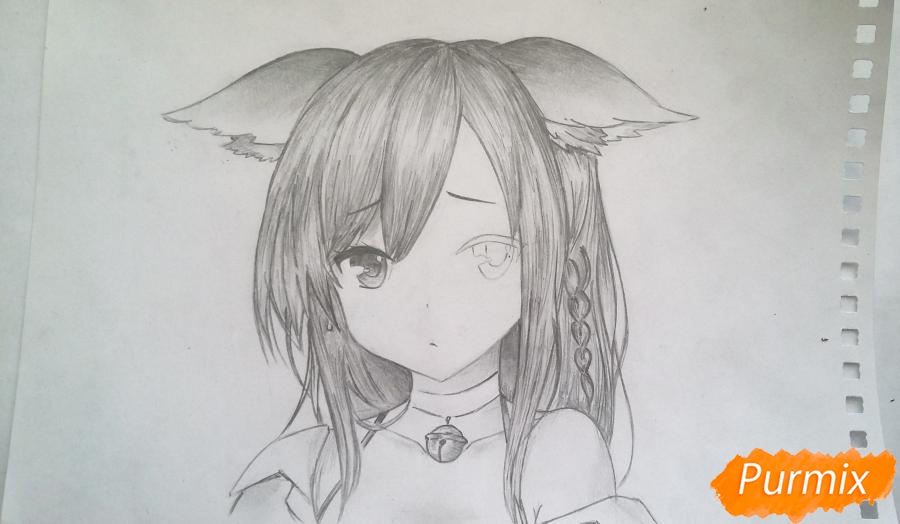
After we are finished with the eyes, add a blush to the cheeks, highlight the nose, draw a fold of the upper eyelid and mark the shadows. Do not forget about the droplets on the chin.
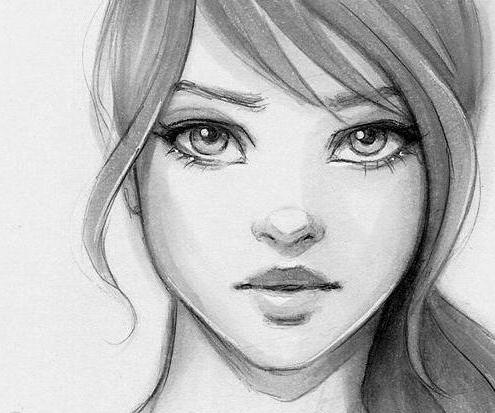
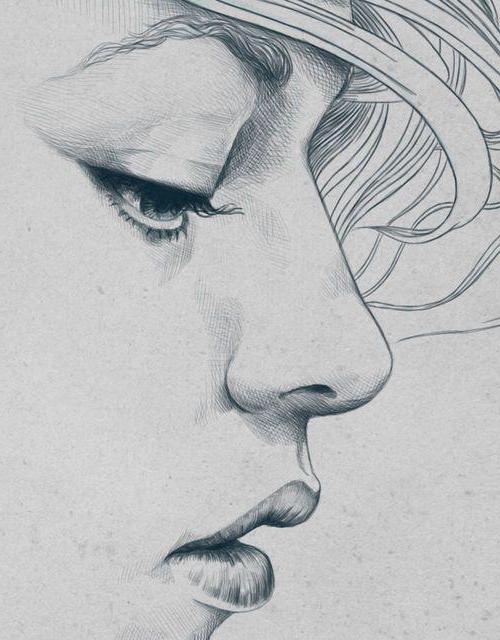
To draw a person’s face is a long, difficult and very painstaking task. It is especially difficult to give a sad face, because sadness should be not only on the lips, but also in the eyes and even in the very features of the face. However, it’s worth a little effort and the result will please you. So, as you already guessed, in this article we will answer the question of how to draw a sad face with a pencil in stages.
What is required
First, you need a piece of paper. The size of the picture will depend on the size of the sheet. The larger the sheet, the larger the face and all its parts: eyes, nose, lips.
Secondly, you need a well-sharpened pencil. It is better to use several pencils of different hardness and softness, so that a sad face is more expressive and does not consist of the same thickness and sharpness of lines. Remember the important rule: all lines must be applied finely without pressing the pencil or pressing it into the paper. So it will be easier to erase errors. It will be possible to circle the brighter at the end when we complete the drawing.
Thirdly, you need to take an eraser to remove auxiliary lines and irregularities. Pick up an eraser in advance that will not spoil the paper: it will not tear it and wrinkle, and also that will not smear the pencil on paper. It’s best to take a softer eraser.
We start with a face contour
First you need to determine what size the face will be, and then draw its oval. Remember, a face can be rounded, slightly pointed below, completely oval - it all depends on your desires and imagination.

Now you need to draw one vertical line and one horizontal in the middle of the oval. The intersection of these lines will determine the center of our face. And they themselves will help draw a line of lips for a sad face and nose.
Draw eyes
In order to give sadness to our painted face, you need to correctly draw eyes and eyebrows. This will help us to correctly answer the question of how to draw a sad face with a pencil, because it is these parts that convey emotions.
Try to draw both eyes at the same time. If you completely draw one eye first, and then the other, then they can turn out different and you get confused.
First, draw an auxiliary line. With its help, we will depict the inner corners of the eyes (they should be located on this line). The distance between the eyes should be approximately equal to half of that eye. The corners of the eyes should be a little down, as we draw a sad face.

Remember that the inner corners of the eyes should not be in line with the outer. Internal should be slightly lower. This will help us more accurately convey all the sadness of our character.
After you have drawn the contours of the eyes, draw irises and pupils inside.
To draw the saddest face, he can add droplets of tears in the corners of the eyes. They can be both in one eye, and in both - it all depends on your desire.
To the question of eyebrows
Eyebrows are very important for conveying mood. Downed eyebrows express sadness, sharp illustrate anger. Therefore, it is very important to draw them correctly so that the emotions of different parts of the face do not contradict each other.
We begin to draw eyebrows from the inside. To get a sad face, the inner corners of the eyebrows need to be raised a little. To determine the height and bend of the eyebrows - imagine another eye that is higher than the one you have already drawn.
Getting to the nose
In order to correctly determine the width of the nose, draw auxiliary vertical lines from the inner corners of the eyes to the place where you want the nose to end. The narrowest part of it - the bridge of the nose - should be at eye level or slightly lower. Further, the nose to the bottom expands and becomes like an hourglass. At the end, we sketch the nostrils schematically.
 In the middle of the nose on the edge you need to draw a barely noticeable part that will show where it bulges out. Simply put, you need to draw the very “pipochka”. Without it, the nose will not look natural. The location of this very “pipochka” will depend on whether we get a snub-nosed person or a person with a bowed nose.
Draw a mouth
To get less confused, erase all the extra lines and start drawing a mouth. He is also very important. After all, using the line of the lips, you can also determine what is drawn: a sad face or a cheerful one.
The lip line is the one we see when the lips are closed. Their corners can be on the same line in the middle, and can be higher or lower. Since we are drawing a sad face, the corners should be omitted.
To determine the edges of the lips, draw auxiliary lines from the inner parts of the corneas of both eyes. The result is a size that determines the length of the lips. Draw a horizontal line of the lips, the edges of which will be lowered down. We draw the upper lip above this line, and the lower lip below it.
Remember that the bottom should be larger than the top. The lower lip makes up about two-thirds of the entire mouth.
 If you want to draw a slightly open mouth, then leave a small distance between the lips, while the lower lip will need to be made a little puffier than the upper. To do this, draw a rounded curved line in the middle of it. Erase the auxiliary lines and continue.
Face contour
A person by nature cannot have the shape of an even oval. It is necessary to draw the lines of the cheeks, cheekbones, chin, indentations in the temple area. For this you need only your imagination. As you want, how your hand lies, such an oval will turn out. Remember that the widest face will be at the level of the cheekbones.
Let's move on to the hair
Hair must be drawn from the very roots. Draw them above our oval-skull, add splendor to the hairstyle. Thin lines with a harder pencil and lines with a thicker pencil softer draw a hair texture, strands. If you want to draw a braid, there should be more textures and individual drawn hairs.
Shadows and volume of the face
To make a face more expressive, give it volume, you need to draw shadows and highlights on it. To do everything right, determine for yourself where the light will come from and how shadows will behave in this case. Suppose that the light falls directly, so we darken a little under the nose, in the cheekbones, a hollow above the upper lip, the hollows of the upper eyelids.
 The way to create volume can be any: hatching or shading. It all depends on what you want to convey. The sharper the lines, as with hatching, the sharper your pattern will be. Shading will add softness to the portrait. Erase excess lines, errors, irregularities. Circle your eyes brighter - the most important element that conveys mood.
Now draw the lines of the ears. Remember that the upper part of the ear should be on the line of the upper eyelid, and the lower tip of it should coincide with the tip of the nose.
Thus, we answered a simple question about how to draw a sad face. To diversify your drawing, to show all your creativity, you can colorize it. Most interesting in combination with pencil lines are watercolor paints of pastel, light, delicate colors.
Even though today we learned to draw a sad face, the photos in the article will help you come up with something new, inspire you to new, bold decisions. The fantasy of man is limitless, so even a small detail can be the beginning of a great creation!
Nowadays, many refer to anime as a form of art. The most important difference characterizing this style is the hypertrophic features of the bodies of the main characters and creatures, namely: large eyes, magnificent (most often bright) hair and elongated limbs. Nevertheless, this style has won many hearts around the world and many want to learn how to draw anime. In this lesson, you will learn how to draw a schoolgirl, a girl in a swimsuit, a teenage girl and a girl in the style that many people like. After these lessons you can draw Anime pencil drawings.
Before you start, be sure to read about pencil drawing tips.
And so, let's get started.
Girl in anime style.
- Draw a sketch using geometric shapes, but pay attention to the head - in order to maintain the style, the head should be large. So in the anime portrayed young girls and children.
- Add shapes to the sketch to get your body shape
- Continue to draw the girl’s body using geometric shapes, as shown in the example.
- Add hair, clothes and accessories
- Draw fine details using finer drawing tools
- Circle the outline around the picture.
- Erase Sketch Outlines
- Color the finished drawing
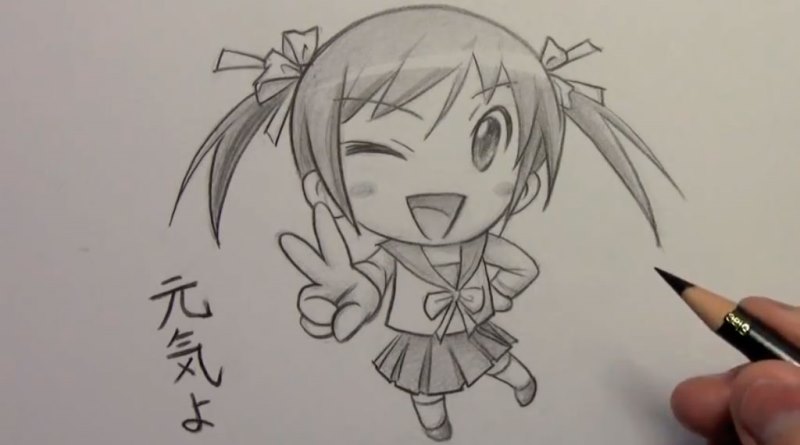
School girl in anime style.
- Sketch the girl using straight lines and geometric shapes. First, draw a circle for the head. Add the angular shape at the bottom of the circle for the chin and jaw. Use a short line for the neck. Draw a curved line from the neck down where the pelvis will be. Draw four pointed shapes for the chest and add lines for the limbs. Use triangles as a base for your hands.
- Use the drawn sketch as a basis for the body of the girl. Add geometric shapes to the drawing, gradually drawing details. Pay attention to the proportions in the places where the joints are located. Add a cross line from the face to the chest. This will help you further maintain the proportions of the body.
- Create a hairstyle for your character. This example depicts a regular hairstyle, which is drawn very easily using slanting strokes. In addition, you can add a flower, a hairpin or any other accessory to the girl’s hair.
- Decide what your character will be wearing. Since we are drawing a schoolgirl, we will not go far from the standards, we will depict a standard jacket, shirt and skirt.
- Color the picture. We advise you to choose neutral tones that blend well with each other. Do not make the picture too bright, otherwise it will be very striking.
- Based on these images, try to draw different clothes for your characters without leaving your school theme.
How to draw an anime (video)
Teenage girl in anime style.
- Draw a sketch on which you will build the further image.
- Add shapes to the sketch to get your body shape.
- Continue to draw the body of the girl using geometric shapes, as shown in the example.
- Add hair, clothes and accessories.
- Draw fine details using finer drawing tools.
- Circle the outline around the picture.
- Erase outline sketches.
- Color the finished drawing.
Girl in a swimsuit in the style of anime. (Anime pencil drawings)
- Sketch the girl using straight lines and geometric shapes. First, draw a circle for the head. Add the angular shape at the bottom of the circle for the chin and jaw. Use a short line for the neck. Draw a curved line from the neck down where the pelvis will be. Draw the shape of the inverted dome for the chest and add more lines for the limbs. Use triangles as a base for your hands.
- Use the drawn sketch as a basis for the body of the girl. Add geometric shapes to the drawing, gradually drawing details. Pay attention to the proportions in the places where the joints are located. Add a cross line from the face to the chest. This will help you further maintain the proportions of the body. Given the fact that the character will be in a swimsuit, outline the place where the chest will be (use two teardrop-shaped figures for this). Mark the navel.
- Sketch a sketch of the eyes. Arrange them arbitrarily, using crossed lines. Add small curved strokes for the eyebrows. Draw a corner for the nose and a curved line for the mouth.
- Decide on the hairstyle for your character. Use curved strokes if you want your hair to be wavy. Draw the ears in the shape of the letter “C”, so that they peek out from behind the curls of our heroine.
- Circle the contours of your body and design a swimsuit. The standard solution is a two-piece swimsuit.
- Underline the details and erase the outline sketches.
- Color the finished drawing.
Here are a few more options that can be used in this direction.
Well, friends, today will be an entertaining lesson and we will show you how to draw a girl’s tears in an anime. A crying girl has been hanging in the table for a long time and the hour has struck!
But you can now pay attention to the details when drawing your anime characters. So, let's start more often and express their emotions. And let's start, no more, no less, from what we see, how to draw tears in anime. Let's start the task with a simple tutorial on how to draw a sad face in an anime style. And we really have long wanted to find and prepare for you a lesson on how to do this in a simple and quick style. Facial expression can be a tedious job because there are many different expressions and the choice is very wide. Our faces are never the same in photographs, so many aspects of our facial expressions are often surprising. There are many options for drawing faces and emotions on the face in the anime, and a lot of examples can be chosen. So go ahead and let's begin our work in order to find out how to draw a sad face anime girls.
Step 1.
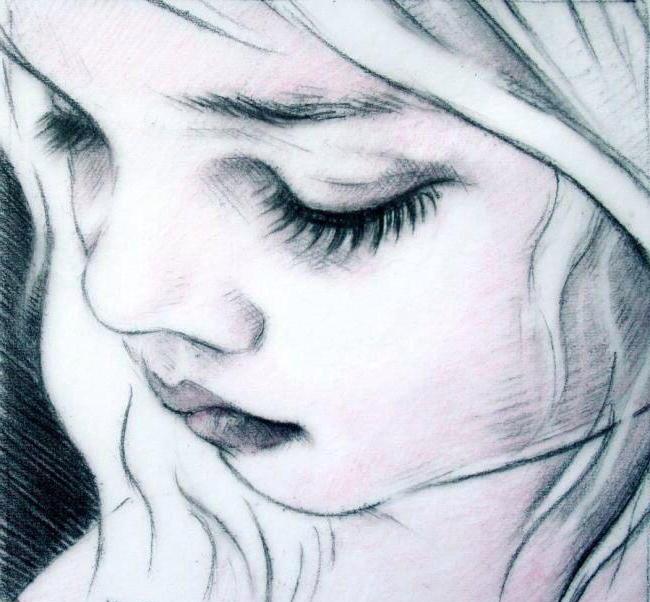
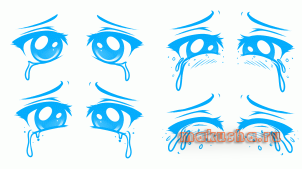
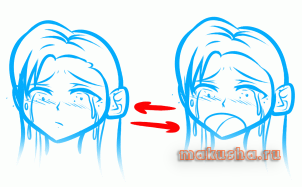
The intensity of tears and crying can be different. Several ways to draw a crying face, and this depends on the situation and the character. The more intense the eyes and feelings on the face, the stronger the emotions and more tears. In the beginning, a variant of simple small drops of tears. And as our drawings advance, you can notice how eyes fill and burst with tears as the intensity of the upset feeling of the anime character grows. Also pay attention to the number and size of tears and the appearance of blush on the cheeks. Closed eyes, as a rule, mean the most powerful experiences.
Step 2
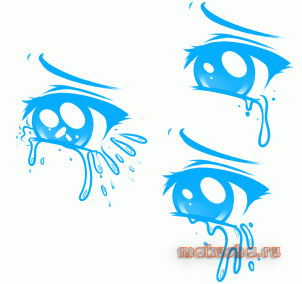
Consider how to draw a tear in the drawings larger. It is important not to overdo it, so as not to turn them into unrealistic and even comedic. The difference between a serious and comedic picture of tears is shown below.
Step 3
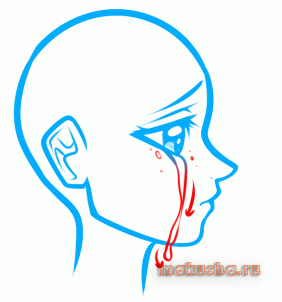
On the surface of the cheek, tears flow already at a serious stage of development. See how tears deform over the surface of the skin. Please also note that they do not just hang straight down into a simple line, but are distorted. Add a few spots of watery tears for emotions and realism.
Step 4
Serious and comedic tears - see the difference between the girl’s serious crying face and the comedic version of the same situation. A comedic face will be with a big gaping mouth, and a serious drawing is just a small indent and line. Depending on the topic and situation, these are two very simple and useful ways to draw a crying anime character for the sad scene in the anime.
Step 5
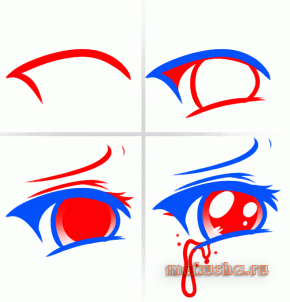
To begin the task for the first eye, let's start from the top line of the eyelid. As you can see, the end of the incision is sharp. Draw the eyeball, the line of the lower eyelid and paint over the area in the corner of the eye. Draw the pupil, as you see here with us, and then add the details to create a glitter effect. We draw tears. So far, everything should be easy to get!
Step 6
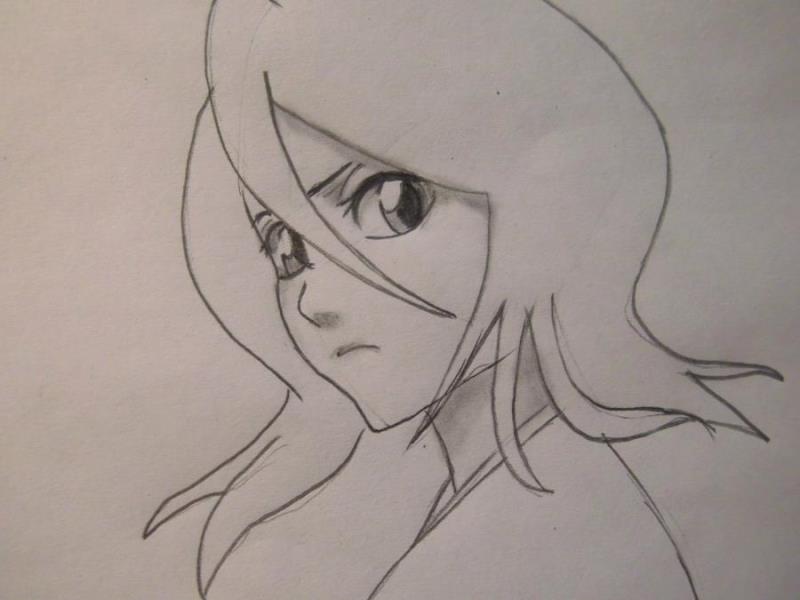
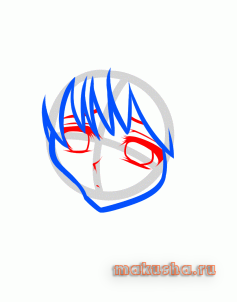
Now let's start with the face itself and draw a fully crying anime girl. Draw a circle for the head, then add intersecting lines to draw the face.

Step 7
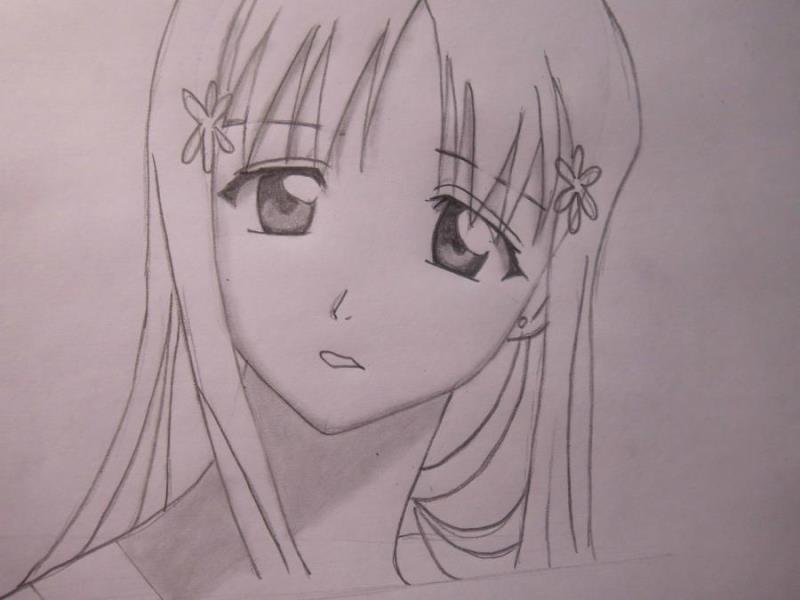
We outline the shape of the face and deal with its long straight bangs, divided into large curls falling on the forehead.

Step 8
The next thing we will do is outline the shapes of her eyes. We decided to draw eyes that would be as sad as possible, but still not quite able to cry and grieve for some reason. We draw her nose, mouth and eyebrows.
Step 9
Step 10
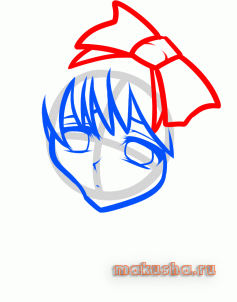
Let's continue to draw and take care of her hair. You will also need to draw her ear, and then add lines for her hair to form