Quote from Rainy77 A detailed workshop on crocheting seamless socks for the first time was published here - http://xvast.forblabla.com/blog/45408314616/Podrob...yu-besshovnyih-nosochkov-kryuc and even won a hundred rubles on the phone !!) )))
Already repeatedly showed these socks, and now MK!
By popular demand, I present to your court my own way of crocheting socks.
Of the many options, this is perhaps the simplest, even a beginner can handle it. And for those who knit - knitting such socks will take only an hour) Fast, convenient and comfortable.
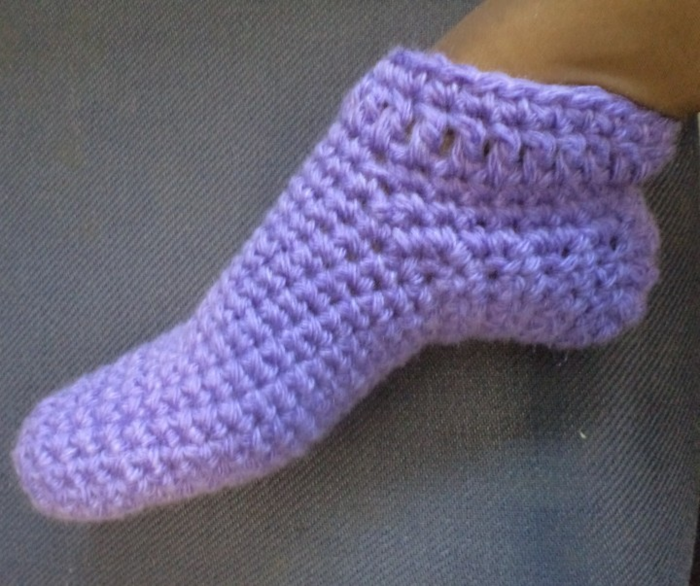
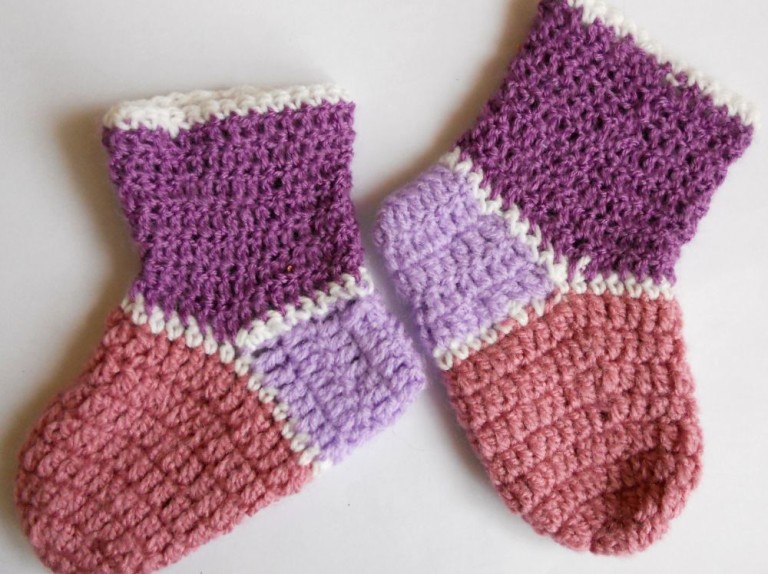
That's what we get in the end

I knit in two threads (acrylic), I won’t say the number of the hook, but it’s quite plump, about 5. Next, the photo will be visible)
Next, I give my sizes (number of rows and loops) Exclusively as an example. Your performance may vary slightly or very much. It all depends on the size of the leg, the thickness of the thread, hook, etc. I have a 35th rr, about the thread and hook description above. Special skills are not required, it is enough to be able to knit a regular column (without a crochet), it is not difficult to learn this, there is a lot of information on the Internet, but if suddenly it is not clear to someone, I will explain it with pleasure)
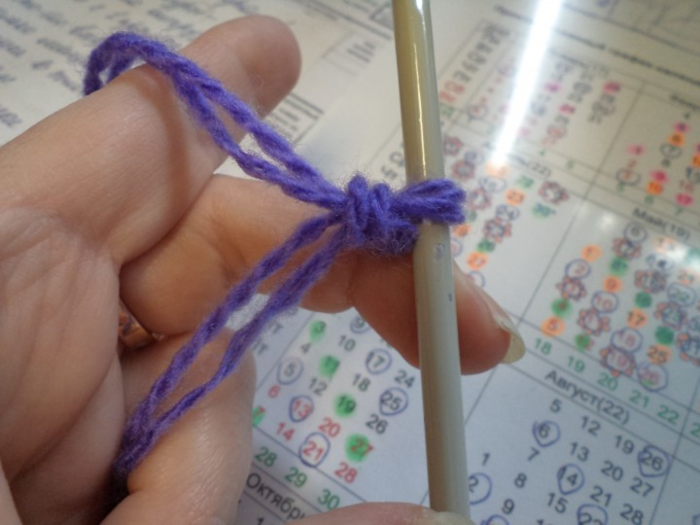
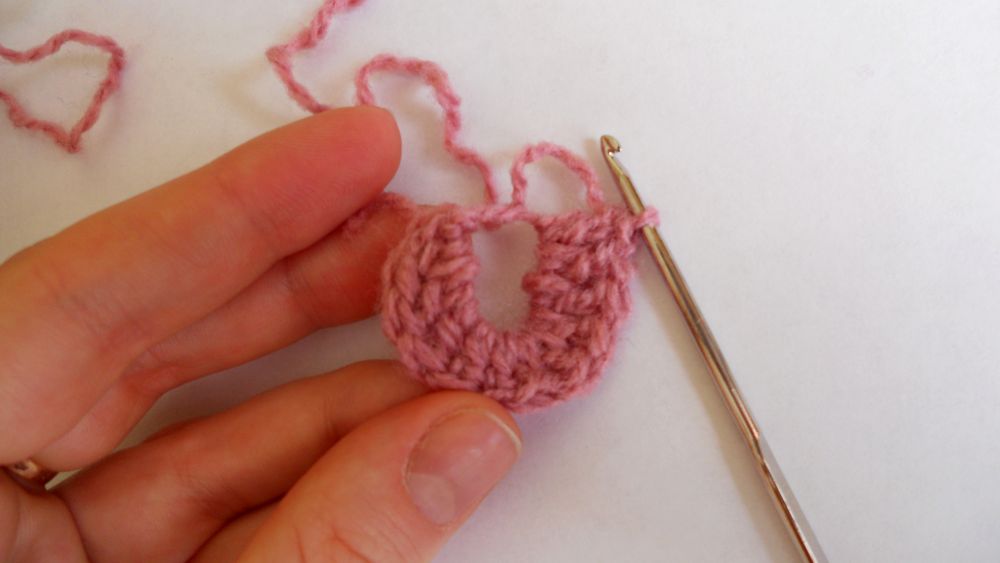
So, we make the first loop and knit 4 air loops into it, then connect it to the first connecting loop (insert the hook into the first loop, grab the working thread, stretch through all the loops on the hook. Next, we make the connecting loops as in this description).
We start knitting with the toe.
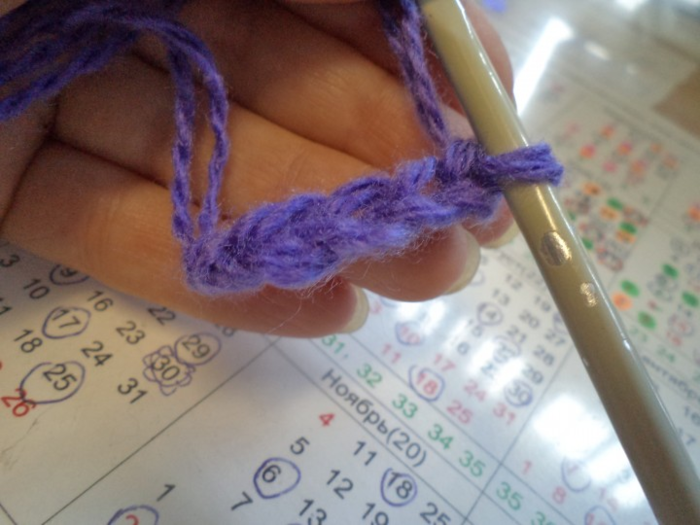
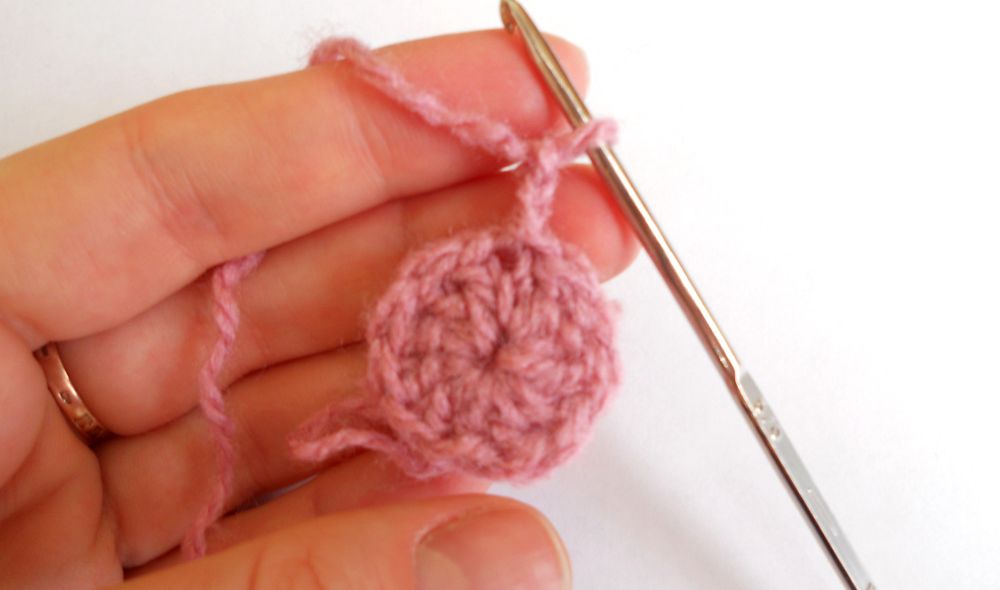
The result is such a small circle. Further, moving in a circle we knit two columns in each of the formed base loops. We knit in this way 2-3 rows. The rows in this case will be conditional, since we knit in a circle without lifting loops, we look approximately. You can put a beacon. 
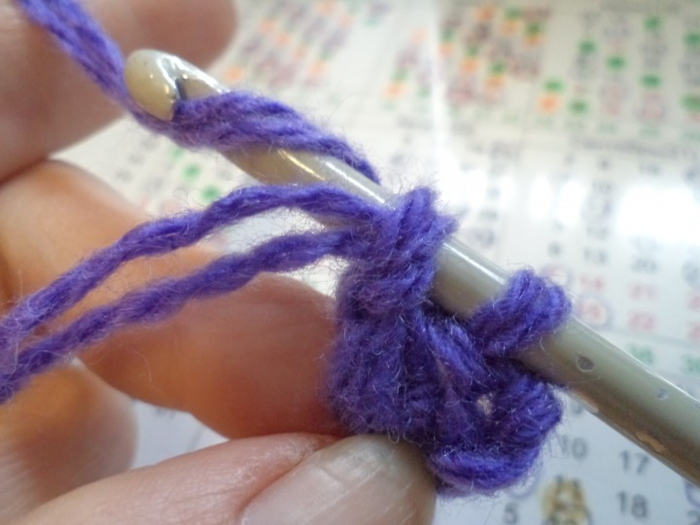
Then we knit through one - that is, in one loop of the base - one column, in the next 2 columns. Thus we add our circle. In the process, everything will become clear)
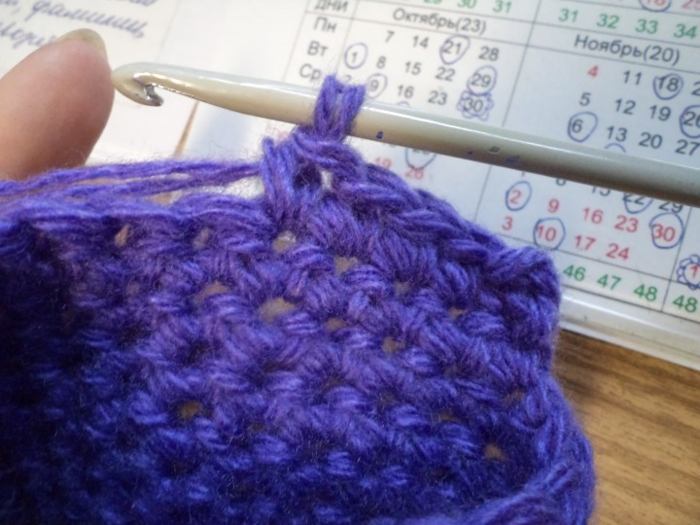
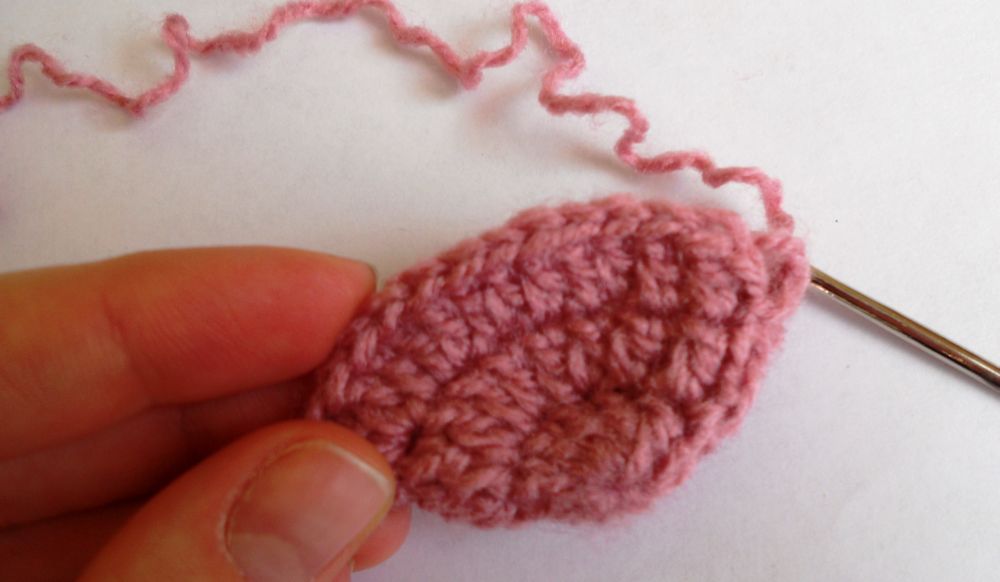
It turns out 
It is already possible to try on a leg) Smtrim that the typed loops are already enough. In my case, it turned out 22 loops. Remember the amount. In order to count - put the beacon. Advice for beginners - be sure to write down how many loops turned out !! 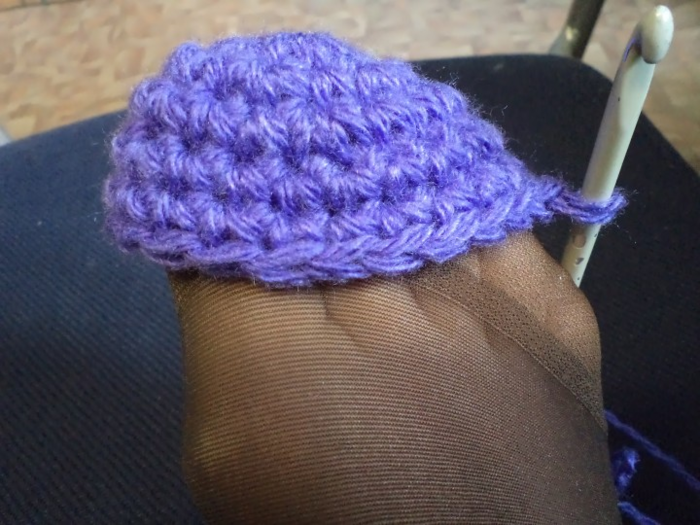
It is better to put the beacon on with a contrasting thread, I didn’t have it at hand; 
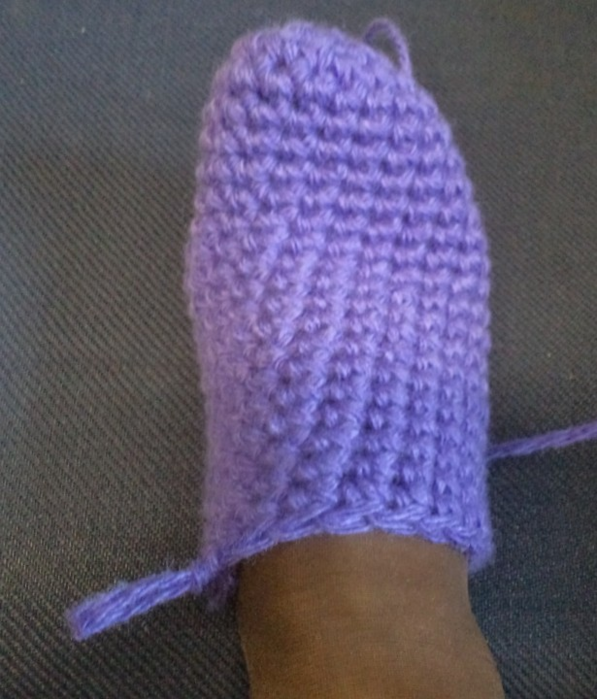
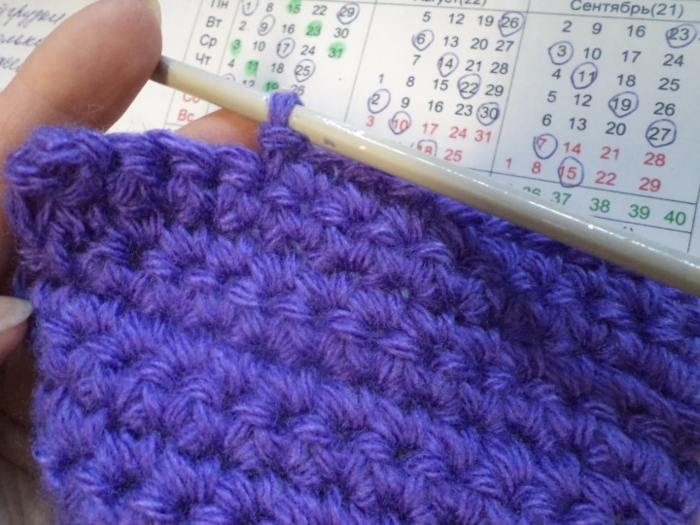
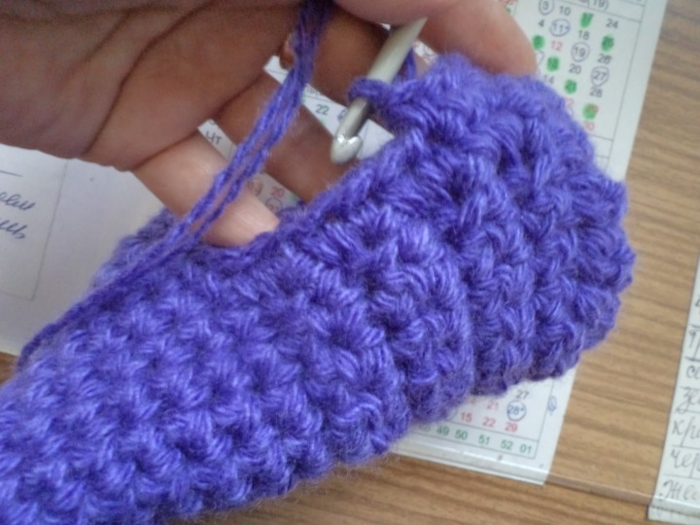
Then everything is simple - we knit in a circle, periodically trying on, to the base of the foot. 
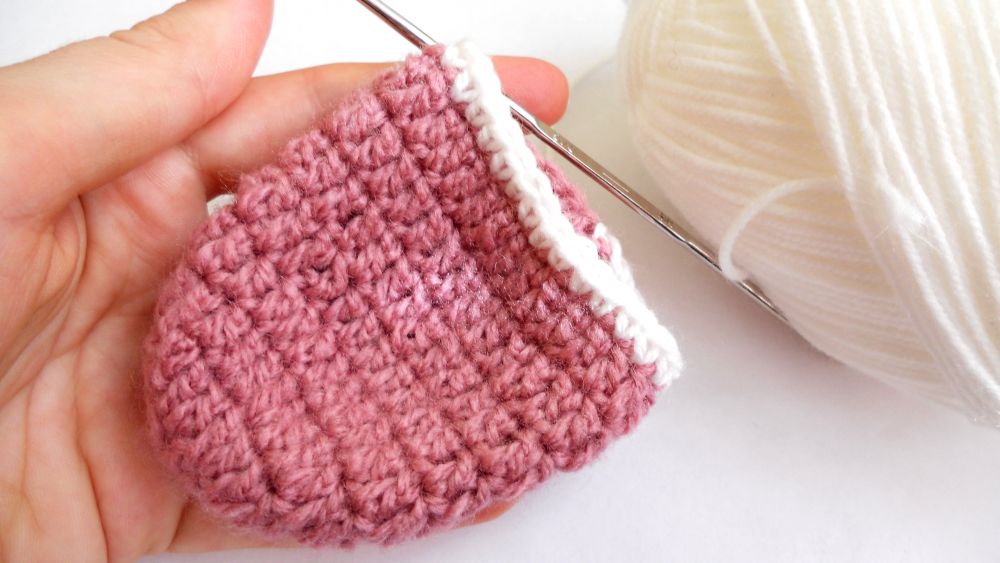
We try on, we see that it is already long enough, we begin to knit the heel.
Advice for beginners - count and write down the number of rows so that the second sock is tied to the appropriate size! I remind you that the series are conditional, but you can count them - we start from the beginning of knitting to the base of the foot. I got 22 rows.
Determine the size of the hole for the leg. We estimate approximately how much we need to leave the loops so that the leg later fits into the sock. Count the loops.
Advice for beginners - on the heel it is better to leave an odd number of loops. This is not important, but, as practice shows, is reasonable)
So, I got 9 loops left on the hole. We recall - there were 22 in total. 22 - 9 \u003d 13 - the stitches remain on the heel.
The number of loops left can be noted with beacons, but to do this, in general, it is useless, since we have already calculated how many loops we knit further.
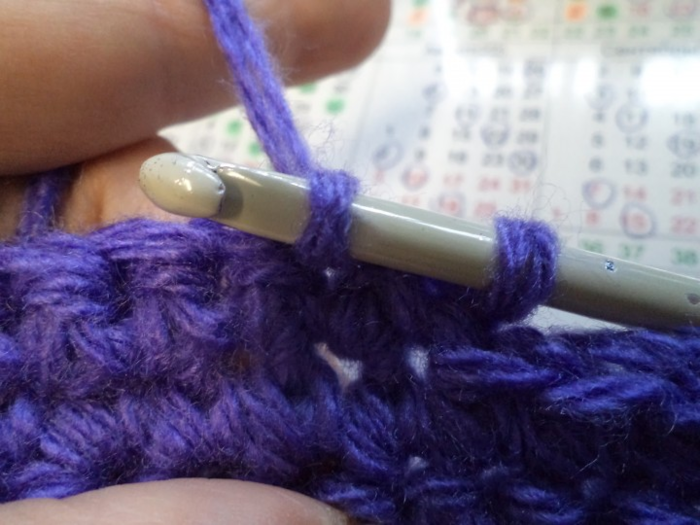
We collect two air loops into the loop on which knitting was stopped. We unfold our knitting and knit in the opposite direction.
In the same way we do, having tied the row to the end - we collect 2 air, deploy, knit.
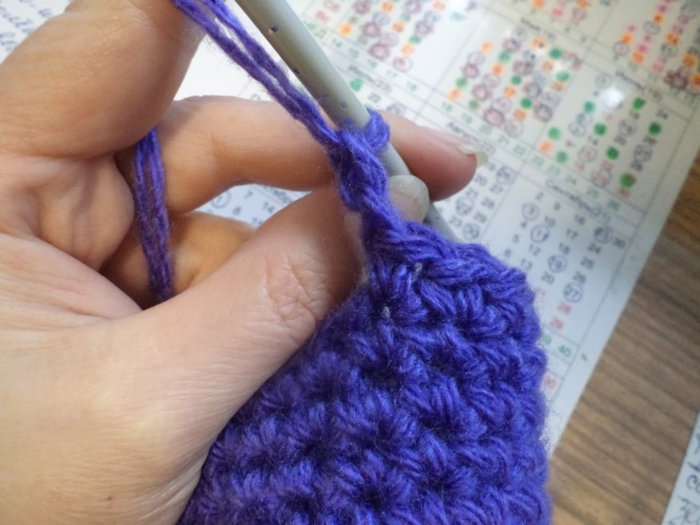
Attention!! We knit only loops left on the heel!
In my case, it's 13 loops.
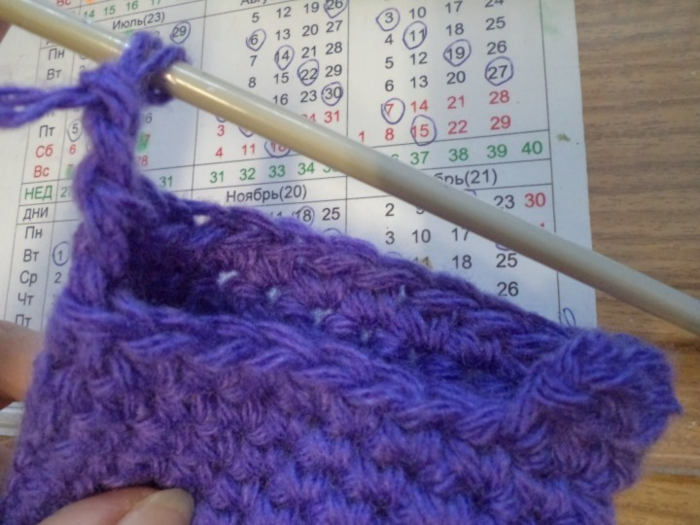
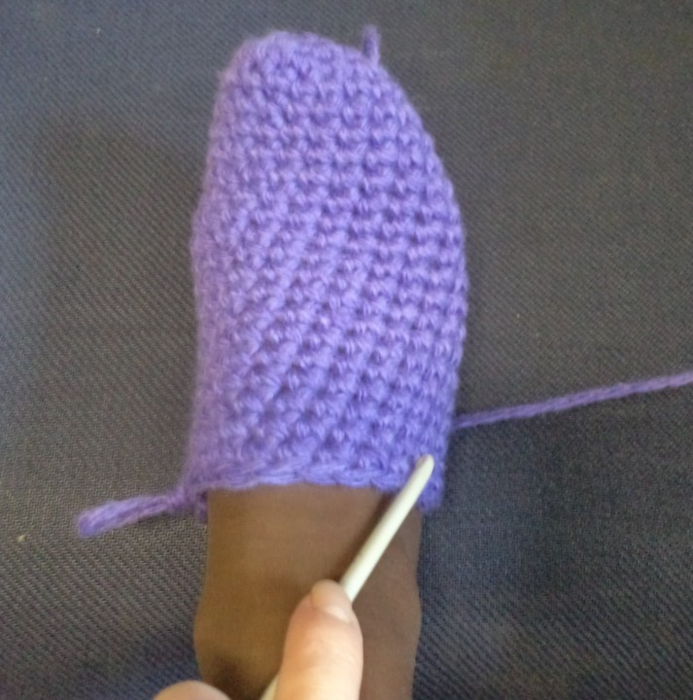
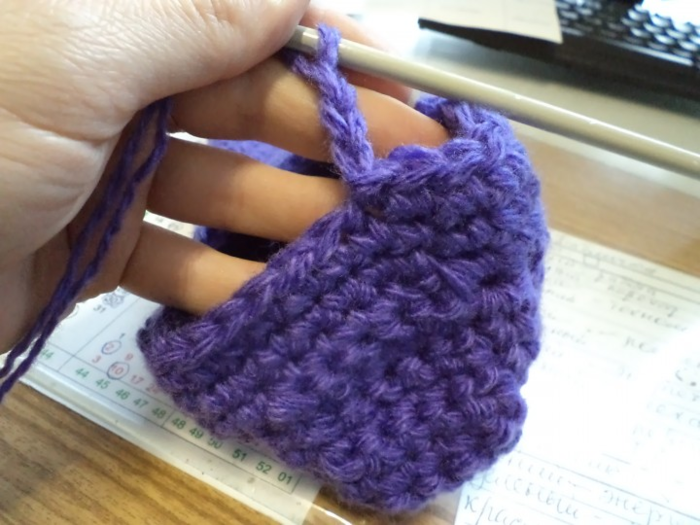
We knit the required number of rows - we try on to determine. It should be like this 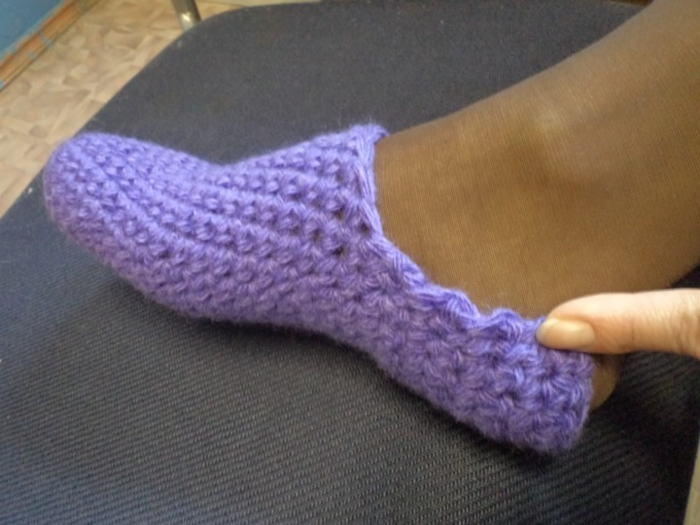
I got 7 rows. We begin to untie the heel. For this, the number of loops left on the heel is divided by 3.
In my case: 13: 3 \u003d 4 (+1) So that it’s clear why we divide by 3 - three, this is the number of sides of our heel!)) Thus, 4 loops will go along our sides and 4 +1 more - from below.
We knit the next row - the side part (4 loops), the bottom (4 loops) and make a connecting loop in the next loop of the base.
We unfold the knitting, knit the lower part (4 loops) and make a connecting loop with the next side loop.
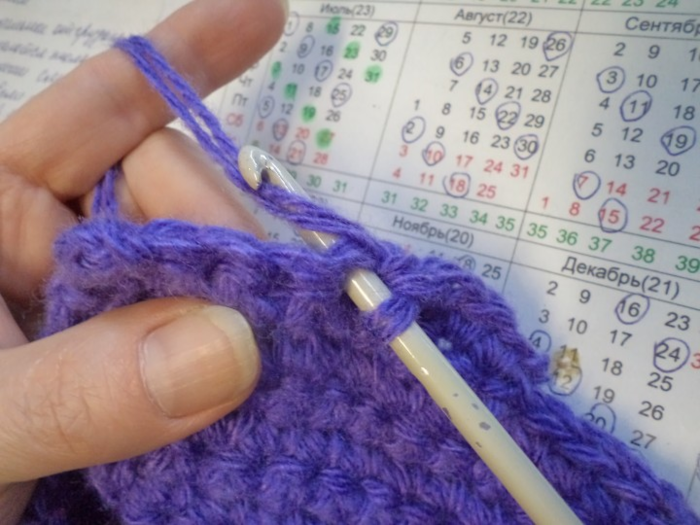
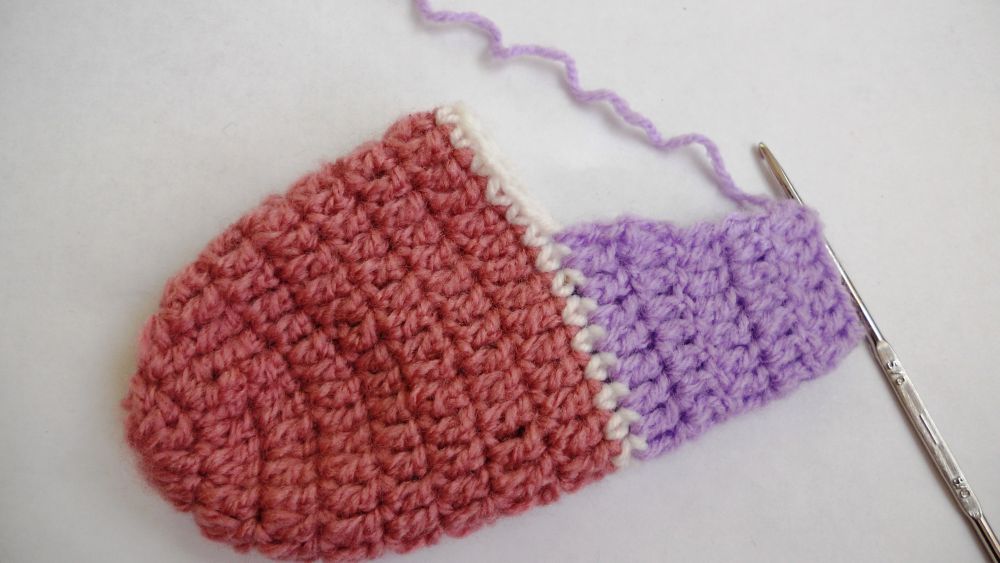
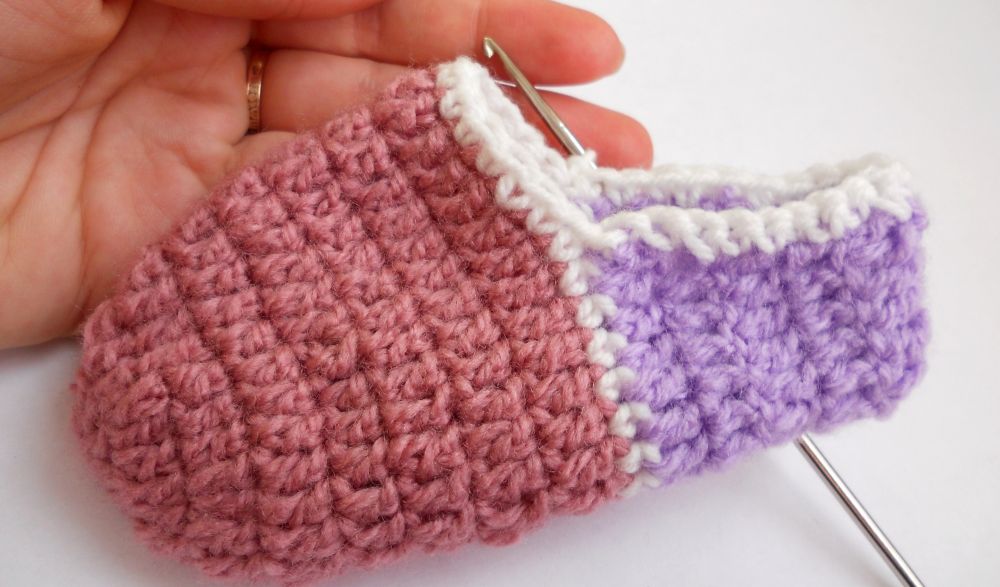
Everything, the heel is ready. We make two air lifting loops and knit again in a circle, increasing the height of the sock. 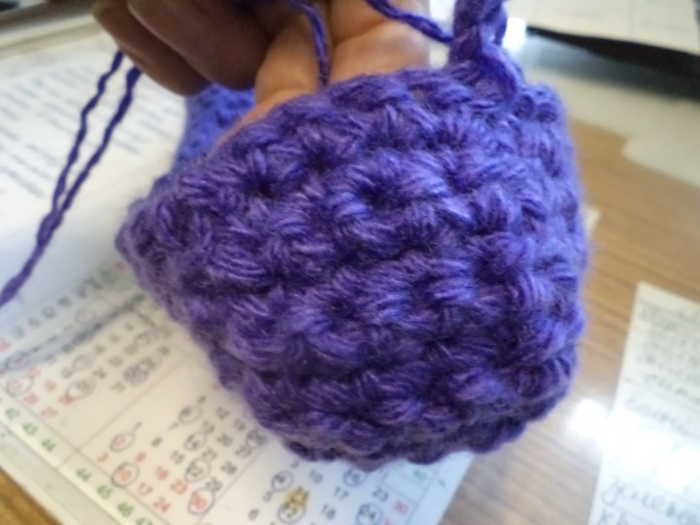
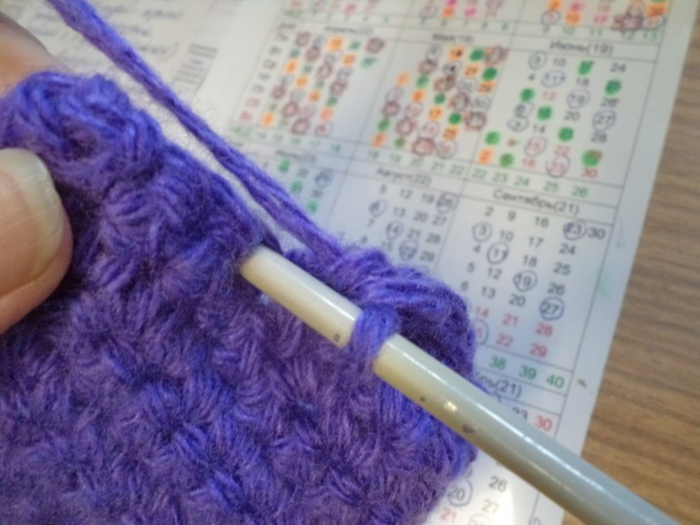
In the 2nd and 3rd row I remove one loop in the corners on the sides - for a better fit) I just do not knit them. 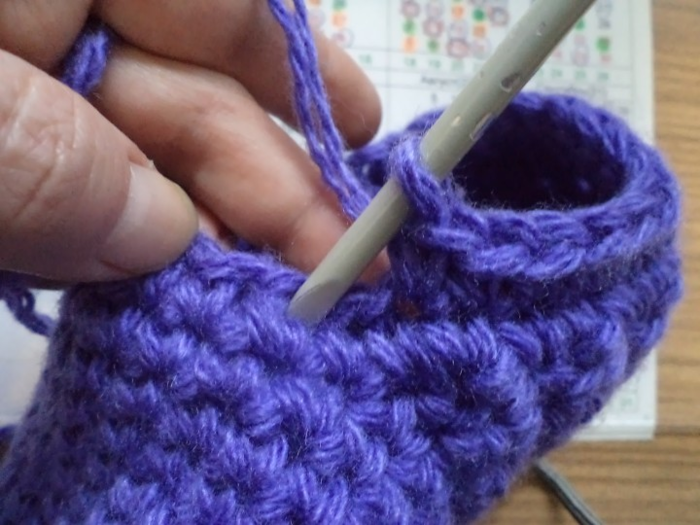
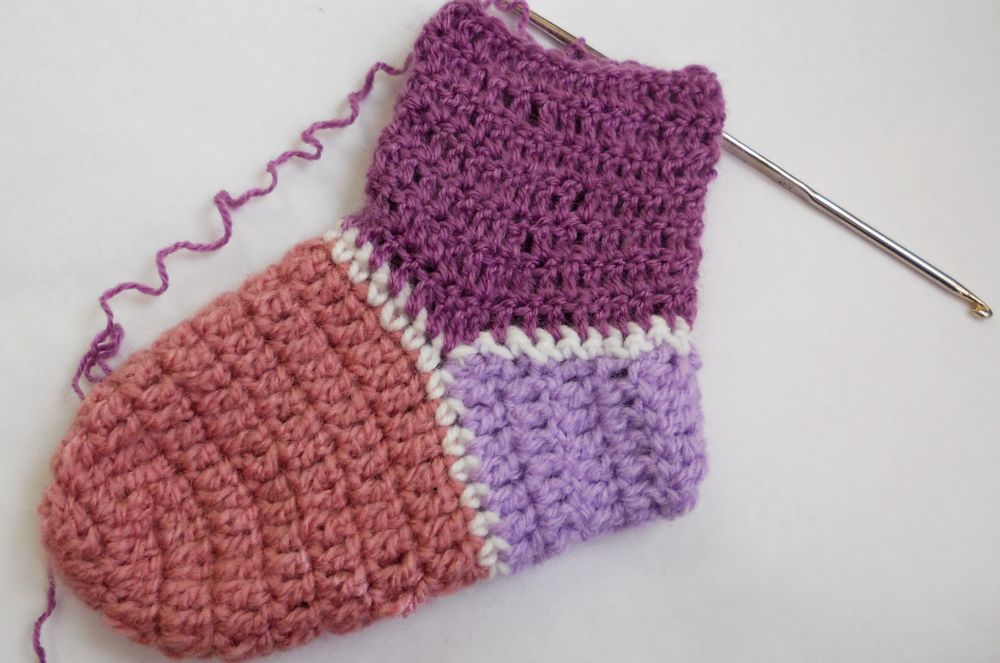
In order to quickly increase the height of the sock, I knit a series of double crochet posts. If you want high - golfs, then you can knit further, to the required height, double crochet or without. Or add some kind of picture)
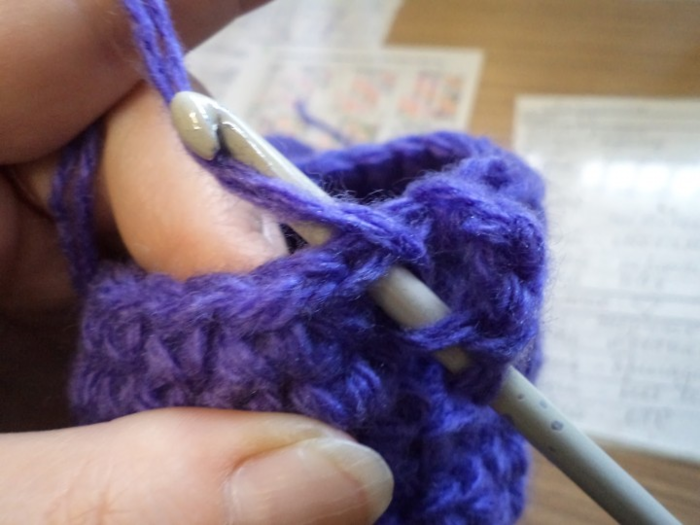
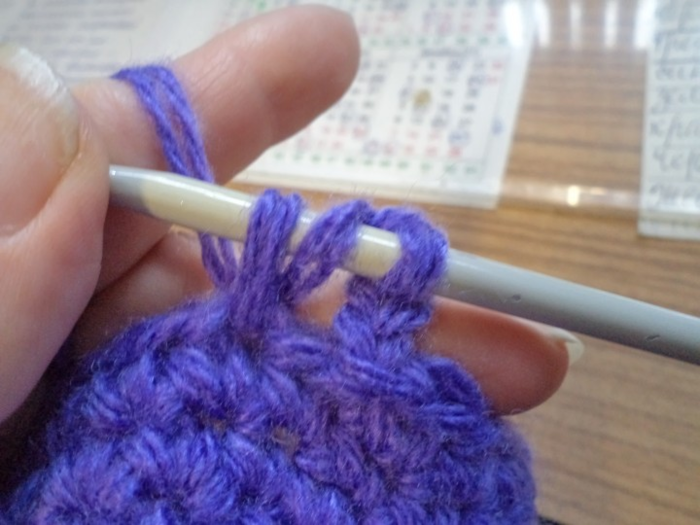
To perform double crochet, you must first dial three lifting air loops at the beginning of the row.
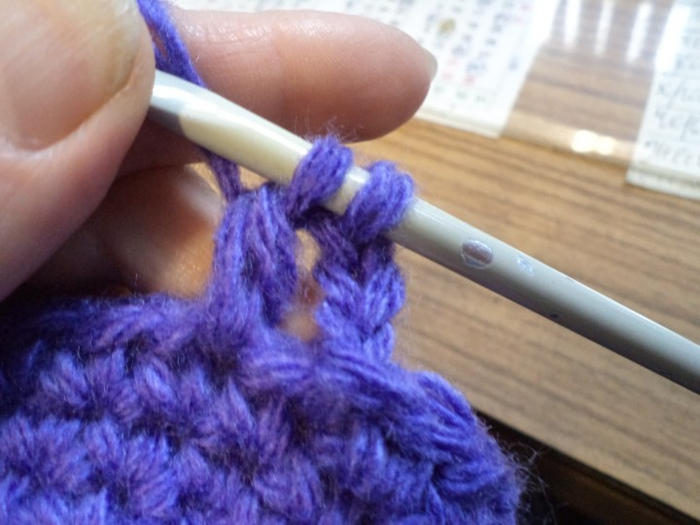
Next, we knit a series of double crochet posts. We connect a connecting loop. 
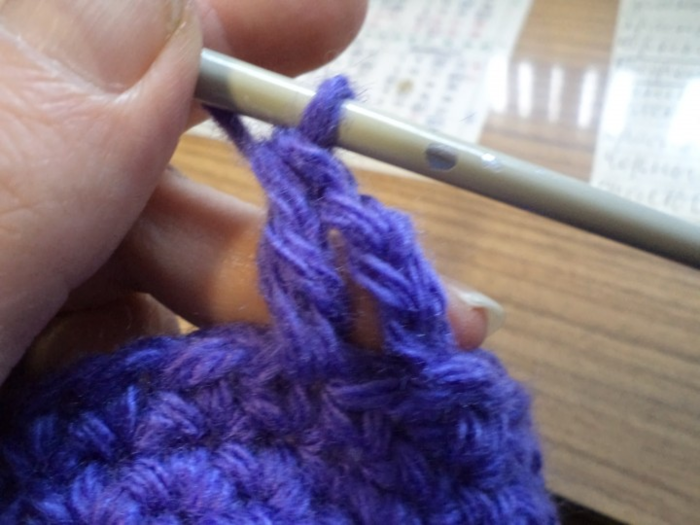

Having knitted the required number of rows, we finish knitting. 
Voila! The sock is ready !! We knit the second in his image and likeness) 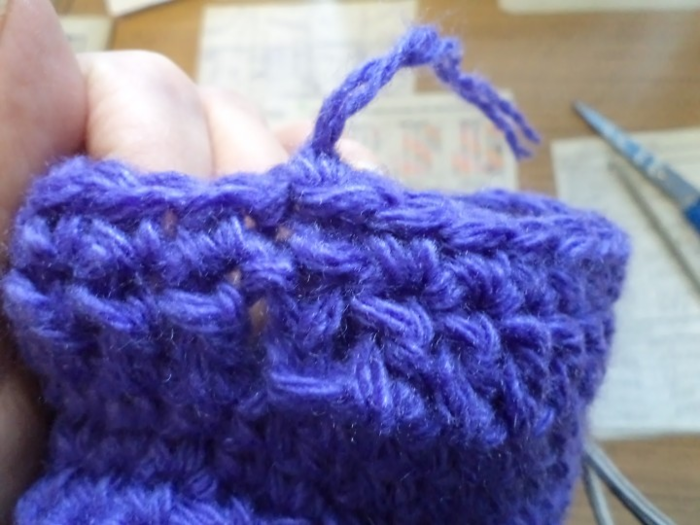
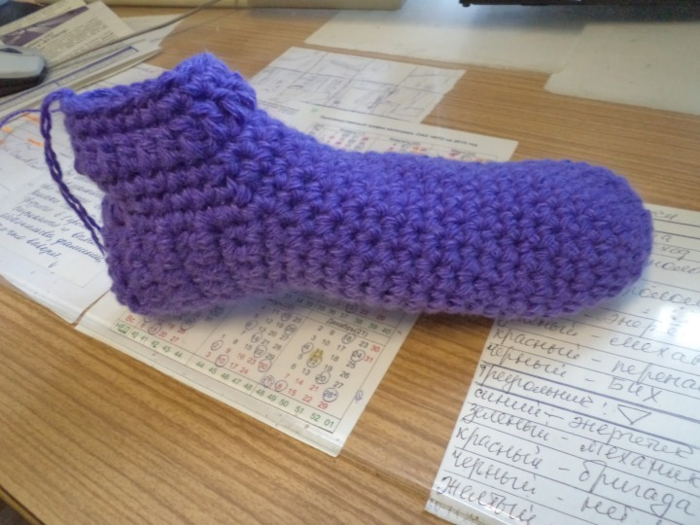
Such socks are very comfortable to wear, keep their shape perfectly, warm and comfortable)
And, most importantly, their dignity - they fit very, very quickly!


Personally, my opinion is that such socks are not only legs, but also warm the soul))
All great success and a lot of cozy, beautiful socks !!)))
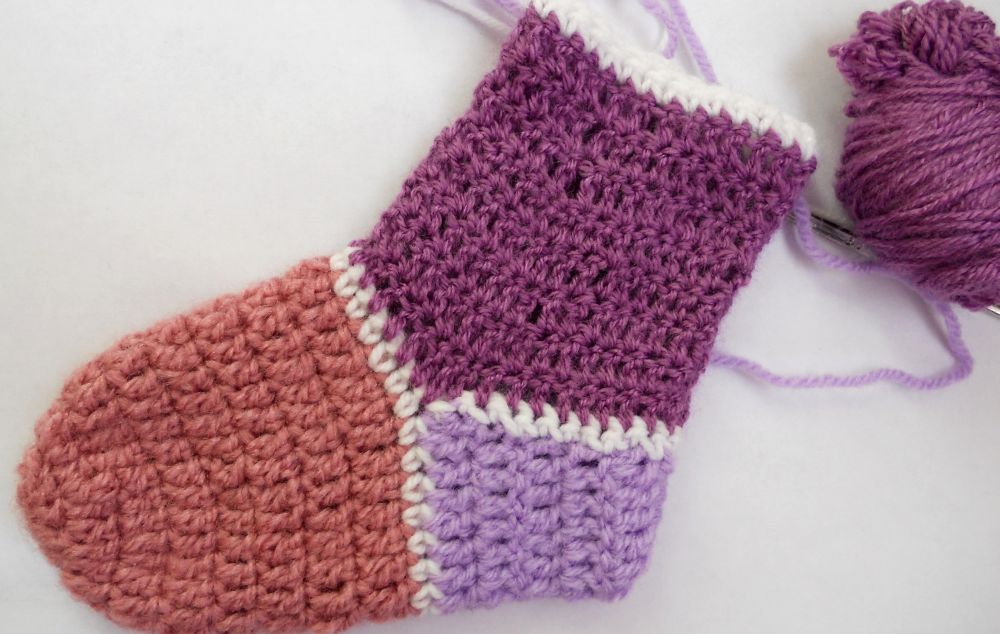
In anticipation of colds, slushy seasons, and then frosts, knit yourself warm, elegant socks with crochet patterns of unpretentious drawings for which you can find in this master class. To get started, stock up with beautiful half-woolen yarn of medium thickness. Socks made of white and light purple yarn are presented here, but the choice of color is up to you. You will also need hooks with a thickness of No. 3 and No. 5.
Attention to this video:
Pick up 8 half-columns of white thread and tighten the ring from them, connecting them with a loop, which you skip into the first half-column.

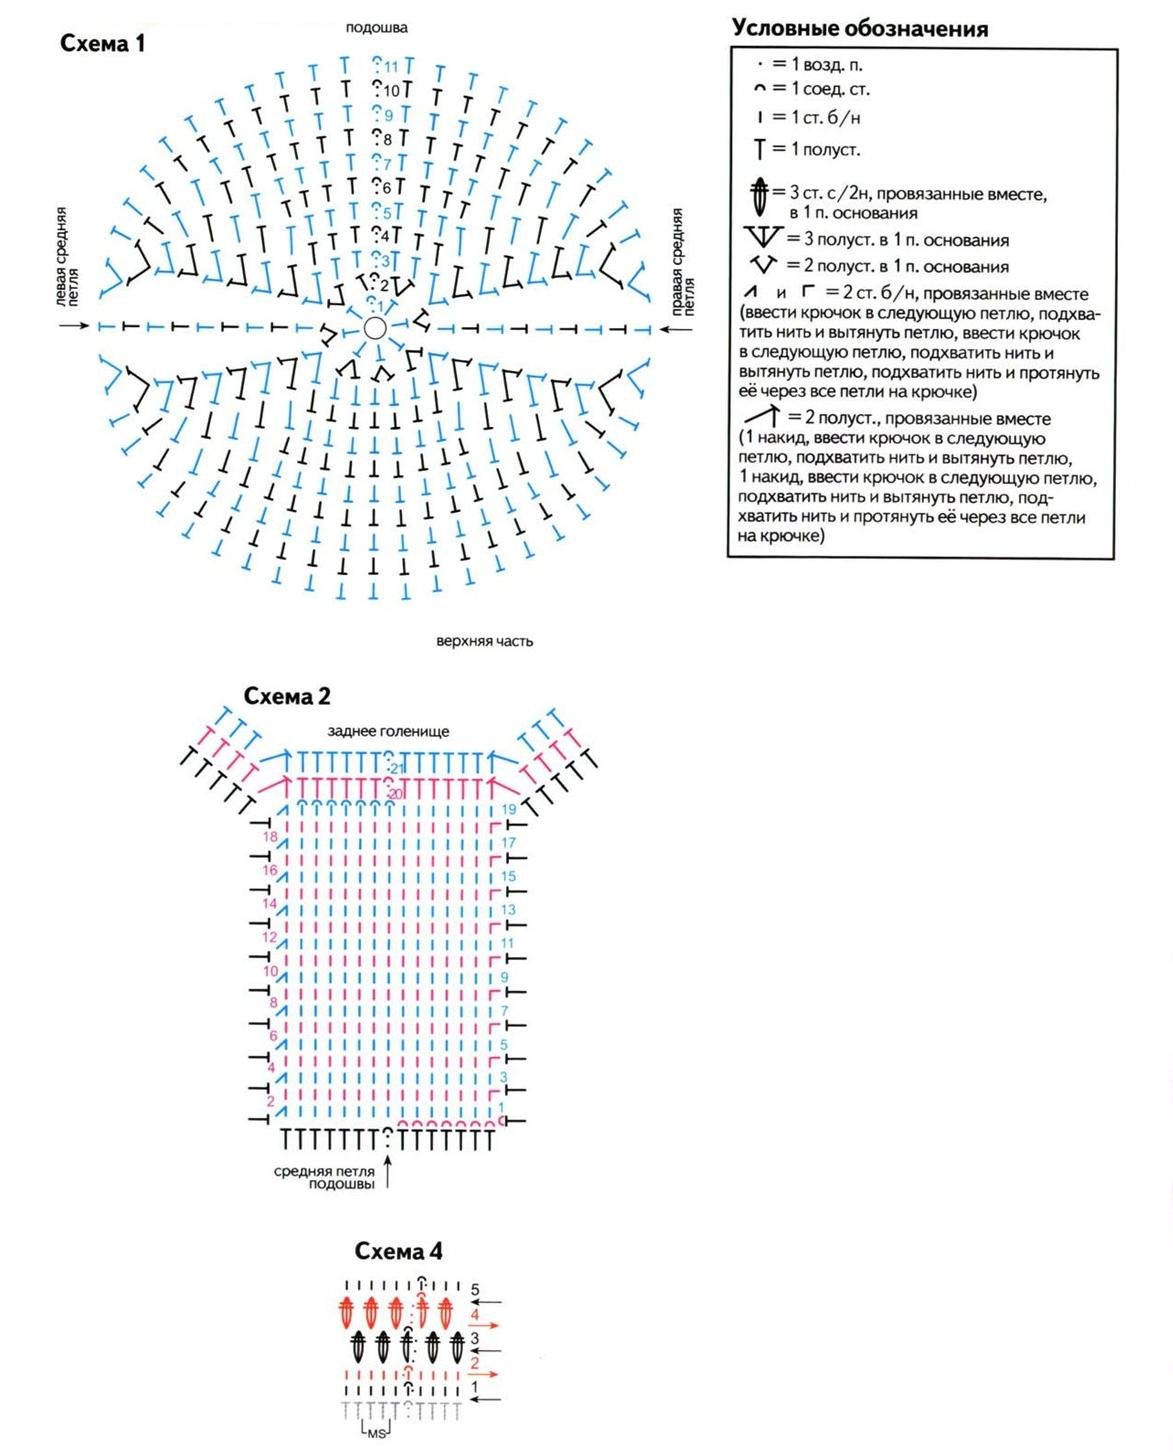
Now, according to the 1st scheme, we begin to knit the sock with half columns, adding loops on the sides up to the width of the foot. You should have about 10 rows with additions, then knit in a circle with half-columns further.
Jacquard patterns
This master class will tell you how to crochet socks for beginners. Let's analyze the technique of knitting patterns. Stylish and unique jacquard patterns are very popular among needlewomen. In another way, this technique is called tapestry. It is very light, and the socks are dense and durable.
There are two ways of knitting a pattern - direct knitting with a turn of work and knitting with a pipe, that is, in a circle.
Patterns for knitting can be created by yourself or taken as a basis for patterns for cross-stitch. It is very simple to navigate according to this scheme - the cell corresponds to the loop, the alternation of colors is fully consistent.
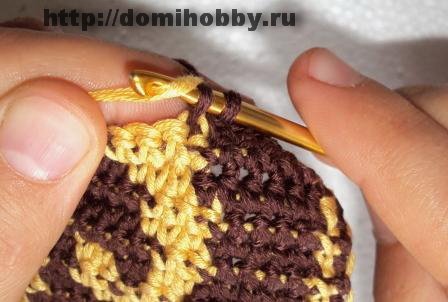
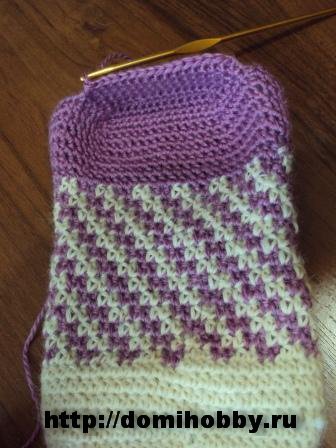
In order to begin to knit a pattern. We take the purple yarn and alternate the threads, stretching 2 half-columns of white yarn over the purple loops and vice versa.
The color transition may be different. Knit a sufficient number of loops of purple color, pull the outer loop with a white thread and knit both purple loops with a white thread.
Now the location needs to be changed. For convenience, hold the light thread on your index finger when working with dark yarn, and vice versa.
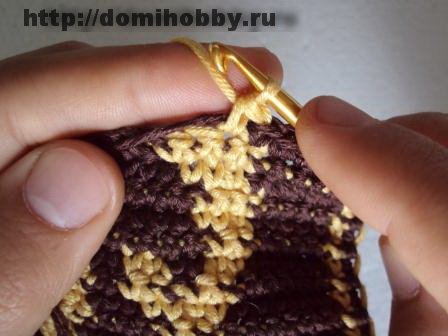
When you knit in a straight way, the rows of single crochet need to be alternated from the front and back sides, and then in the figure the single loops are blurred. When you knit in a circular manner, the pattern is clearer, since single crochet columns are only front. But in the latter case, the picture is a little tilted.
Now start knitting the heel. To do this, we use single crochet columns - in reverse and straight rows on the middle of the sole (see diagram 2). When you start knitting a heel, you need to tie it to the toe at the same time until the middle of knitting.
Now you need to continue to knit the bootleg. We knit it in half-columns, in circular rows. After 5-7 rows of knitted shaft, we knit the cuff in 4 patterns.
Schemes:
You can also watch a video on how to crochet socks just below.
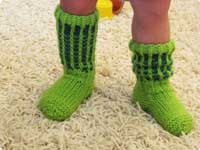 Socks for children's legs are not only a piece of clothing. This is a thing that should be warm, comfortable, hypoallergenic and pleasant to the touch. The assortment of materials and the color scheme of store socks amazes with variety, but it turns out that many mothers prefer handmade socks.
Mom or grandmother, about to knit baby socks, selects material and color at her discretion, which allows us to make high-quality socks.
Video lesson "A master class in crocheting children's socks for beginners"
Crochet socks is easy
A series of workshops on crochet socks will give an answer to a number of questions that needlewomen have about this product:
- Where to begin?
- How to choose the material from which the threads are made?
- How to choose a hook that matches the thickness of the yarn?
- How to calculate the size of the product?
- How to tie a heel and a sock?
These video materials will be interesting for both beginner needlewomen and those who are good at crocheting, but have not yet tried to knit socks. These video tutorials will demonstrate that knitting socks is not such a difficult process. The main thing is to choose the right materials and know a few secrets in knitting these products.
These materials allow you to watch how a professional knits socks. Crochet movements are commented on by the needlewoman and are clearly visible, which makes it possible to easily repeat what she saw.
Cozy socks for daughter and son
You need to have basic crochet skills and follow the techniques shown in the training video, and even a beginner needlewoman will be able to quickly knit children's socks. They will turn out beautiful, durable and suitable in size to the children's leg. It is so important that the child was not only warm, but also comfortable.
Women's hobbies
Looking for a simple and quick crochet? Spend a couple of evenings knitting socks for the baby.
If you have chosen among hundreds of hobbies, we suggest you start with simple and small models - this way you will quickly see the result and be inspired by new exploits. When a family has a baby, you can replenish a new wardrobe with a new thing. For example, crocheting these children's socks, for beginner knitters this model will prove to be feasible. Follow the step by step description and photo.
For knitting children's socks you will need:
- hook number 3.5–4;
- yarn of several colors.
This model is based on 2 basic skills: knitting in a circle and the ability to knit crochet columns. The number of loops and calculations are presented for the children's foot 12–13 cm in size.
The first stage consists of forming a circle. Make a sliding loop, inside which dial 2 lifting loops. In a loop circle, knit 11 columns with one yarn each and end the row with a loop of connection. You should get a sliding loop with 12 columns, which should be tightened.
At the second stage, you need to set the desired width of the future sock by circular crochet. Start the second circular row with 3 lifting air loops, then in the same loop, knit another 1 crochet column.
In each remaining loop of the first row, form 2 double crochet columns. The second circular row of knitting will include 24 columns.
The third circle is similar to the second, but here you should alternate - in one loop of the previous circle, knit 2 crocheted columns, and in the next - one, again two, etc. As a result, the third row of the canvas should include 36 columns.
If the leg is wide enough, then you can further increase the width in the fourth row, by alternating knitting 2 columns with a crochet in one loop, but after 2 single columns, in the end - 48 columns.
The third stage of knitting is to increase the length of the sock to the place where the heel should be. For the size taken for onsovy, these are 4 rows of circular knitting in each loop of the last row, one crochet without additions.
The next step is to tie the heel. For knitting the heel, you can use yarn of a different color, which will make the product more interesting, also each new transition in colors can be separated in a separate row without lifting stitches.
The heel is knitted in a semicircle 4 rows in depth in the same stripes, knitted with columns with one yarn in each loop of the bottom row.

Be sure to combine the semicircle of the heel with connecting loops.
The final stage is the combination of the heel and the main canvas of the foot with the subsequent formation of the toe in height.
Using a different thread, make columns in a circle with one crochet for each loop of the last row (approximately 7–9 columns).
Having completed the last row, you can decorate it with columns without a crochet in a circle.
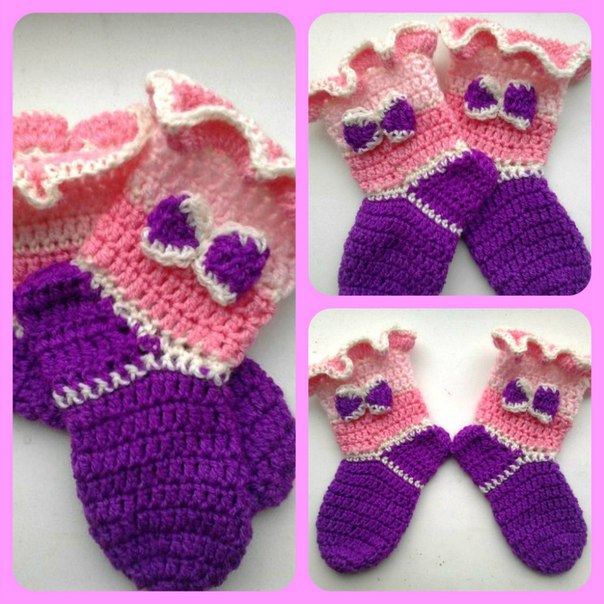
If the socks are for the girl, in the last row you can make a volumetric frill and sew a bow.
Here's how to crochet baby socks for a young fashionista or fashionista in two free evenings. If you want to do something else with your own hands, look at a workshop on knitting a beautiful openwork or make a fashion for yourself.
The master class prepared Olga Volkova especially for the online magazine "Women's Hobbies."
Even more master classes and ideas are waiting for you in the “Needlework” menu section. Join us on social networks in order not to miss new materials.
On winter evenings, and especially on very cold days, for the full comfort we sometimes lack the smallest - warm socks. They fit in quickly and easily. Crocheted Socks get thick, warm and very durable. They even resemble valenki in shape. Therefore, crocheted socks will serve their owner for a very long time and heat in cold times.
Crochet socks are knitted with simple crochet.
The photo shows how to crochet.
How to dial a chain crochet. How to knit the first row.
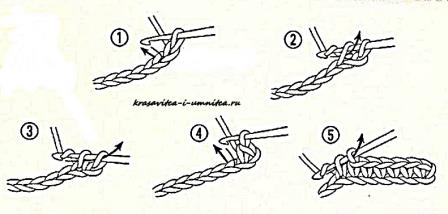
And how to continue crocheting the following rows.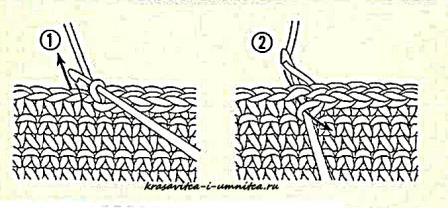
How to knit socks quickly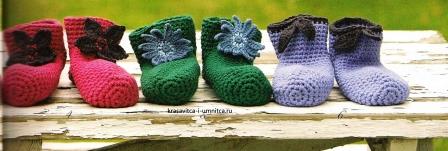
Work begins with the design of the toe of the toe by knitting in a circle. Crochet socks can be made from both thick and thin yarn. But here it will be important to correctly calculate the number of columns and rows for knitting a toe. If you do everything right, further work will not cause you any difficulties and you will be able to knit socks quickly.
Here is the most important crochet pattern for socks: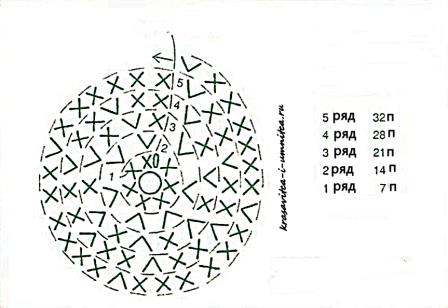
Shown here are the first rows of the knitting pattern of the toe of the toe in a circle. Further actions depend on the size of the future sock, the thickness of the thread and the density of knitting. Therefore, take all the measurements of the future sock in advance - girth of the foot, foot length, ankle circumference, toe height (pagolenka).
I decipher the scheme: how to start crocheting a sock: 1st row: Short 7 SC in the ring.
  2 row: knit 2 single crochet into each column of the bottom row. Get 14 columns.
3 row: knit alternately - 1 single crochet in one stitch of the bottom stitch and 2 single crochet in one stitch of the bottom stitch. Repeat 7 times. Get 21 columns.
4 row: knit alternately - 1 tbsp. b / n in one loop of the lower column, 1 tbsp. b / n in one loop of the lower column and 2 single crochet in one loop of the lower column. Repeat 6 times. Only 24 columns.  5 row: knit alternately - 6 times 1 tbsp. b / n in one loop of the lower column and 2 single crochet in one loop of the lower column. Repeat 4 times. Only 32 columns.
 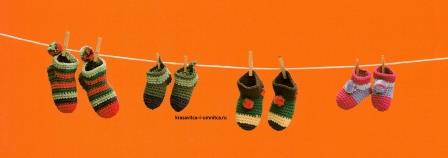 Note:This ends the scheme, but if you plan to crochet a sock with a larger size, or you have a very thin yarn, knit an additional 1-2 or even 3 rows in a circle, for example like this:
6 row: knit alternately - 7 times 1 tbsp. b / n in one loop of the lower column and 2 single crochet in one loop of the lower column. Repeat 4 times. A total of 36 columns.
7 row: knit alternately - 8 times 1 tbsp. b / n in one loop of the lower column and 2 single crochet in one loop of the lower column. Repeat 4 times. It turned out 40 columns.
We will consider the knitting pattern for the specified example: from 32 single crochet stitches.
Do not forget to try on the product more often, so as not to make a mistake with the size during the knitting process or check the patterns of socks.
Crochet Sock Pattern:

After you have designed the toe, continue to knit in a circle with 32 single crochet without additions (without 2 columns in one loop of the bottom row).
Knit the fabric of the desired length.  We tie the top to the border of the lifting of the foot, close the upper 14 loops, and on 18 SC we continue to knit the heel.
  When the heel is made of the required length, we connect the ends of the product, as in the photo below and connect them.
  Next, we draw the single crochet around the entire circumference of the resulting base of the sock (see photo below) the required number of columns (in the example 35 single crochet).
  We continue to knit in a circle consisting of 35 st. B \\ yarn, the required number of rows to the desired sock height.
  Close the last row. The sock is ready. Similarly, we knit a second sock.