

In this theoretical Photoshop lesson, we will look at how to draw realistic hair with the mouse.
ATTENTION: The lesson is intended for already advanced users of Photoshop.
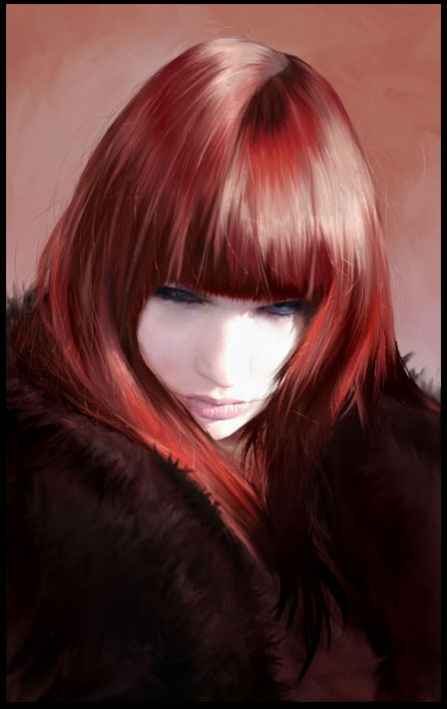
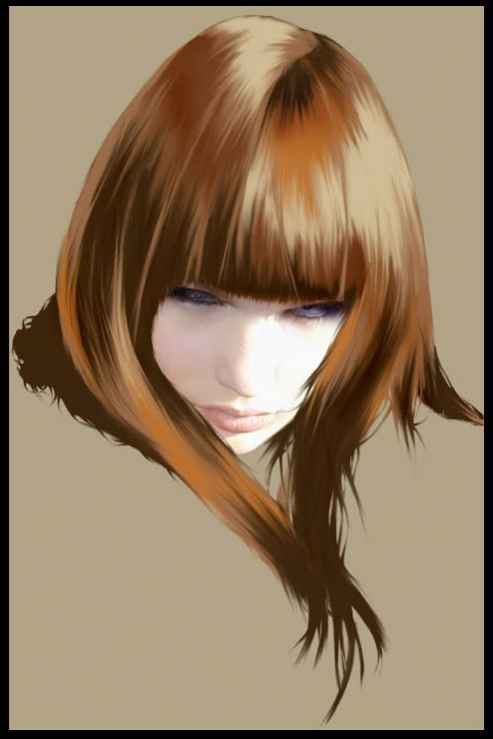
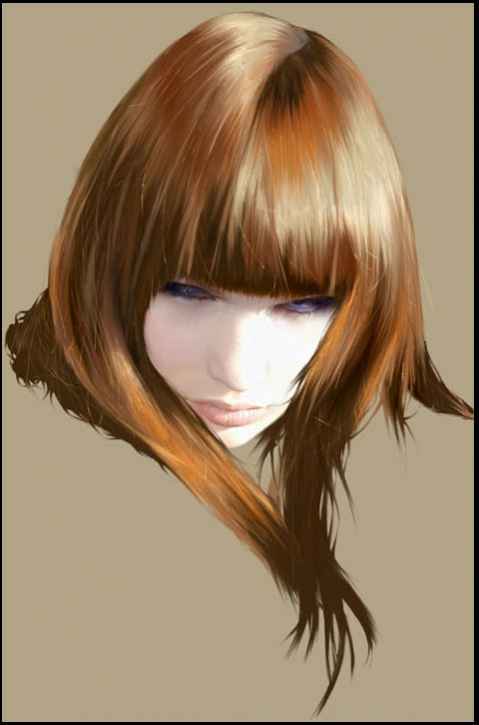
Final result
Getting started with Photoshop
In this lesson, I will only explain how I color my straight hair, illuminated by sunlight. When coloring (drawing), a lot depends on the lighting, as well as on the type of hair, but I can not explain all the options, because there are too many of them.
There are millions of ways to color (draw) hair, but whatever you use, if you want to achieve a realistic result, you will have to spend a lot of time (and sometimes nerves). I'll talk about the easiest way to draw hair. You can make it more accurate just by spending a little more time, but personally I'm too lazy to do this detailed description (it will take twice as long).
You will need: Photoshop 7 or higher (you can use earlier versions, but there may be unnecessary problems due to a different program interface). In addition, you need basic knowledge of the structure of hair and how it grows on the head. Therefore, the lesson will provide a diagram that will help you when drawing hair.
How I work: I use Photoshop CS And I draw everything with the mouse, because my tablet is broken. But I recommend using a tablet, because drawing with a mouse is difficult and time consuming.
The canvas size I used was 924 x 1484 px.
Preparation for work: We will work mainly with layers and different tools. You will need a tool palette (click Tabif the tool palettes did not appear on the program workspace) and the layer palette ( F7) You will not need other windows; therefore, you can close them.
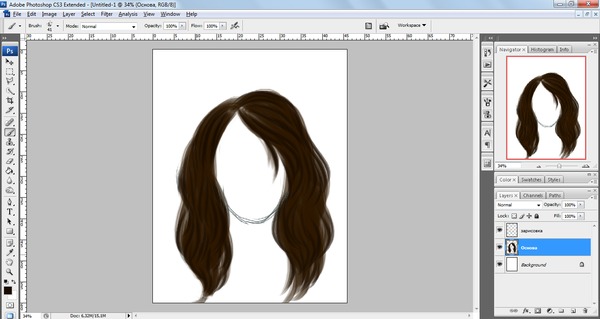
Now we will work with the palette of layers. We need another layer. One for the outline (outline), the other for the background.
The background color should be neutral, not too bright and not too dark. Your layer palette should now look something like the screenshot.

Basic knowledge: When drawing hair, remember that the hairstyle consists of strands, and drawing each hair does not make sense. Many people, drawing each hair, highlighting it with different tones, spend a lot of time, and almost always such work subsequently looks unnatural.
Step 1.
This head here clearly needs hair instead of lines around it. Contour lines help a lot while drawing. They seem to create certain borders of the hairstyle.

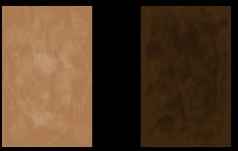
Make sure you are in the " hair paint 1". First you need to decide which hair color will be the main one - I chose brown because it’s easier to work with than blond (blond) and it looks more profitable than black. Now create a color palette that you will use :
# 996742 - background color (neutral). Not too bright, not too dark.
# B97234 - brighter color.
# 724422 - dark color.
# D2BE99 - lighter, but not white.
# 3E2A11 - darker, but not black.
Step 2
Now you need to decide where the light comes from and what its brightness is. In this case, this point is already selected, if you look at the face. This is sunlight, located a little on the left, which strongly illuminates the left half of the face. This is an important point to pay attention to. It is on the left that the main highlight on the hair will be located.
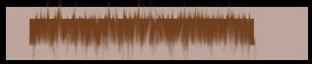
First, we’ll fill the hair area “ neutral"Brown color # 996742 . I painted it using a brush with a diameter 42 px (brush diameter depends on the size of the canvas).
Of course, the hair on the left side will not be as crowded with white as the face. I will try to explain it on " figure». ↓

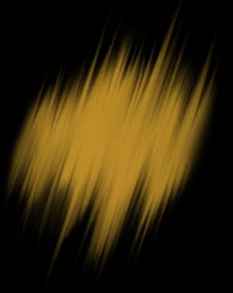
Now, using a brush, apply shadows and highlights to the strokes, not forgetting the volume and lighting.

Step 3
This hair is not real yet. Fix it with the tool Smudge tool (Finger Tool / R Key). First you need to make the individual strokes of the color softer. I use a brush size 72 px and force 60% .

Now I changed the brush size to 25 px, and reduced the force to 40% . The movements are zigzag, repeated several times. This work is time consuming, therefore I recommend using the key Shiftas shown in the image.
(Direction of movement, see the diagram.)
That's what I got in the end. Do you think that's all? Not yet.

Step 4
We do not need a layer with an outline (outline) anymore and we can remove it.
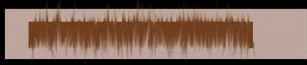
Hair cannot end with a straight line, so we need to make them more realistic: ↓

We will do this in about the same way as described above.
I took Smudge tool (Finger Tool / R Key) - brush size 3 px and force 60% . (The actions are the same as in step 3. Brush up and down again and again.). Here is the result: ↓

Now change the settings: force 80% , a brush of a different size (arbitrary) and do the same thing again, but not so often. In the end, it should turn out like this: ↓
To make the ends of the hair more realistic, you need to blur them a little. You can just use Blur tool (Blur Tool / R Key). Brush size 36 px, power 40% . It will turn out like this: ↓
Now add the shadows.

Create a new layer under the layer in which the hair was painted. Color i used # 94644E. Brush Settings: Size 11 px, opacity 50% . It will turn out like this: ↓

Step 5
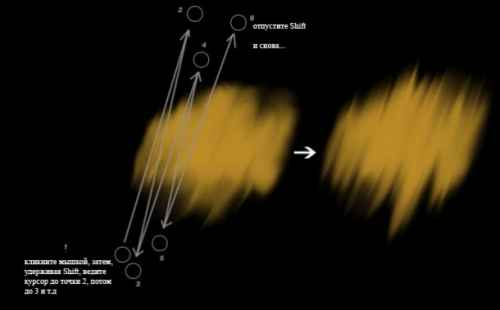
This step will be quite simple, since you already understood the principle of using the key Shift and tool Smudge tool (Finger Tool / R Key) described above. You need to do the same here, only with different settings: brush size ~ 3 px, power - 90% . And WITHOUT a zigzag, because with force in 90% need to work carefully. I mean:
Click on any part of the color spot and hold Shift, drive him to any point a little higher. Letting go Shift and repeat everything from the beginning, but from a different point, again and again, here and there. Sometimes from the bottom up, sometimes from the top down. Do this until you are satisfied with the result. The result is: ↓
I didn’t do it too carefully in the image that you see below - you should try to do it more accurately than I do. As a result, I had to adjust a lot because of my sloppiness.
Regarding the ends of the hair ... I made them the same way as described above.

Step 6
Agree that the hair at this stage looks quite flat. It's time to add some details in the form of individual hairs. This is quite simple, but first you need to create a new layer above the layer in which the hair was painted. If we stay in the same layer, then possible shortcomings will be very difficult to correct.
Call the new layer " Inner Details".
So now we take Brush tool (Tool Brush / Key "B") with the following settings: diameter 1 px, opacity 40% and color # F3BC84.
Now draw a variety of lines on the hair. You can do it in any way that you like best - it is not so important (with your free hand or with a pressed key Shift) Just do not forget that in the area of \u200b\u200bthe main sun glare, the color of the brush needs to be changed from light brown to white.
I made the ends of the hair brighter with the same brush.

Now using the tool Eraser tool (Tool Eraser / Key "E") (opacity 20% soft brush size 17 px), randomly erase some parts of the lines you just drawn, but do not erase the lines completely: ↓

As a result, I got such a picture. It already looks more realistic.

Step 7
Medium-sized brush (the size of the brush depends on the size of the canvas, I chose 19,5 and 5 px), opacity 20% .
Click, click, click, click!

Smaller points for small areas, of course ... You can also add a few lines: ↓
That should work.
Oh yes ... place dark points and lines in dark areas, and bright ones where the main light falls.
After all the tricks, we get the following result: ↓
Step 8
This step is the last. He is like 6 -this step, but now we add external hair. First, create a new layer ...
I used a brush with a diameter of 1 px. On the dark side we use dark brown, on the illuminated - bright brown colors. Again, I partially erased the lines and used the tool Blur tool (Blur Tool / R Key) (Strength 40% ) for a slight blur of these lines.
Now ... Almost done ... almost!
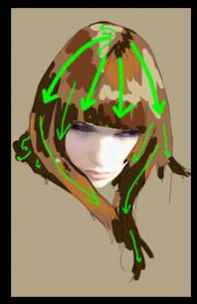
It's time to discover all the unnatural areas.
I marked them green ...

Do not forget to add hair shadows on the rest of the image.
In the last image you can see what I added.
Final result
As you can see, I changed the color to red.
I hope I could at least help someone with this lesson.
You may need hair drawing when correcting the model’s hairstyle, sometimes it happens that all the styling, makeup, image were done on the photo, and when you look at the pictures, you start to see mistakes, and naturally you want to fix them. You can change color, add volume and remove imperfections when creating a hairstyle template and applying it to a photo. This is a creative process from which photography will only benefit from the main thing to do everything in moderation. This lesson will talk about an easy way to draw hair, with which any user, even a beginner, will be able to draw a fantastic hairstyle to your taste. The lesson is designed for users who have a graphics tablet (of any brand), Adobe Photoshop versions from CS3 and higher, and basic skills in owning the program.
So, we start by creating a new file. When creating, it is best to use a large canvas size in order to maximize the detail of the picture. For example, take a canvas measuring 1300 * 1700 pixels. After that, create a new layer, which we will use as a sketch (you can rename it to “sketch” or “sketch”). Then we take a solid brush of dark color ranging in size from 3 to 5 pixels, and make a sketch of the head, and then the shape of the future hairstyle. We will not pay attention to drawing the skin and drawing details of the face - we are only interested in hair.
When creating hairstyle shapes, remember that they should not resemble a hat, that hair is also subject to gravity and should hang down, framing your head (except for the effects of wind). It must be remembered that the hair can not be exactly the same length, so you need to depict individual strands, slightly knocked out of the hairstyle.
Drawing №1
It is not necessary to make it detailed, the main thing is to have an idea of \u200b\u200bwhat shape the future hairstyle will have. Under the “ Sketch"You need to create a new layer, which we will call" The basis". Next, you need to determine the color of the hair. I chose the usual light blond color. The base of the hair is always drawn with a color 2-3 shades darker than the shade that you want to get as a result. Therefore, we choose a darker color and begin to paint over the basis of the hair according to the sketch. To do this, use the standard brush shown in Figure 2, and set the same settings for it as in the picture.
Drawing №2

After that, begin to paint over the foundation in the direction of hair growth. This form will have hair.
Drawing №3

Now we need to start drawing the strands, for which we will take the same brush, with the same parameters, but smaller, and a slightly darker shade. We begin to draw dark strands, as shown in Figure 4. (For convenience, I erased from the “ Sketch"The outline of the hair, leaving only the head.)
Drawing №4
Now repeat the same thing for light strands, changing the color to a lighter one.
Drawing №5

Well, now is the time for detail. You will need the so-called "crushed brush" for drawing hair, you can find it on the Internet or do it yourself.
Having selected the brush, and setting the following settings for it (Figure 6), we begin to detail the strands.
Drawing №6

On light strands, draw a slightly lighter color, on dark ones a little darker, reducing the size of the brush if necessary.
Drawing №7
 The result is approximately the same as in Figure 8. Now we take a brush with a width of 1 pixel, select a shade 2 shades lighter than the base, and pass it along the hair growth, simulating individual hairs.
Drawing №8

Well, now the final stage - give our hairstyle shadows and lights! To do this, we need the tools “ Clarifier"And" Dimmer". Choose the direction of lighting, and go through the clarifier in these places. Then, with the dimmer, mark the shadows in the places where the hair frames the head, and the places opposite from the light source. And now, our hairstyle is ready, and you can model your dream styling!
Drawing №9

Good luck in your creative endeavors! About fotomtv.
Show html code to insert into blog
A simple tutorial on drawing hair in Adobe Photoshop
You may need hair drawing when correcting the model’s hairstyle, sometimes it happens that all the styling, makeup, image were done on the photo, and when you look at the pictures, you start to see mistakes, and naturally you want to fix them.
Many of us like to create fan art, and of course, it often does not do without painting any exterior details. But not every person can afford a tablet and without certain skills to draw the desired image with his hands, and even more so when it comes to such a complex detail as hair. Sometimes special brushes for Photoshop help us out, and today we’ll talk about them. The lesson is designed for basic Photoshop knowledge, but does not require special training, so it’s suitable even for beginners.
Brushes
To get started, download any Photoshop brushes from the network. Choose hair that is made in good quality, not divided into separate hairs (otherwise it will be difficult to work with them) and, preferably, they should have a natural shape and bends, and not look like straw. I suggest a set of brushes that I use myself. You can download it.
Having decided on the brushes, set them in the folder with Photoshop:
... \\ Adobe Photoshop \\ Presets \\ Brushes
And then load in the program by selecting the Brush Tool, going to the context menu of the templates and selecting the Load Brushes option.
Training
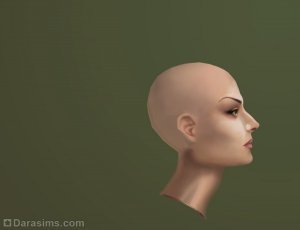
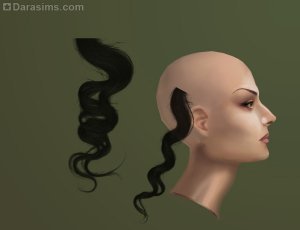
Launch Photoshop and open the image with which we will work. I’ll take the blank of a girl from Sims 2 without a hairstyle, since it is easier and more convenient to work with such a screenshot - you can choose your forehead shape and hairline.
If your character has a short hairstyle, it's not scary - you can completely sketch it with new hair. Decide on an approximate form of hairstyle: whether it will be developing curls or an ordinary straight hairstyle. For example, I will choose a dynamic hairstyle from curls.
For each strand, we will create a new layer so that you can work with each of them individually, without affecting the rest. Therefore, at each stage, do not forget to create a new layer and save more often.
Creating curls
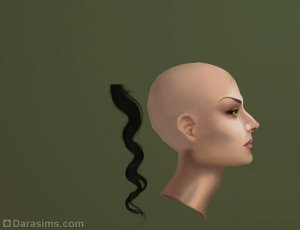
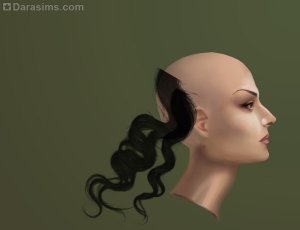
Create a new layer in Photoshop, as mentioned above. Take one of the desired strands in a set of brushes, select its color and size and draw near the place where you want to attach it.
Now our strand is directed vertically and looks a little larger than we need. Therefore, I take and customize it with the help of transformation tools (Scale / Scale and Rotate / Rotate) as I need.


Once the strand is ready, you can create a new layer and move on to the next. This time I choose a different type of curl so that there are no repetitions and the hair looks more natural.
Again, I select the transformation tools, slightly reduce, and then turn the strand in the direction I need.
In addition, you can mirror the strands so that they do not look the same, stretch or narrow them using the same scale, and bend and expand everything in the same transformation section. This will make the curls not look alike, even if they were taken from the same brush template.
Continue to create strands on new layers and adjust them to the shape of the head and direction of movement.
What we will create
In this article I will tell you how to draw a realistic beard and two short hairstyles. And also which hair brushes for Photoshop use.
1. The basic principles of creating short hair
There are many types short hairstyles. Today we look at two fashionable hairstyles that people often wear, as well as designers and illustrators often use in their work.
Follow direction
No matter which style you choose, one rule remains unchanged. To get the best result, paint your hair following the direction in which it grows from the skin.
Consider this principle in practice:

Starting from the crown of the head, pay attention to what direction the hair takes, depending on the hairstyle. When you begin to make the first sketches and organize the layers, remember this in order to create the proper hairstyle shape and choose the right one.
Challenge yourself
Try to draw hair that you would not dare to portray before, and study the different patterns of curls that will look interesting:

Choose the right hair photo
Choose photographs that are clear and have good lighting so that you can easily determine how hair should be colored. If you are new to drawing, choose hair colors that are easier to recreate. Here are the resources used in this guide:
- Hairstyle Pompadour;
- Short haircut;
- Beard
2. What brushes to use
I will use brushes from the Adobe Photoshop Brush Presets list. You can draw a lot of things with the base round brush. Experiment with " Stiffness» hair brush brushes in PhotoshopTo get soft or hard edges for your desired effects:

Brush stiffness - 0% (top) and Brush stiffness - 100% (bottom)
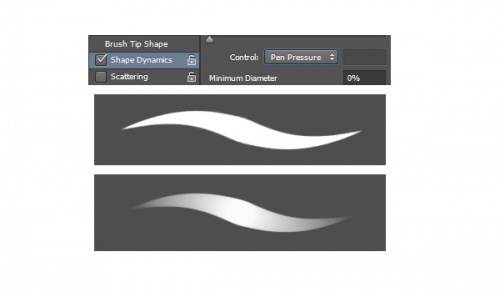
The next brush is a hard round opaque brush with simulated pressure, which can also be found in presets:

Make sure “Opacity” is set to “Press”, which will make the brush even more versatile
And for each brush, turn on the “ Pen pressure" in section " Shape dynamics"So that every touch is smooth and elegant. I often use this function for thin strokes:
Custom hair brushes and patterns
Using custom brushes for photoshop hair You can achieve a realistic effect by drawing a few strands at a time. Select this option if you are an advanced illustrator or want to save time when drawing. You can also use hair patterns to immediately apply them to the portrait you are creating.
3. How to draw realistic short hair: Pompadour
Pompadour is a mixture of various hairstyles. Popular in the 50s in a modern interpretation, this retro haircut includes cut or shaved areas on the sides.
Step 1
Draw a sketch of Pompadour using a smooth brush. I will use this hairstyle as a basis.
Note that the hair is combed back from above, and on the sides they are directed down:

Step 2
Apply a solid brown color for the base. Place this layer under the sketch layer. Set the new layer as " Clipping mask"For the basics, and change its blending mode to" Multiplication". On this new layer, draw shadows using shades of the same brown color:
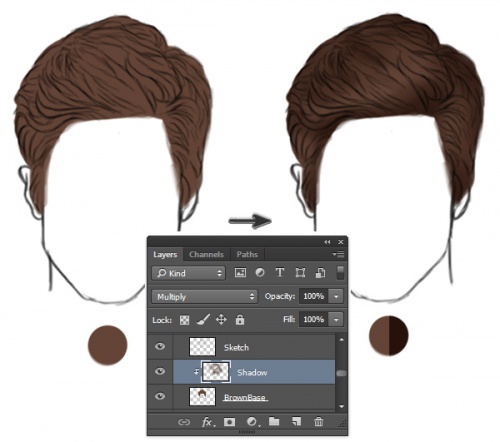
To understand which brush to draw hair in Photoshop, keep in mind that with such a change in the blending mode, the color will automatically darken. The new shade is multiplied by the base.
Step 3
Set some more layers as " Clipping mask"If you need to add more shadows. Then create a new layer and set its blending mode to “ Overlap". Set white as the foreground color to start drawing warm highlights in the places where the light falls. Apply some light areas, while paying attention to the fact that they correspond to the logic of lighting the hair:

Step 4
You can remove the black hard strokes of the sketch by mixing them with the colored parts. To do this, set the sketch mode to “Blend Overlap". Then add a new layer and set it to “ Linear Dodge". Create light areas of the face by sketching the areas around them hair brushes for Photoshop light beige color:

Step 5
Adjust your hair color with the adjustment layer. Go to Layer\u003e New adjustment layer\u003e Color balance and adjust the parameters of the adjustment layer in such a way as to deepen the red, blue and purple shades of the hair:

Step 6
Now that we have adjusted the colors, in the next step, make the fine details clearer. Set hair brushes in Photoshop 100% hardness and draw arcs that will be hair lines:
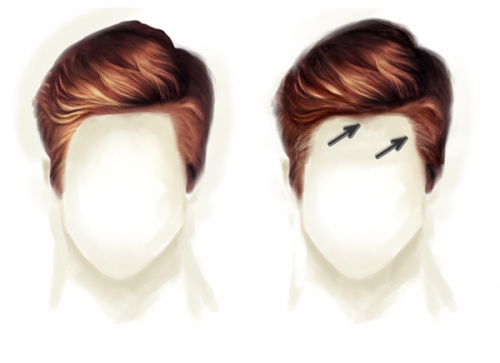
Step 7
Reduce the size of the brush to draw small, thin strands of hair along the edges of the head. Finally, add a beautiful gradient background behind the head. Paint the background part of the hair along the edges of the head, so that the whole head looks more realistic and more harmoniously fit into the scene:
![]()
Here's what a complete Pompadour hairstyle will look like!
4. How to draw realistic short hair: hairstyle with curled curls
Step 1
Use this image to create a foundation. Using the same hair brushes in Photoshop sketch your face and hair. Pay attention to the change in the direction of the hair. The hair in this image is longer, and therefore they curl in different directions:

Step 2
Now apply the base colors. Apply each color on a separate layer. Use them as a clipping mask to create shadows. Set the blending mode again for the shadow layers to “ Multiplication"And use the same colors that you applied the base to draw shadows:

Step 3
Reduce the opacity of the sketch layer to 25%. Create two new layers, for one set the blending mode to " Overlap", And for the second -" Lightening the basics". On the first layer, draw bright blue highlights. And then draw areas of pink highlights on the hair to get an interesting effect:

Step 4
Reduce size photoshop brushes hair strands up to 5 pixels and set the hardness to 100%. Color the strands, observing the direction of each of them. Try not to lose sight of which parts of the strands overlap each other, and do not forget to delete areas that extend beyond the boundaries of the strands:

Step 5
Add a new layer with blending mode " Linear Dodge»To paint more intense highlights. Apply pink areas around the edges of the hair to match the background color. They will add a sense of clarity and shine to the hair. Let the background peep through the hair in some places so that it does not look clumpy:

Step 6
Perform additional processing. Clarify the strands with highlights, and also draw extra strands to make them crisp and seemingly moving. Finish the image by adding a new adjustment layer “ Levels"To adjust the color intensity:
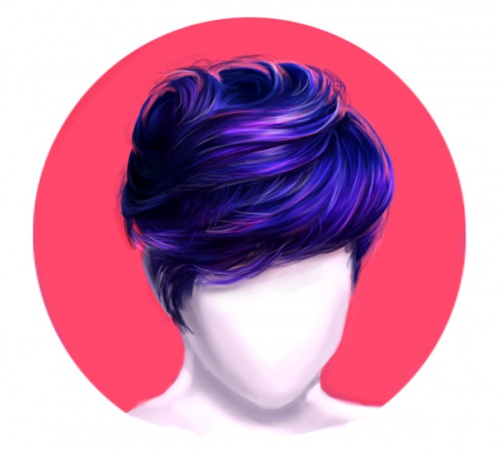
Here is a finished image of a hairstyle with curled curls.
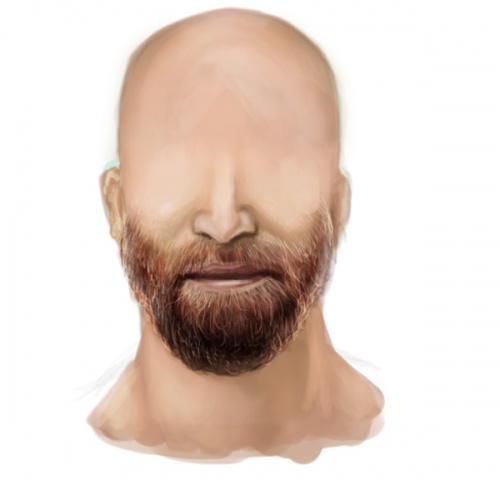
5. How to draw realistic facial hair
Another type of short hair that we cannot forget about is facial hair. Despite the fact that they are not located on the top of the head, they behave in a similar way. Let's get a look, what brush to draw hair in Photoshop.
Step 1
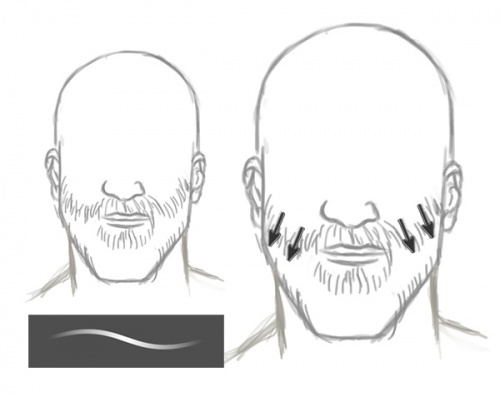
I used this image as an example. Start with a preliminary sketch, paying particular attention to the direction of the hair. In this case, we must remember that the hair is directed down:
Step 2
Adjust the base colors and reduce the “ Opacity»Sketch layer up to 20%. Using a soft round brush, draw a shadow on the new layer and set the blending mode for this layer to “ Multiplication". The color of facial hair depends on the skin tone, so make sure that you harmoniously mix the skin and the adjacent beard and mustache:

Step 3
On the same layer with the blending mode " Multiplication»Draw with photoshop brushes hair strokes of various lengths that will define the structure of the hair. Pay attention to how these strands of hair bend along a curve along the chin and around the neck:
Step 4
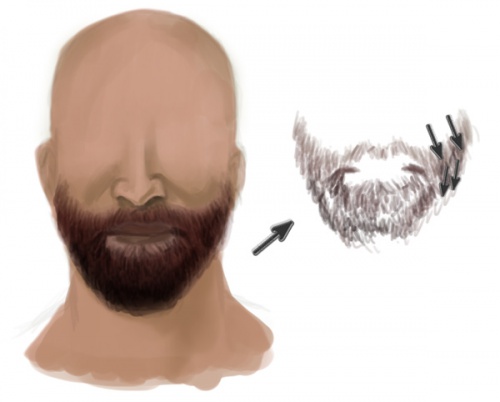
Overlap". Set white as the foreground color and paint some highlights. There should be more light glare in the upper part, where there is more light on the beard. Adjust skin tones to look natural:

Step 5
Add a new layer and set its blending mode to “ Linear Dodge"And draw subtle strokes of shiny hairs. Add bundles of several hairs, and also draw shiny hair at the top where the skin touches the beard and mustache:
Step 6
Keep drawing hair brush in Photoshop on the face and shiny hairs until you are satisfied with the result. Remember to draw bristles around your neck for more realism. Add a beautiful gradient background and enhance the colors with the new adjustment layer " The curves
Related Materials
This is not a full lesson for one simple reason - I am constantly experimenting with hair drawing and do not stop at one technique. However, there are things that I use almost always. I am sure that the technique shown in this lesson is not the best of its kind (maybe it will be even backward \u003d)), but it suits me completely.
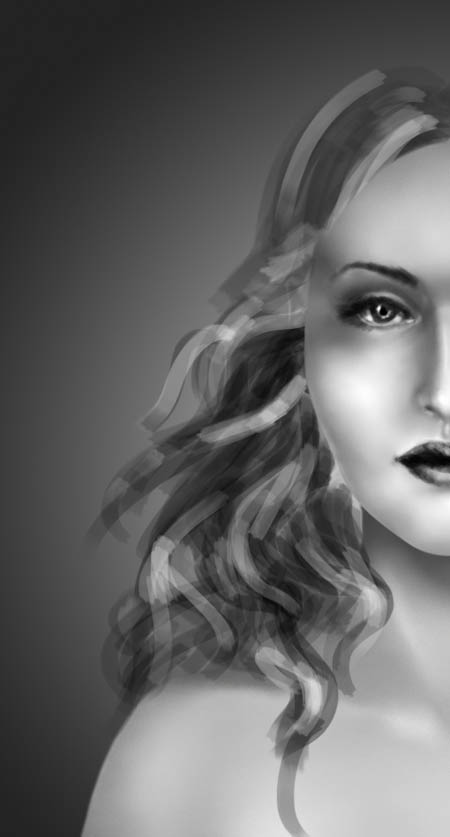
Another thing that I should immediately mention is that I always work in black and white format, and only then work on “coloring”.
During the lesson, brushes that I made myself will be used. I give permission to all users to use these brushes, you can, of course, thank me, but this is not necessary. I trust you and hope that you will not give these brushes as your own and sell them.
So, we have a body blank (a very rough blank, but its mission is to just be there), now we will determine the approximate shape of the hair, adding shadows and highlights. Usually for this purpose I use a hard brush with rough edges, something like chalk. Our “strokes” should turn out smaller than the curls of hair should be, all this in order not to sweat with “sticking out” edges later.

Now I will do the same work with a smaller brush to indicate thinner curls.
Draw the back of the hairstyle behind the layer with the body itself.

After that I use my hair brushes. You can use your favorite brushes or use my brushes. I usually use the setting Pen Pressure).
We start with large brush sizes.
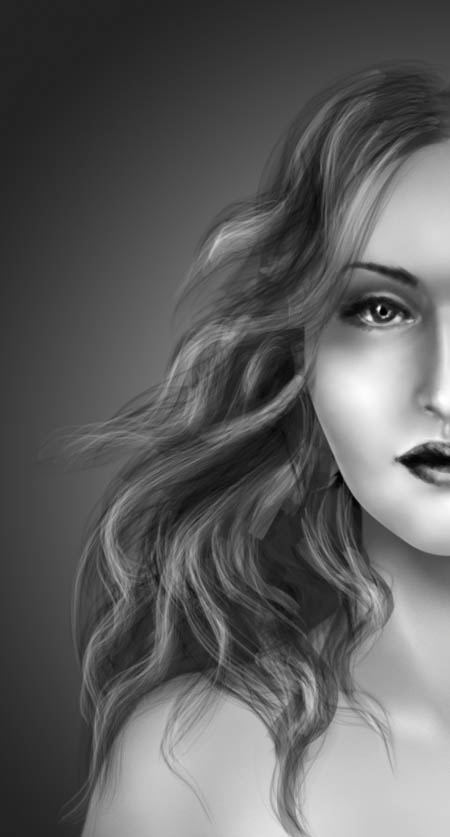
After that, I paint more highlights and shadows using smaller brushes. I like to put shadows under highlights to better draw all the curls. If necessary, remove some unwanted curls - for example, covering your face, as I did.
Now combine all the layers with hair (except for the hair behind the body) in one group ( CTRL +G) and duplicate it. Select all layers in the duplicate group and apply the function to them. Merge (Association).Now a little blur the resulting layer. As long as you can hide the group with the original, it’s good when there is a backup to which you can return if something goes wrong.

And now the real detail begins. I usually work with shadows first, and then add highlights. Even at this point, I change the shape and location of the edges of the curls of hair mainly in random order and stop when I like how it looks. I work with an increasingly smaller brush, then switch to a hard brush, similar to a pen, as small as needed depending on the size of our picture to add some curly hair.
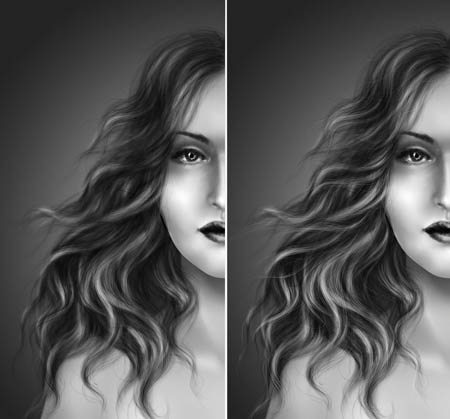
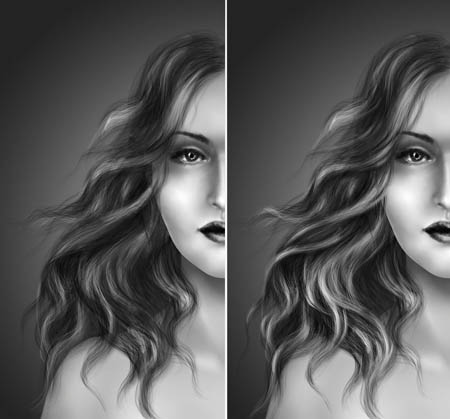
Now click (Ctrl + Shift + Alt + E),selecting only the layers with hair (of course, except for the back ones), and adjust the contrast using Levels (Levels).
Using again Levels (Levels)with mode Screen (Lightening)on a new layer, I add highlights to the work, and also add shadows, again using Levels (Levels).
You obviously already have a question about why I chose such an intricate way. Well, let's go back to the original version with shadows and highlights. When I painted shadows and highlights for the first time, I still did not know what the hair would be, so the contrast was exaggerated, in some places the shadows and highlights appear in inappropriate places. Therefore, we went this way - we muffled everything and modeled the lighting again.

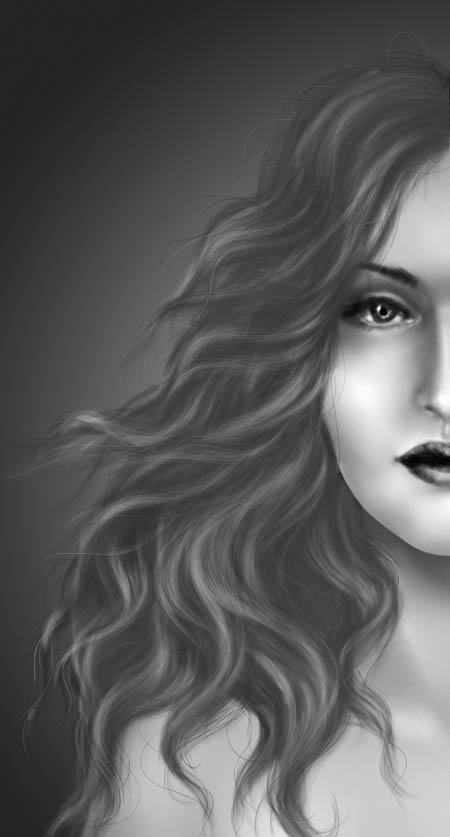
Yes! Half the work done! Now we pass to coloring. To make it easier, I combined all the layers with hair and with Levels (Levels)in one group.
To start, I add GradientColor with primary colors for shadows, highlights and midtones. You can use photos or pictures that you like for this.
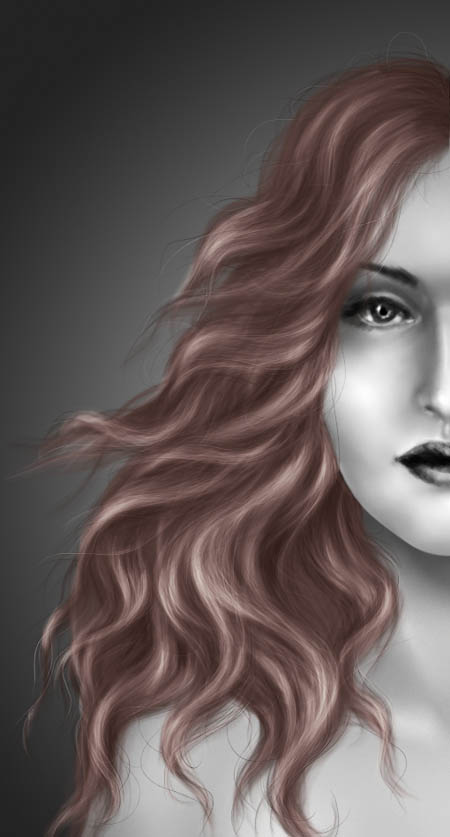
One more GradientMap (Gradient Map) with modeColoradd warm tones, and another one - the third of the same layer - will finally finish our correction. I also inverted the masks of these layers and, again using my “hair” brush, highlighted the places where I want to change the original color.

Next, play with the settings, adding more shades (hair includes almost all shades of colors) on the layer with soft light and on the layer with overlapping. All this is purely experimental, you should see how and what shade affects each setting.
When you are happy with the result, add a layer on top ColorBalance (Color balance)to align the colors.

It's time to add some basic lighting. Add layer Levels (Levels). By the way, do not forget to use ClippingMask (Create a mask). Now invert this mask and paint over the dark areas with a large soft brush.
Now create another layer Levels (Levels) with blending mode SoftLight (Soft light). Again, use a large soft brush, but this time paint over the light areas.

Almost ready. J. Now we need to finish the hair, knocking out of the hairstyle. To do this, I use a small hard brush and PenPressure (Pen Press). I drew hairs mainly in bright areas, very few in dark areas.

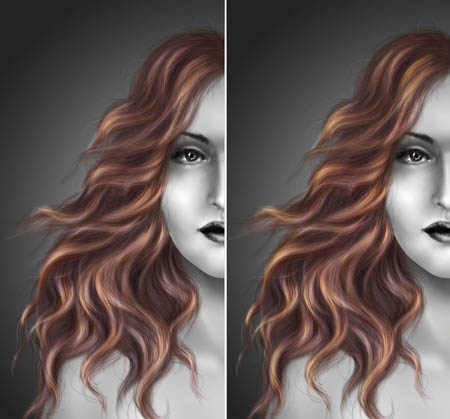
Now make the ends of the hair glow. To do this, use this brush with blending mode ColorDodge (Lightening the base). And again, add more “backlight” to the bright areas and less to the darkened ones. I like it - cute and bright, though not realistic. You can do as you want by changing the value Opacity (Opacity).

And last, add another layer ColorBalance (Color balance)to finally adjust the colors.
Here is another work drawn in the same way.