

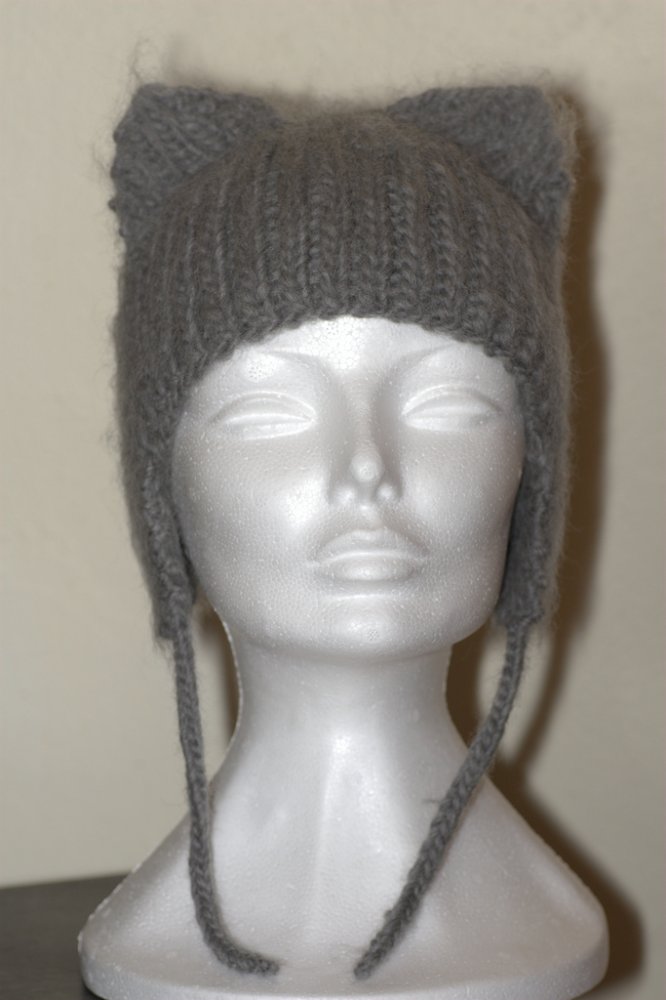
On the Internet, you can find a variety of interesting things that delight children. These are unusual toys or things made by yourself, sandwiches in the form of insects or animals and much more. A hat with cat ears is one of them. An exhaustive description of the process below will help needlewomen knit a creative hat and give pleasure to their child. Rate her look will help the photo
Crochet
In order to crochet a hat, the following materials are required:
- Hooks No. 4,7,8;
- Wool yarn - 100 grams;
- A little white or pink yarn;
- Centimeter.
To make the hat tight, it is knitted with a thread in three additions. For better insulation, the fleece lining is hemmed from the inside. For children - this is a great protection against the cold in winter.
1 row. Crochet number 7 to knit three air loops and make a circle.
2 row. Knit 9 single crochet behind the front wall (three of each loop).
3 row. From each column of the bottom row, knit 2. Total 18.
4 row. Crochet number 8 - 18 columns.
5 row. Add after 3 loops.
6 row. Do not add.
7 row. Add after 4 loops.
Now you need to calculate the diameter of the circle. To do this, measure the head circumference (OG), its length is divided by 3.14 and subtracted 2, if the cap is without insulation, 1 - if with insulation. So, with a head circumference of 51, the following diameter is obtained: 51 / 3.14-1 \u003d 15.2 cm, rounded to 15. The bottom of the cap fits without adding to the desired diameter length.
The knitting continues to the required depth of the product, which is determined by fitting on the child during work (approximately 18-20 cm). The last three rows are crocheted in columns with a single crochet behind the back wall.
The next step in describing the mating is the ears themselves. They consist of two parts: the outer, most and the inner, smaller.
The inner part is crocheted with number 4. It is longer by 2 rows and wider by one addition. Her scheme:
Both parts are tied with single crochet and stitched together. All unnecessary strings are hidden.
The last operation is sewing on the ears. And the hat is ready!

Knitting
For those who do not own a hook, it is possible to knit a similar model with knitting needles. Needleworkers can choose one of the options: simpler and more complex. Each type of hat is suitable not only for a girl, but even for a young woman.
For work, you need needles number 10 - 5 pieces and yarn.
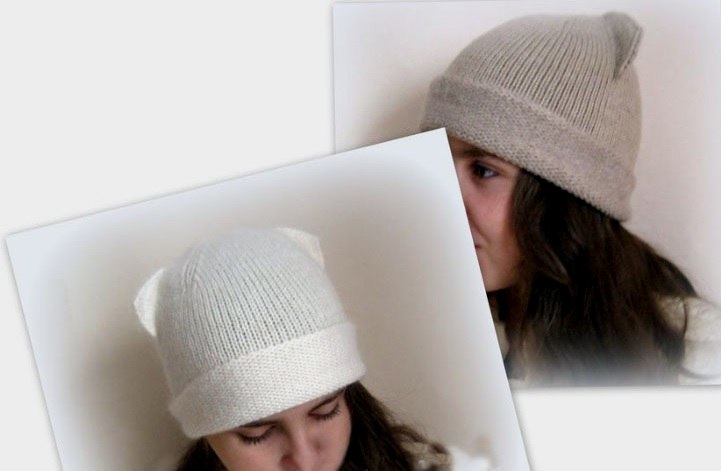
The first version of the product is seamless.
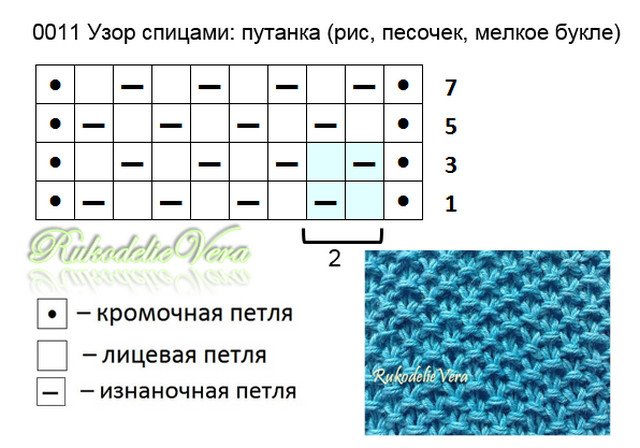
48 loops are typed and 13 rows are knitted with a small boucle pattern - in the even row, the front and back loops are knitted sequentially. Odd rows fit the other way around (diagram in the photo).
The next 10 rows are knitted with facial loops.
In the 24th, 26th, 28th, 30th rows on each spoke, the first two and last two loops are knitted together.
In row 32, knit together every two loops. After 4 remaining loops the thread is threaded, displayed on the wrong side of the work, tightened and fixed.
The next stage is the ears, lower and upper.
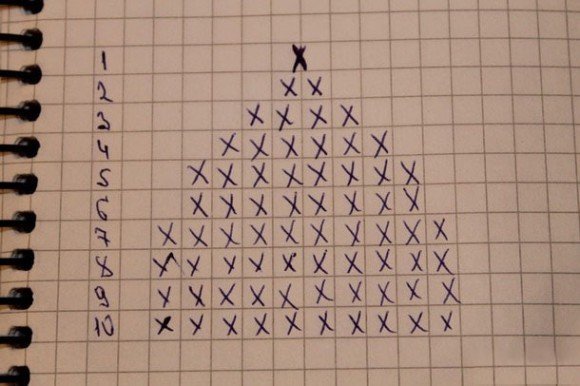
On both sides of the bottom of the cap, symmetrically dial 11 loops. Knit, reducing in each second row a loop at the beginning and end of the row (at the beginning after the edge, at the end - in front of the edge loop). When 5 stitches remain, knit them as one. From the loop, knit a chain of 28 air loops (for those who do not have a hook at all, an educational video is attached to the article).
The upper ears are also crocheted:
1st row: of 2 air loops, 4 single crochet (RLS) are knitted in the first loop.
2nd row: 2 sc in each sc in the lower row. Only 8.
3rd row: without addition.
4th row: add through the column. Total 12
5 row: No addition.
The ears are ready. It remains only to sew.
They can be knitted with needles of any dense double-sided viscous, for example, the same booklet to which the bottom of the cap is connected, a double elastic band, etc.
Second option
For work, use knitting needles No. 10 (2 pieces)
- The hinges close. The resulting fabric is sewn to the side and top.
- From the first to the fourteenth row, one-on-one elastic bands fit.
- 60 loops typed
- From the fifteenth row to the desired height, the front surface is knitted.
- An alternative to the elastic band and the front surface can be another pattern to the taste of the needlewoman.
To form the "ears", you need to fix the corners of the cap with stitches. To give them shape and “durability”, you can put some material inside them (for example, pieces of synthetic winterizer, dense fabric, etc.) An original and cute hat with cat ears!
Video materials on the topic of the article
Crocheted chain of air loops.
Crochet Hats Video:
Video guide to knitting caps with cat ears knitting.
Inspiration and success to you, mistresses!
In my opinion, all people are divided into two categories - those who go to any hats and those who go to any points. Unfortunately, I belong to the second. Not a single hat painted me. They didn’t spoil - except that the boring male type is black, tight-fitting head.
Here is a hat with cat ears - even I would definitely go). Sorry, I can not knit. Knitting explanation for more sleeved:
There are two ways - “real” and for ... such as me, say;). 1. Such as that of Lindsay Lohan, knit in a circle, with knitting needles, for example, No. 10, 5 pieces are required.
We collect 45 loops and knit 13 rows, alternating the back and front loops, and on the next row, vice versa, make the front over the back and the back over the front. Thus, the gum fits. And then - 10 next to the front looking, the simplest. Starting from the 24th row, we decrease in each 2nd row (i.e., through the row) at the beginning and at the end of each knitting needle one loop (i.e., we knit two front loops together) 4 times. It turns out that on each spoke you will have 2 loops reduced and, accordingly, 8 loops in each row. In the last row, we knit every two loops together, and tighten the remaining loops.
The most interesting is how the ears are made.
They are made in two stages: Lower ears: We count 11 hinges in the middle of the bottom of the cap, collect 11 loops on one side and knit it down, reduce it through a row along the edges before and after the edge. When 5 loops remain on the spoke, we knit them with one loop. Next, take a hook and knit a chain of 28 cm air loops. We also knit an eye on the other side. Upper ears. 1st row: 2 air loops, we knit 4 SC in the first chain. 2 row: 2 senior in each senior bc of the previous row \u003d 8 st.b.n. 3rd row: we knit in a circle without increases \u003d 8 st.bn. 4th row: increases through one st.bn. \u003d 12 st.b.n 5th row: we knit without increase \u003d 12 st.b.n. We sew the upper ears. Done!
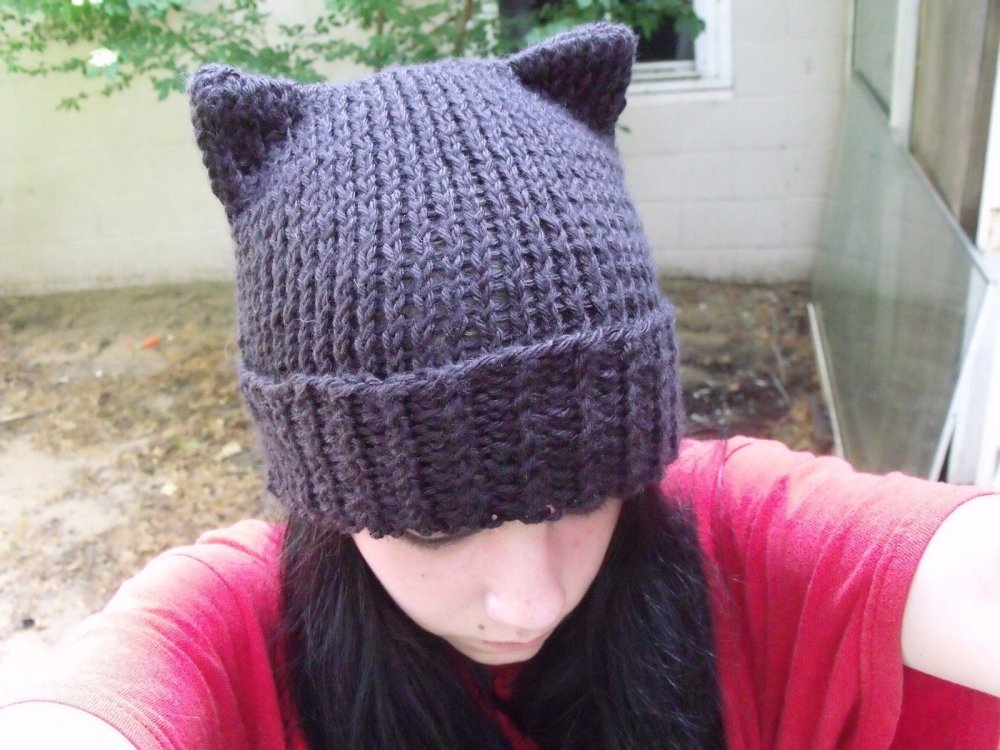
2. Now it’s easier and in steps - a master class in knitting hats with cat ears with an elastic band (here is the original, but in English).
The difference from the first method is that there will be seams and there will be no lower ears covering your own.
Again, 10 knitting needles, gain 60 loops and knit with elastic with 14 rows.
Then 40 rows of stitch.
Sew the side and top sides
We put on the resulting square piece and, as my daughter says, a big lover of plasticine - “pinch” the “ears” in the corners, immediately fix them with stitches.
Inside, for the form, you can put something - a piece of shoulder pads, synthetic winterizer ... in the comments, the girl shared her option - she put the wheels from the toy car;).
By the same principle, it can be simply sewn on an overlock or hands - from a fleece or an old sweater.
Winter should be cold). Both caps fit in a maximum of 2 days, we insulate;)?
It is widely believed that women and cats are very similar to each other. And if something in this statement is controversial, then certainly the beauty and grace of both women are not disputed. Knitted hat with cat ears and knitting patterns and a master class which are presented in this article will add playfulness and lightness to the image of her mistress. And having tied this headdress with your own hands, you are guaranteed to get a unique thing for your wardrobe.
We will need:
- yarn of your choice - b / w or half-wool (200m per 100g) - 100g;
- knitting needles No. 3 - circular or a set of socks of your choice;
- needle with a wide eye.
Patterns:
- elastic band: 1l.kh1i .;
- pattern - see diagram. It shows 1⁄2 caps + ear. The purl rows not shown in c. Are knitted according to the apparent pattern.

Description
We begin to knit a cat hat with a set of knitting 96p. Around you need to tie 4p. gum. From the 5th p. start knitting the pattern according to the pattern. The rapport we have to knit twice in a row.
At 23r. add 2p., knitting them purl. We get in the 25th r. on 7p. between the side braids.
We continue according to the scheme. Having tied the desired height, close the item. Stitch the upper seam. In the upper outer corners of the cap we sew the ears. The hat is ready! 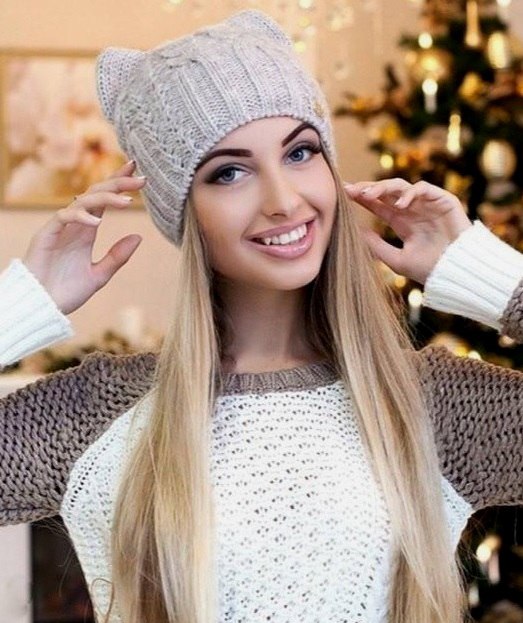
Hat with ears: MK video
Knitting cats, a detailed master class
 This model is very concise in the chosen pattern, but it is original in the technique of knitting ears. This method is not very difficult, work on microns with photos and you will succeed!
Head circumference: 50-52cm.
We will need:
- yarn of medium thickness - about 100g;
- knitting needles, circular or set of toe;
- hook;
- needle with a big eye;
- markers (M).
Pattern:
- front surface: when knitting round all loops in all p. - facial.
Density: 18p. at 30 p. equal 10cm to 10cm.
Description and master class
We start knitting with a set of needles 88p. Round knit 57r. In the last r. after every 22p. put M, denoting the four descent lines on the top of the cap.
58 p.: Microns for each sector (\u003d 22p. On one spoke) the same. The first 2p. tightly knit in 1p. for the upper slices. Then - facial p. To the extreme 3 p. For them, the algorithm is: 1p. remove, 1l. for the upper lobule, left joint. pick up the first shot p. and transplant it through the knitted.
Tighten the loop. Finish knitting at each joint. 1l This extreme eyelet will be a beautiful border between the decrease on the wedges.
In the next odd 59p. we do not decrease. Further, the scheme repeats: in even p. decrease by 1p. on the boundaries of wedges (i.e., 2p.x4 wedges \u003d 8p. in a row), in odd p. we do not reduce anything.
So we work up to 3 p.

Cut the thread, leaving the tail. We pass it through the remaining 12p., Tighten and, withdrawing to the out. side, we fix.
Ears
We count 10p from the top of the crown. down and set M, denoting the beginning of the ear. We raise 10p along the vertical row - you can do this with knitting needles or crochet, as you are more comfortable with. Then in the same vertical row we raise another 10p. - already in the second joint venture.
It is better to knit the ears with needles 0.5 mm thinner than the canvas of the cap. 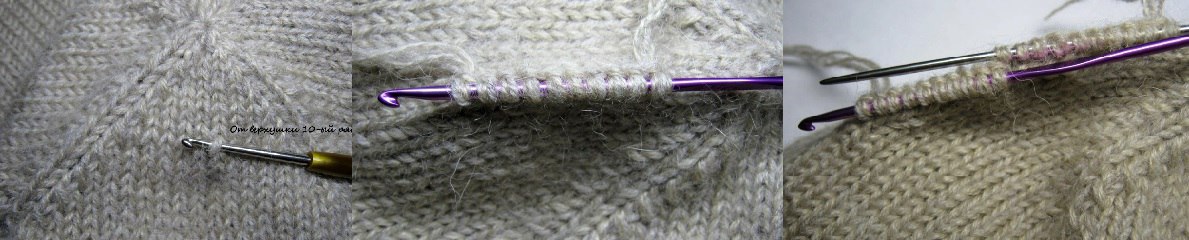 We turn the canvas to 1800 and from the loops of the same vertical row, only now for the second segments, we raise 20p.: 10p. for each sp.
  The photo shows - we got only 40p., 10p. on each of 4 spokes. We knit the first row of ears around the front for the upper segments.
2nd p. and all subsequent we will knit with decreases. 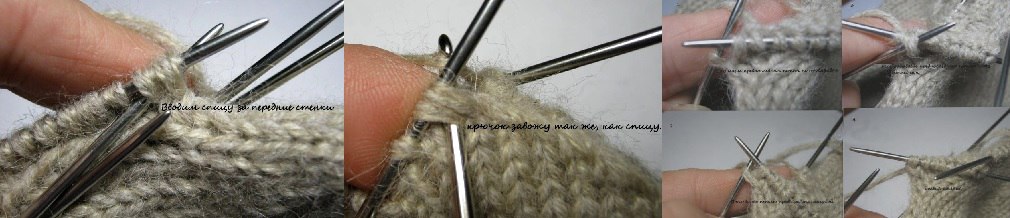 The first 2p. knit in 1l. for the upper walls. Do not allow loosening of the thread at work, it is better to tighten it harder - otherwise the ears will look messy. You can do this by crocheting, transferring the resulting item to the joint venture.
Then we knit facial, including and loops on the second joint. to the extreme 2 p. With them we do this: 1p. remove to the right sp., 1l. for the upper lobule, we throw the removed item onto the knitted one.
We continue the algorithm for microns, filling out the bevels on the ears with decreases (beginning of the 1st and 3rd, end of the 2nd and 4th sp.). When there is 3p. at each spa., remove the excess. Now it is quite enough 1 working joint venture. and 2 knitting needles for eyelets.
We must associate with a decrease to 2p. on the spoke. Cut the thread, tighten the remaining loops. It is more convenient to do this crochet.  The main part for the hat with cat ears is ready!
The second ear is performed by repeating the previous mic.  Now our hat is almost ready.
 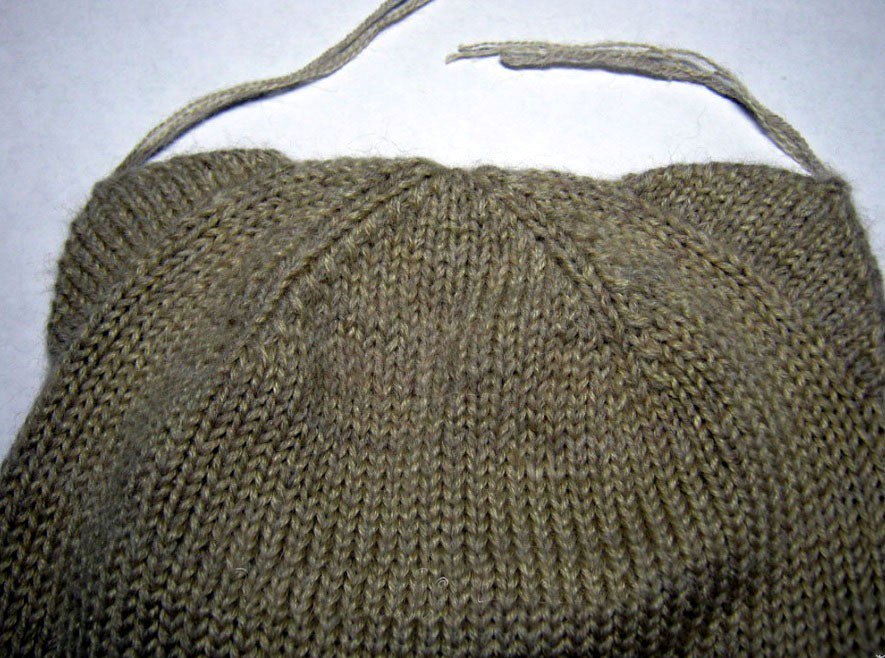 It remains to hide the ponytails of the thread.