and you start to draw flowers on paper with a pencil. You could draw something serious. But how? Who knows? And there is a lot of time, and the material is at hand, but there is no necessary knowledge. Why not learn to paint a portrait?
The most common technique
How to draw a portrait? Artists from different eras practiced the techniques of depicting a human face, and some achieved unprecedented mastery. Our task is to find out the basic principles in order to learn how to draw a portrait with a pencil. This is not to say that it is so difficult. But, if you don’t know the basics, you won’t succeed anyway.
Getting started
Technological progress has affected even art. Today, many artists use not ordinary pencils, but mechanical ones. This provides greater accuracy. Such pencils do not need to be sharpened. Finishing small parts takes less time. With their help it is easier to draw a portrait in stages. So, if you have the opportunity, use such a pencil.
Draw from photos

Usually portraits are drawn from photographs. This method is more convenient. You do not have to ask the sitter not to move and sit still for hours. So, we begin to study photography. We are interested in the position of the head in comparison with the horizontal and vertical line. Even a novice artist is recommended to have knowledge of the structure of the human skull. It will be useful to refer to any anatomical atlas. According to the shape of the head of the person you are drawing, we draw weak lines on a sheet of paper, depicting the silhouette of the hair, the circumference of the face. We draw additional lines in the area of \u200b\u200bthe eyes and eyebrows, nose and mouth.
When the image of the common lines is finished, we begin to parse the area of \u200b\u200bthe face. Determine the height of the nose per plane. You can even hatch to comprehend the bulk of this part of the face. If a person is drawn in a half-turn, then it is necessary to designate the area of \u200b\u200bthe near cheekbone, the plane of the lips and eyes, do not forget about the eyebrows. This stage is not drawing smooth lines, but dividing the human face into precise geometric shapes. It’s easier to understand how to draw a portrait. We turn to detailing the face.
Professional artists often use "nag" - a type of eraser. If you erase the lines with them, then there are no visible traces on the paper. Did you manage to get the "nag"? We recommend using it in drawing. So, we draw it along the surface of the sheet to remove the top layer of the painted. Thus, we remove the auxiliary lines completely, and make the main strokes almost invisible. Now we draw all the elements of the face, round off where necessary, and give the drawing a resemblance to a photo. It is known that many artists measure the size of parts of the face, their ratio, in order to achieve maximum identity with nature.
It's time for hatching. Before proceeding with it, you should make sure that all structures are completed and additional lines are wiped. Because if you start laying tones, you will not be able to remove neatly unnecessary strokes. As you can see, during the lesson on the topic “How to learn to draw portraits with a pencil?” We learned many different nuances. In principle, there are no general hatching rules. Each artist has his own way. It all depends on the way you hold the pencil. But it’s best to start hatching those places where the shadow is the darkest of all. They will be used as landmarks. They will help to avoid severe darkening of the skin, clothing or eyes.
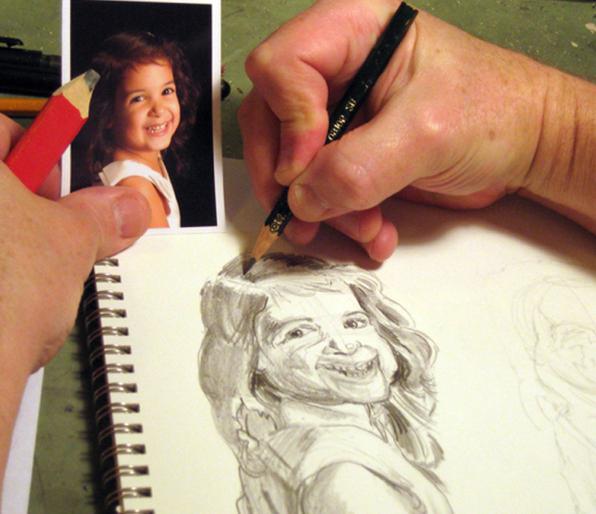
We proceed to the implementation of halftones. What is it? We give tone to the face, hair and parts of clothing. It would be nice to make the clothes black. Then she would perfectly set off her face and emphasize it. Apply the hatch so carefully so as not to smear anything. After finishing work, our portrait is already 90% ready. The only problem is that it does not look voluminous. To fix this, we move on to the most pleasant stage of work - lightening. Like this? We will highlight some parts of the face. In this "nag" will help us again. This will give the picture liveliness and naturalness. It remains only to darken the depths. Then you can clean it. We darken folds, small wrinkles, some locks of hair. Our drawing becomes voluminous. So we figured out how to draw a portrait.
The easiest way
Not all of us have an artist’s innate talent. It’s hard for most people to learn lessons on the topic “How to draw a portrait with a pencil?” A clear sequence of actions is needed here. This is exactly what we will define now. So now we are drawing a portrait for beginners. Firstly, we make the contour of the depicted face. It is important not to click on the pencil, because not everyone gets it the first time, and it will be difficult to erase the wrong bold lines. Try to draw only an oval of the face. When it is ready, draw additional horizontal lines for the eyes, nose and mouth. They should be light and little noticeable. Also do not forget about the ears.
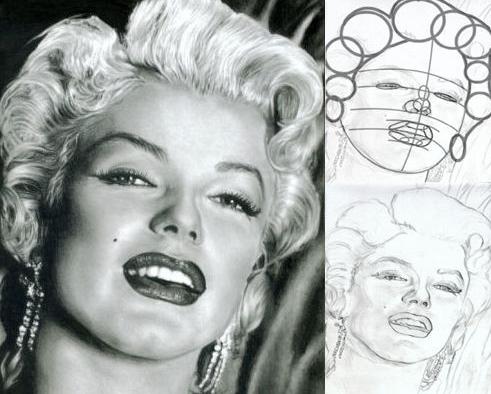
The main part of the face is the eyes, it is on them that you need to focus and draw as believable as possible. Pay extra attention to the image of the pupils, the line of the mouth and the initial contours of the hair. Then we begin to carefully draw each element. When everything is ready, remove additional lines and add shadows to give the picture volume. So your first drawing is ready. Maybe not a masterpiece. But the main thing is that it is performed independently.
Main mistakes
To paint a perfect portrait on the first try is unrealistic. No matter how accurately you follow the prescribed tips, something will still go wrong. How to avoid the most common mistakes while learning how to draw a portrait? First, check your pencil. It should not be too hard. Otherwise, you will not be able to apply hatching and midtones. The lines will turn out too light. Secondly, never draw portraits from photographs to documents. It is difficult to portray a human face turned strictly in full face even to a skilled artist. Moreover, people always look unnatural on documents, and drawing a good portrait from such photos will fail.
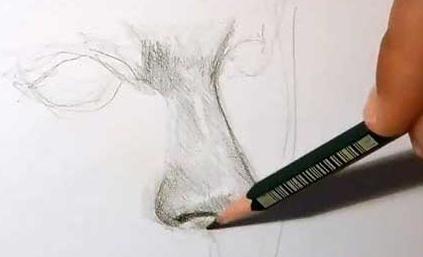
For many, difficulties arise in conveying the correct proportions of facial features and symmetry. When applying hatching, do not be afraid of black. It is vital, as it sets off lighter areas and reflects a natural shadow. Do not neglect the volume of the picture. The reason is simple. All natural has volume. In addition, it must be remembered that in nature there are no objects that have a clear outline. Use lines with different keys. Do not work with cheap paper. Its surface is too smooth. It repels the stylus, the lines are too thin and light.
Types of portraits
We are used to thinking that a portrait is an image of a human face. Is it so? In nature exist different types portraits, namely: head, chest, waist, generation and full height. Each of them has its own nuances. But before you learn how to draw portraits, you must definitely study human anatomy. Otherwise, you cannot correctly convey all the proportions of the body. And who needs a distorted picture?
Work on order
By learning how to draw portraits with a pencil in stages, you can make good money on it. Recently, many want to have their own image, made in the classical style or in the form of a cartoon. Family portraits are also very popular, so the knowledge and time spent will not be wasted.
Conclusion
After completing this lesson, you can make your dream come true. But after practicing the lesson on the topic “How to Learn to Draw Portraits”, don’t stop there. The acquired skills can be increased. They will help in portraying common portraits of a whole group of people. And not only! You can start drawing a self portrait. ![]() Photography is, of course, good. But drawing is of great value. It is as if the soul of a person appears on it. Such a gift, especially someone close, will definitely like it.
Photography is, of course, good. But drawing is of great value. It is as if the soul of a person appears on it. Such a gift, especially someone close, will definitely like it.
To draw a portrait of a person with a pencil, it is not necessary for beginning artists to complete courses, become students of an art academy or take private drawing lessons. It’s easy to draw a person’s face, the main thing is not to be lazy and develop your skills.
The main thing in the article
Do-it-yourself pencil portrait of a man: what is needed?
To draw a portrait of a person you will need:
- simple pencils;
- a4 white paper sheet;
- eraser;
- stationery knife;
- scotch.
Learning to draw portraits of people with a pencil: where to start?
There should not be any excess objects on the working surface. Take a sheet of white paper, lay it vertically or horizontally in front of you and fasten along the edges with tape. Remember that you cannot tilt the sheet while drawing. You only work with your hand.
Use a pencil from Koh-i-noor medium soft HB or soft B.
Improperly sharpened pencil affects the quality of the picture. Do not sharpen pencils with a sharpener, but use a clerical knife. This method of sharpening a pencil allows you to bare the core as much as possible, to make it sharp. Correctly sharpening a simple pencil, you will be less distracted from the process and draw longer.
For training, use a regular sheet of A4 paper. In the future, if you like to draw, buy professional paper for drawing, for example, paper for drawing, kraft paper.

How to learn to draw a portrait of a man with a pencil?
To get started, take a photo of the person whose face you want to draw. Take a close look at it. A person’s face on a sheet of paper consists of geometric shapes that change shape during the process of drawing. Remember that people's faces are disproportionate. Therefore, during a detailed drawing of parts of the face, this must be taken into account.
To learn how to draw a portrait of a man with a pencil, you need to make sketches on paper.
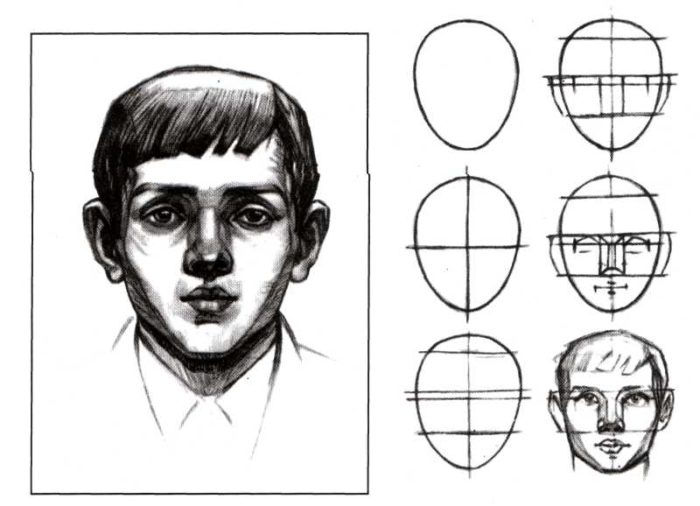
How to draw a portrait of a man with a pencil for beginners in stages
The process of drawing a person’s face with a pencil can be divided into the following steps:
- drawing the general contour of the face;
- marking the main parts of the face inside the oval;
- eye drawing;
- drawing eyebrows, drawing the nose and mouth;
- detailed drawing: wrinkles, shadows, moles, hair, etc.
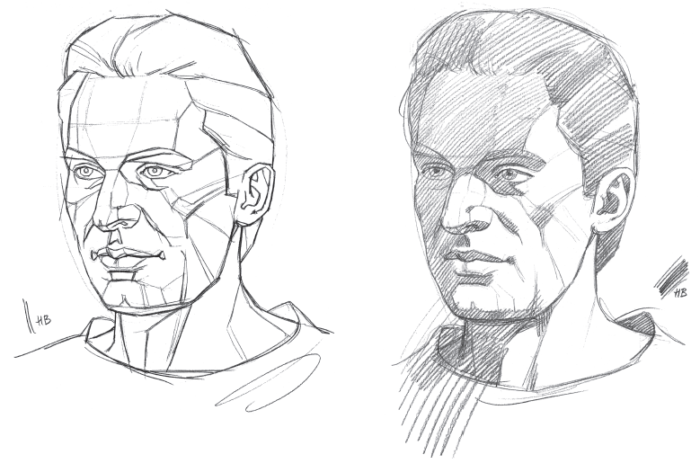
Getting started: building a head and a facial outline
To correctly draw the general contour of the face, you need to know a little the human anatomy. First, draw an oval, which will be lower at the bottom than at the top. Next, change the shape individually.
Marking parts of the face and working with planes
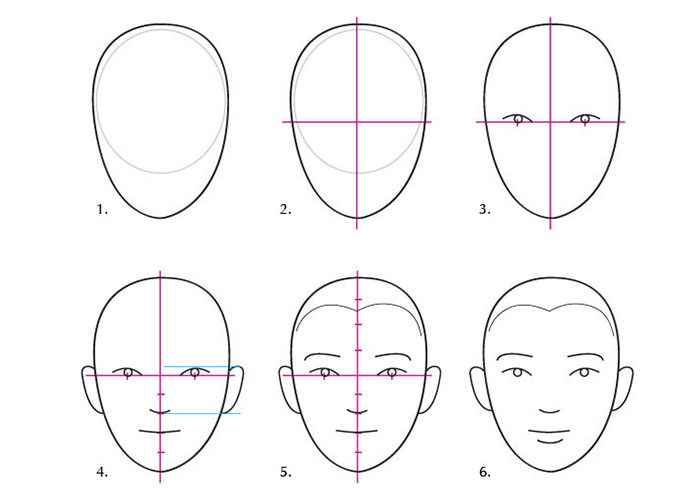
Full face
- The skull and jaw are a flattened sphere, speaking roughly, the face in this position resembles a chicken egg, turned upside down. Draw such an oval and draw two perpendicular lines through its middle.
- The horizontal line is the line of the eyes. Divide its right and left parts in half. This will be the middle of the eyes (pupils).
- Divide the lower part of the vertical line into 5 equal segments. The tip of the nose will be located at the 2nd mark on the top, and the mouth - between the 2nd and 5th mark.
- Divide the upper part of the vertical line into 4 equal segments. Hair should be in 2 pieces on top. The bottom of the ears should be at the tip of the nose, and the top at the level of the eyelids.
Artists use small tips for portraits:
- the width of the face consists of 5 segments equal to the width of the eyes;
- the distance between the eyes is approximately equal to the width of one eye;
- the width of the chin is equal to the length of the eye.
These standards are adjusted individually.
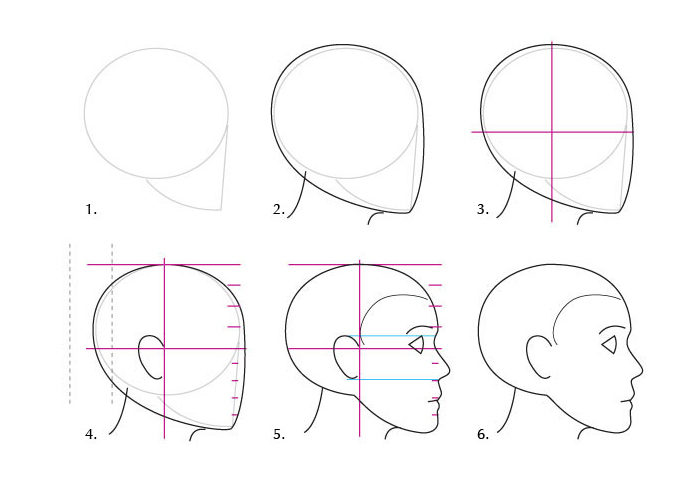
 Profile
- The profile in shape also resembles an egg, but its sharp part is shifted to a corner.
- Divide the drawn figure with two perpendicular lines.
- The ear is located behind the vertical line. The depth of the skull is drawn individually.
- The correct location of the nose, eyes, eyebrows has already been disassembled in the sub-item "Full face".
Detailing the face: drawing the eyes, the contours of the eyebrows, nose, lips, ears
Eyes
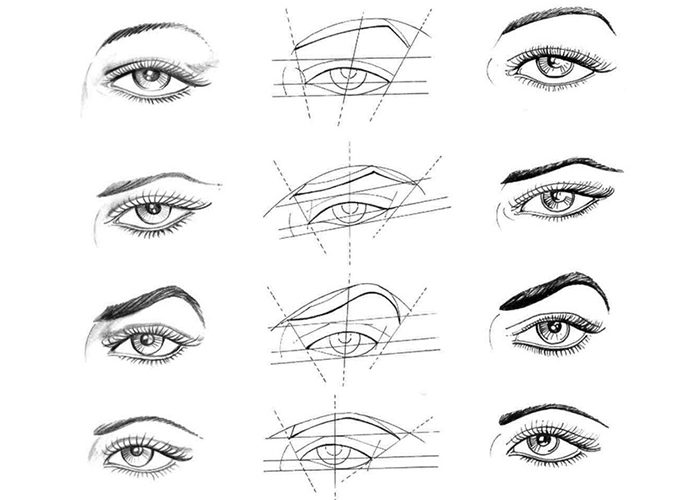
Since the shape of the eyes of each person is different, it is impossible to accurately describe this process. The middle of the eye is already marked. Now draw two arcs to the right and left, which you will later “turn” into eyes.
The main points that you need to pay attention to when drawing eyes:
- the outer part of the eye is always slightly higher than the inner part;
- the arches of the eyes are rounded closer to the inside of the eye and narrowed to the outside;
- if a person looks directly, then the iris of his eyes is always slightly covered by the upper eyelid;
- eyelashes always begin to draw from the eyelid;
- lower eyelashes always shorter than upper;
- do not forget that the lacrimal ducts, lower and upper eyelids should be traced in the eye.
Very often, beginners, having drawn one eye, stop looking at the photo and copy the second eye from their drawing. Do not forget that people's faces are not proportional. The second eye is a couple of millimeters wider / narrower, higher / lower. The eyelid above the right eye may be lower than above the left. All these little things must be carefully copied from the photograph.
If you draw your face in profile, then the eye here will resemble the shape of an arrowhead with convex and concave sides. The iris is poorly visible from the side, but, drawing a portrait, you need to draw it so that the eye does not look strange.
 Eyebrows
The widest part of the eyebrow is often closer to the bridge of the nose. Do not start drawing hairs right away. Designate the shape of the eyebrows. If you draw your face in profile, then their shape will resemble a comma.
 Nose
Nose
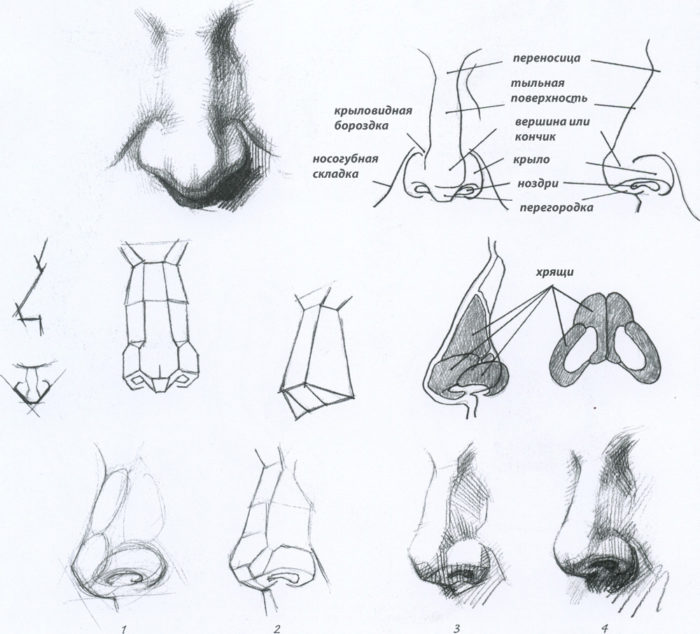
The easiest way to draw a nose is illustrated in the picture. Draw a circle, then draw wings and “backs” to it. At the very end, it remains to trace the nostrils with a pencil.
There is a more complex but realistic way to paint this part of the face. As shown in the picture, draw a polyhedron. The shape of the polyhedron varies depending on the position of the face. Next, start rounding the geometric shape.
 Lips
Lips
Start to draw lips from the inner line, from the point of contact of the lower and upper lips. This line will never be perfectly straight; it always consists of several curved lines.
The inner line of the mouth is always darker in the figure than the outer contours of the lips, and the upper lip is often smaller than the lower.
If you draw your face in profile, then never bring the tip of your lips sharply up. Draw the middle line of the lips first straight or down, and then lift it up.
 The ears
The human ear can be represented in the form of the letter C. Do not forget that the ear has a rim and an inner part that resembles an arc, and a lobe. Be sure to draw these basic parts of the ear.
![]()
Hatching and halftone design
It seems that you are already at the finish, but the portrait is absolutely unrealistic. Hatching and elaboration of halftones is something that you cannot do without when drawing a portrait of a person.
First of all, determine where the light falls on the face and where the darkest places are. Apply strokes on the face in one direction - from top to bottom. To make the skin dull, blend the lines with your finger or a regular napkin. In order to lighten areas on the portrait, use the eraser.
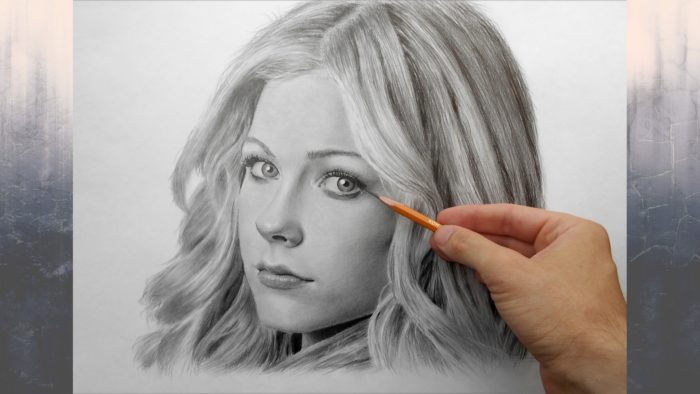
Highlight and darken areas of the face
Highlighting and darkening of areas of the face is necessary so that the face on a sheet of paper looks voluminous, and not flat:
- If you need to lighten an already shaded area, then use the eraser.
- Start sketching areas of your face with lean lines. Do not press hard on the pencil.
- Layering lines in layers. The more lines, the darker the face area will be.

How to draw portraits of people with a pencil in different angles: full face, profile, head rotation
We figured out how to draw a full face and profile of a person.
- If you draw a person from the back, then not all parts of his face may be visible to you.
- With the face turned almost in profile, the middle line of the lips is very small, the line of the neck merges with the line of the chin. A part of the cheek is also visible, behind which the human nostril is shown.
- When a person has his back turned towards you, you can clearly see the eyebrow line, cheekbone, neck line that tends to the ear (if this part is not covered by hair).
- With a larger rotation of a person’s face, you see eyelashes, a small part of the eyebrow, a protrusion of the lower eyelid and the tip of the nose.

How to draw a portrait of a person with a pencil: the basics and secrets of mastery
- The focus should be on the eyes of a person.
- Try to draw not only the head, but also the shoulders, decoration on the neck, collar, etc.
- Never start drawing small details without the right outlines.
- Outlining the contours, do not press hard on the pencil, draw with barely noticeable lines.
- Pay particular attention to the proportions of the person’s head.
How to draw a portrait of a man with a pencil: video tutorials
The person whose portrait you decided to draw will certainly appreciate your efforts. You can make such a gift to yourself. If you are afraid of the amount of work ahead, practice drawing individual parts of the face. In the future it will be easier for you to draw a portrait of a person with a pencil.
Today's lesson is devoted to this type of drawing as a portrait. A portrait is an image of a person, or a group of people, existing (or existed) in reality. The main task of the portrait is to repeat the lines of a living face with artistic interpretation. I took for example a photo of a wonderful American singer, actress Debbie Ryan. Here is her photo: I’ll say right away that the portrait is one of the most difficult types of drawing, since we have to convey all the features of a person. If you won’t succeed the first time, don’t be upset, people learn from mistakes \u003d). So let's try step by step to draw a portrait of this girl with a pencil.
STEP 1. Start drawing with a circle that describes the face. Apply light strokes on it where the eyes and nose will be located.  STEP 2. Now with light strokes we outline the contours of the real shape of the head. Please note that it has a slightly square shape. Add a bang, tilted to the right side like y.
 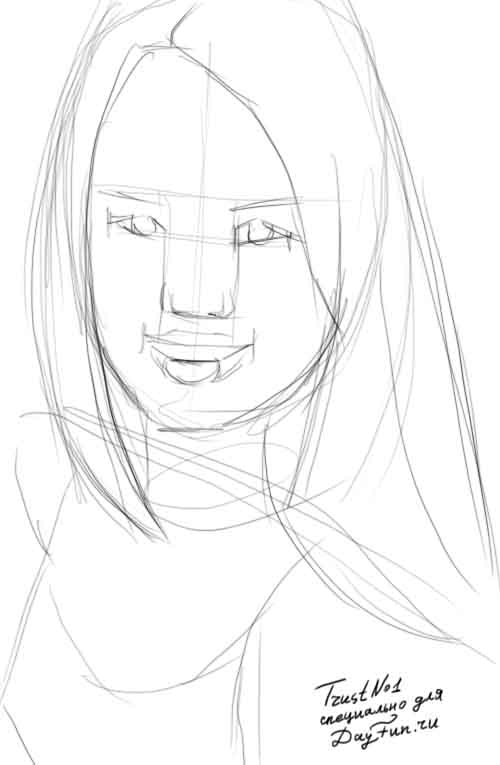 STEP 3. Go to the outline of the face elements. Sketched thin eyebrows, upper eyelids, as well as eyelashes. Then proceed to drawing the nose. The nose is a very important part of the portrait, which beginners sometimes do not pay attention to. This element can radically change the entire portrait as a whole. In the following lessons we will consider in more detail.
 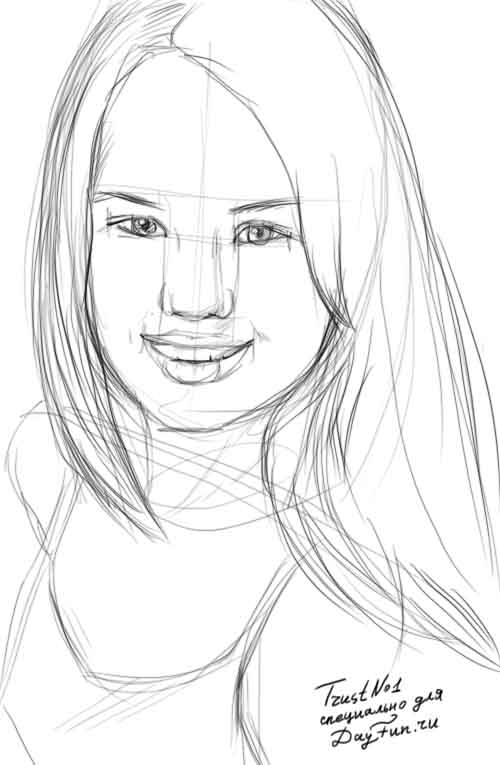 We step further. 4. We are left to finish the outline of the eyes. Here you need to carefully outline the eyeballs. Add also the cilia and upper, lower eyelids. STEP 5. You are almost there. Now we have to draw a mouth. Look carefully at her lips. (Do you want to learn how to draw lips correctly? Then read the lesson: How to draw a smile) We draw folds on the skin to show her emotions, smile. Lips slightly raised. The edges can be slightly shaded with a pencil. STEP 6. The last thing we need to do is a hairstyle. She has long straight hair, a little wavy. Try to draw with smooth lines, and you can also add some thicker lines to create the effect of voluminous hair. After all that has been done, we erase the auxiliary lines with the eraser and specify the edges. We should get this picture:
  I hope you have succeeded. Ask lesson questions. Show off your masterpieces! Leave your comments below, write what pencil drawing lessons you still want to see. I advise you to go through such lessons:
- (on the example of Johnny Depp);
Simple recommendations will help you draw a portrait of a girl. You can give a picture or make a house on the wall and admire the mysterious stranger.
Face sketch
Before you draw a portrait of a girl, create the contours of the face. It is ovoid in shape, slightly pointed to the chin. Note that near the temples the oval will be slightly concave.
To get symmetrical and correct, it is necessary to divide into sectors. Draw a vertical line that will divide the face in half. Do not press hard on a simple pencil when you draw this and subsequent auxiliary lines.
Next, you need to draw 2 horizontal segments - from the right to the left side of the face. They should divide the oval into three parts. The face of each girl is purely individual, so the distance between these two stripes can be different. If the young lady slightly lower the top line. If the distance between the chin and the tip of the nose is significant, then slightly raise the lower transverse line up.
These two horizontal lines divided the face into 3 sectors. The forehead and eyes will be located in the upper one, the nose on the average, and the mouth and chin in the lower one. Here are the girls, starting with the diagram.
Eyes - a mirror of the soul

Now you can start the image of the eyes. They should be symmetrical about the vertical axis. Position them so that the lower eyelids are on the upper transverse segment. The distance between the two eyes should be such that between them fits another. Imagine it there and proceed to portray an important part of the face.
Each eye consists of three semicircular lines. The lower eyelid is one, and the upper one is two. In the middle between the eyelids there are round pupils, draw a small circle inside them - this is the lens of the eye. Now imagine that he is the sun. From the lens to the pupil, draw rays in a circle, placing them close to each other. If you are thinking about how to draw a portrait of a girl to make it the most realistic, do not forget about this technique. Then the eyes will look like real ones.
Make their outer corner a little slanted, and the inner one narrow, so that this part of the face turns out beautiful. This will help achieve and long fluffy eyelashes. You will create them using dashed pencil lines. Eyebrows repeat the shape of the upper eyelid, portray them like that - and it's time to proceed to other facial features.
We draw a portrait of a girl in stages with a pencil - nose and lips
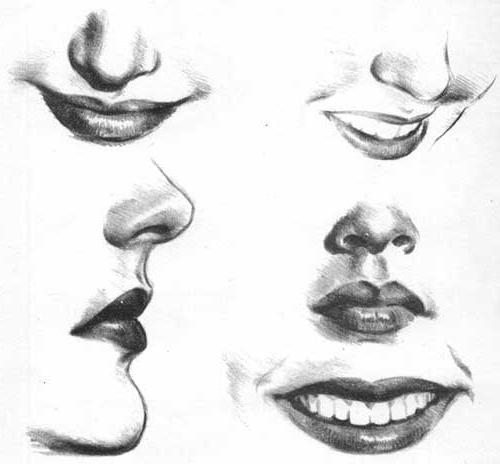
Focusing on a vertical line, depict a nose. It is located between two horizontal segments. Draw two large lines down from the inner corners of the eyes. They end on the lower horizontal line. This sketch will help to create the nose of the correct shape. At its tip, depict two nostrils. Now you can wash these two small lines so that the nose does not turn out too wide. It is enough if only the nostrils are visible.
The mouth is also symmetrical with respect to the vertical line; it is located in the middle of the lower (third) sector. Draw two barely noticeable lines from the middle of the pupils to this place. They will help to identify the corners of the mouth. Draw a small horizontal line from the right to the left corner. She divides her lips into lower and upper. The lower semicircular, the upper one also begins with a curved line, but in the middle it makes two small symmetrical bends so that the lips are a bow.
Portrait Framing
At this stage, you need to erase the auxiliary lines and depict the main ones a little more clearly. When drawing a face contour, stop between the second and third transverse lines. On both sides, make the oval of the face in this place a little concave inward so that the cheeks are not too round and the cheekbones become visible.
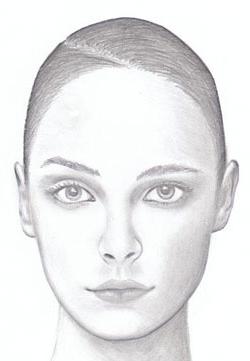
Now you can start creating hairstyles. A girl can have an open forehead, hair is gathered back into a ponytail. Then you need to draw her ears. Their upper part begins on the line of the eyebrows, position the earlobes just above the horizontal line of the nostrils.
How to draw a portrait of a girl so that she looks realistic? Make a few light strokes along the contour of the face - from the left eyebrow, through the chin, to the right. Leave the forehead light. Apply strokes from the upper eyelid, through the nose down to the nostrils to indicate the nose. Small dashes under the lower lip will show that it is chubby. The lips themselves also cover with barely noticeable strokes. Here's how to draw a portrait of a girl.
How to draw a portrait for beginners?
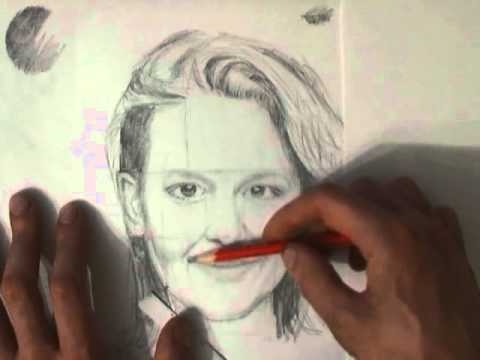
Drawing a portrait is not an easy task, because you need to be able to not only convey the subtleties of the features, but also facial expressions, image features, character. Professional lessons in drawing portraits in pencil will help. Well, at first, the beginning artist will have enough knowledge of the basics.
Stages of drawing a portrait
Like any other drawing, the portrait should begin with the simplest lines, with marking the location of the eyes, nose, lips and other details of the face. This technique is intended for beginners, it will allow you to draw a portrait as correct as possible from the point of view of symmetry. Therefore, first of all:
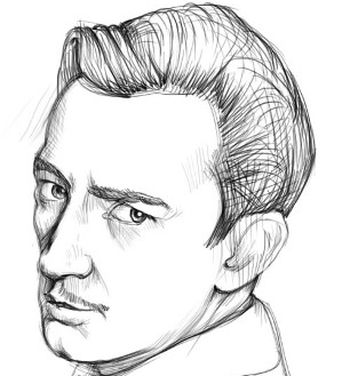
At this stage, the sketch work is completed. To draw with a pencil a portrait of a person as closely as possible to the original, be sure to take another look at your work. Make the necessary corrections. Do not forget to erase all the auxiliary lines and proceed to the next step - “revitalizing” the picture.
- Each element of the face is surrounded by additional details. We are now working with both hard and soft pencils. We allow ourselves a stronger pressure on the stylus.
- Draw shadows and highlight the desired areas. Be sure to pay a lot of attention to the hair, beard (if there is one). Individual parts of the face can be slightly shaded - just make sure that no dirty spots remain.


