Delicate crocuses delight us with their flowering, one of the first. Along with tulips, hyacinths and daffodils, they can be considered the main signs of the onset of spring. If you want to create a spring mood for your loved ones, it is not necessary to wait until the buds of these flowers open. You can make them yourself using corrugated paper and other improvised materials. Use a simple step-by-step instruction to make a bouquet of these delicate flowers.
Corrugated paper crocuses will be a wonderful gift for March 8 or a birthday for mom, sister or girlfriend. They can be used to decorate the interior for the holiday or just to create a good mood.
DIY crocus bouquet
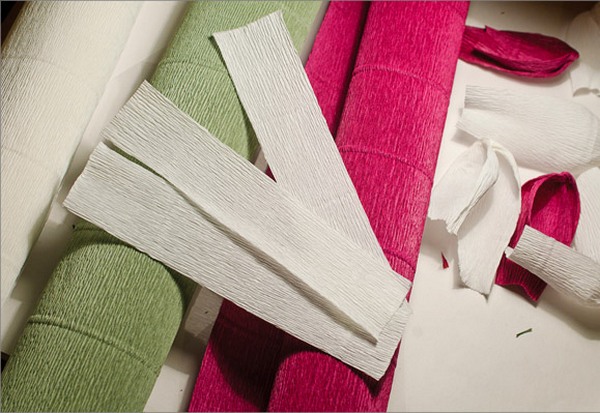
Materials for work
Step-by-step instruction
In order for your crocuses to be impossible to distinguish from real ones, it is important to choose the right shades. Look at the pictures of fresh flowers, traditionally they are purple, lilac, yellow and white. Sometimes there are blue specimens.

Crocuses with a surprise inside
There is another way to make crocuses from corrugated paper with your own hands. Try to make this spring bouquet by investing in each flower a delicious surprise - a sweet candy. It will be a wonderful gift for March 8 or birthday. 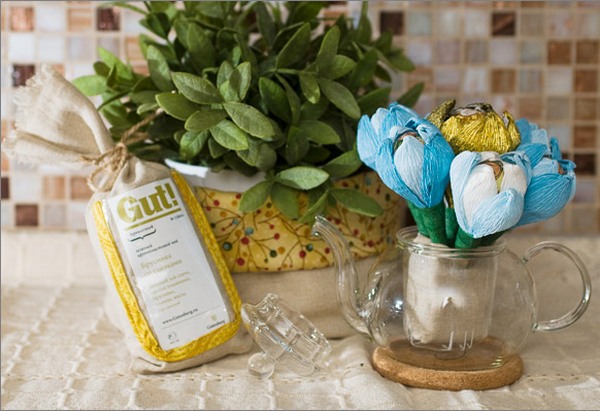
Materials for work
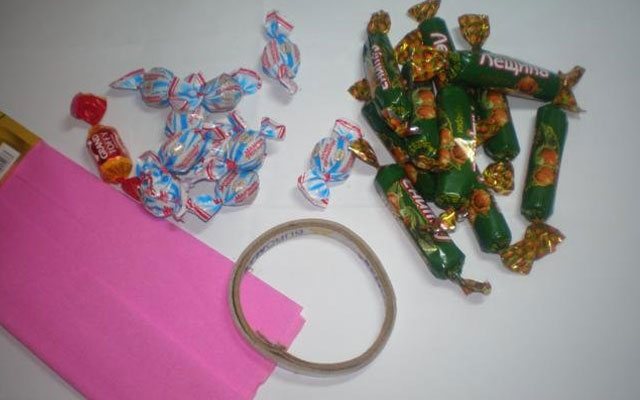
- corrugated paper (green - for leaves, purple, yellow or pink - for petals);
- wooden sticks (for stems);
- scissors;
- teip tape (elastic adhesive tape used in floristry);
- double sided tape;
- candy;
- wicker basket or vase.
Step-by-step instruction
It remains only to hand this charming bouquet to mom or girlfriend!
A master class for making some variants of such crafts will be considered in this article. Trying to do something similar, the master will enjoy it.
Flowers and sweets in one gift
From ancient times, bouquets are considered the best offering to the fair sex. And if they are also edible, then this increases the value and creativity of the gift. Flowers, inside of which there are sweets, are given both to loved ones, wives, mothers, grandmothers, and respected teachers, educators, doctors, and employees. It is original and modern, and besides, you can easily make such gifts from sweets with your own hands.
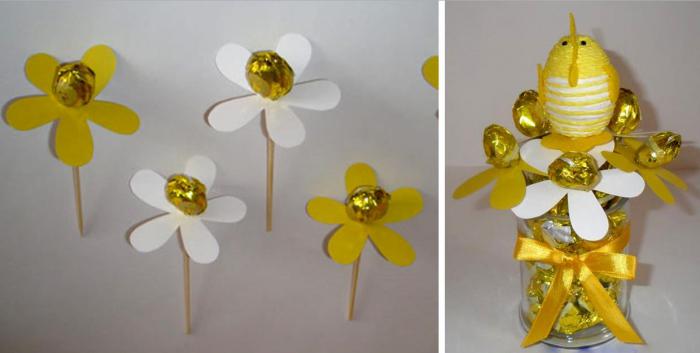
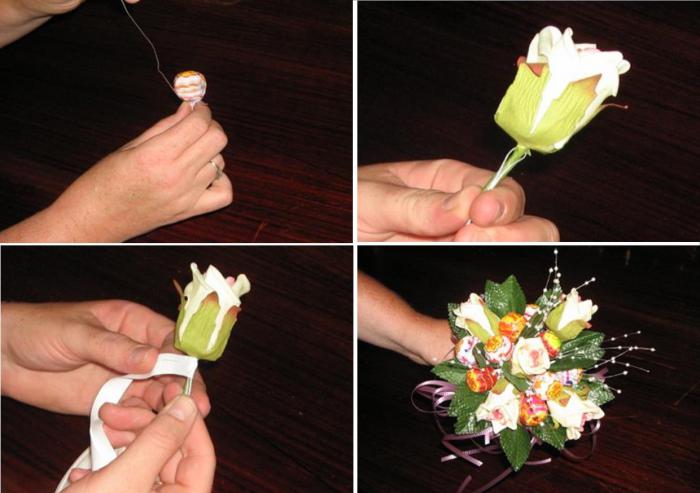
A master class of manufacturing, for example, a bouquet of daisies begins with the manufacture of sweet plant cores. This technique is universal for all types of such crafts. Therefore, first of all, you need to master. So, let's start our first lesson on the topic: for beginners. "
Master class in the manufacture of flower cores
For this stage of work should prepare the material:
- wooden skewer;
- narrow tape;
- scissors.
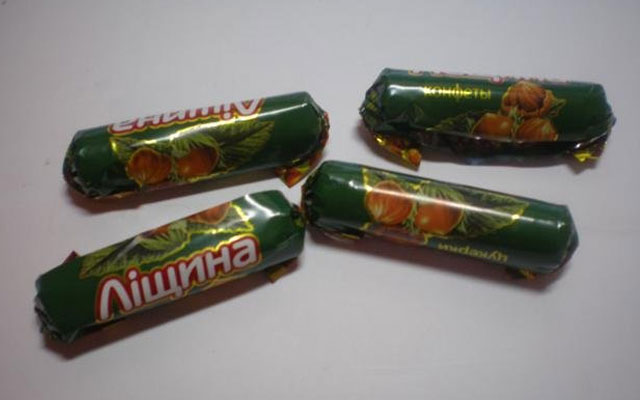
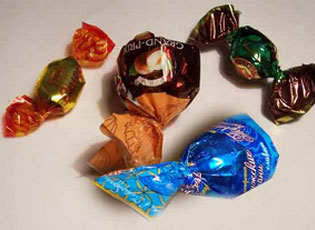
Sweets can be taken both with spins on both sides, and with only one. Do not use sweets without a wrapper. But if it so happens that it becomes necessary to work with “naked” candies, you must first wrap them in bright foil. It is necessary to observe sanitary standards, because we make edible gifts from sweets with our own hands.
A master class in making a core from a yummy wrapped in candy wrappers from two ends is more complicated. Therefore, consider this option.
Candy is wound at one end to the skewer using tape. For lack of such, you can use ordinary threads.
The second, remaining free, neatly straighten the end and cover it with candy, like a skirt. Of course, when choosing sweets for flower hearts, one should rely on the tastes and addictions of the one gifted so that gifts from sweets with their own hands are to their liking.
Master class for making a bouquet of daisies

But in the same way you can make a cornflower. Just for him, patterns of a different shape are cut out, with serrated petals without roundness at the edges. It is better to use not cardboard, but plain colored paper and put together three or four patterns.
The cup template is pierced with a skewer on which the core is fixed. From below, it is better to fix our flower on the stem with a plasticine ring.
The "stalk" is wrapped in a strip of green paper 1-1.5 centimeters wide. It is most convenient to use corrugated for this work, since it stretches well and therefore is quite elastic.
Kinder Surprise with a marriage proposal or car keys
Composing compositions of sweets and flowers, the donor can include a more expensive gift in it. Such, for example, can be a wedding ring or the keys to a new car. Since these items are small in size, incomparable with the material and the gift itself, they can be originally "hidden" in a sweet bouquet.
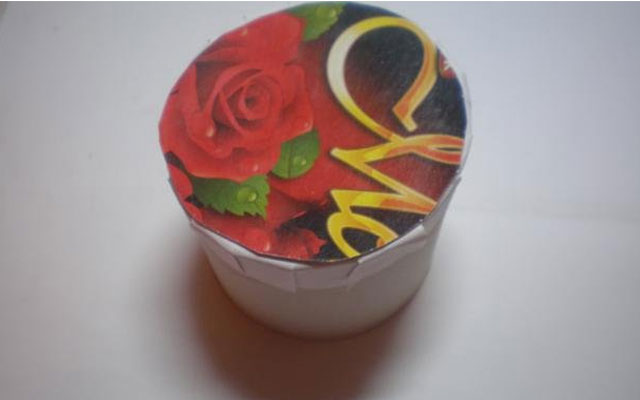
A plastic egg-container from Kinder Surprise will serve as a gift case. First, the chocolate delicacy is expanded, keeping the foil intact. With a knife heated over a fire, gently cut the egg and take out the container. Having freed it from the contents, they put inside the object intended for the gifted. By the way, you can put a rolled up banknote, jewelry or something else, small, but valuable.
The halves of the chocolate egg are folded together, placing a container with a gift inside, and with a knife heated over a fire, they seal the cut line as if they were working with a soldering iron. A small hole is made in the lower end of the figures where the skewer is inserted. You can fix the sweet craft with melted chocolate.
Then the Kinder Surprise is wrapped in foil again. You can arrange the petals around, imitating a large flower. And you can completely modify its appearance by turning it into a funny duckling or owl. To do this, you need colored foil, glue and cardboard. Some use silk as a wrapper, paste photos, giving the treat the appearance of a human head. Actually, here the wizard’s fantasies open an endless field.
Master class for making a bouquet of the first spring flowers
For the holidays that come immediately after the winter cold, most often give snowdrops, crocuses, primroses. All these flowers appear immediately after the snow melts. Their buds are first tightly compressed into an ovoid "cam", the petals are thick and juicy. White, not yet blooming snowdrops made of sweets are made according to the algorithm for making yellow crocuses. A cup of these flowers will require three petals. 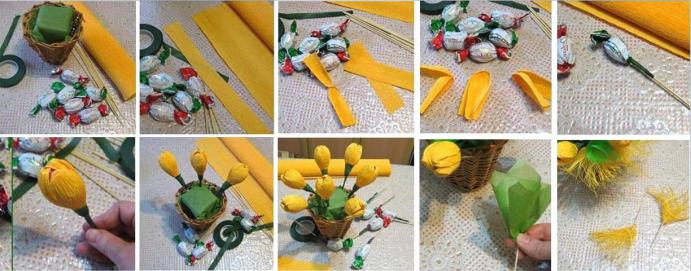
Tulip making workshop
Flowers, in which the corolla consists of one row of petals, are made according to the same algorithm. The only difference is that Yes. And the shape of the petals is also different for all colors. For example, if you need to make tulips that have already opened out of sweets with your own hands, then cut out petals similar to a boat from corrugated paper. The same form parts, but smaller, will be required for bells, blue snowdrops.
The petals in the middle are stretched with the thumbs, giving them a convex shape. Then they are placed around the middle, made of candy on a skewer. You can also make green sepals. From below, the cup is tied with a thread and fixed with tape.
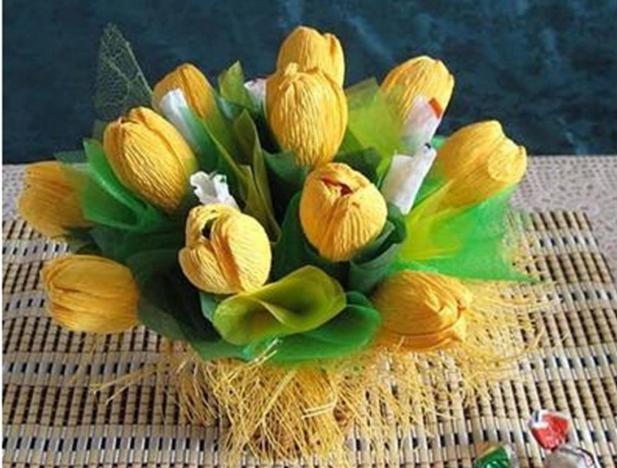
It is recommended to wrap the stem. To do this, use a green strip 1-1.5 cm wide, cut from a roll of corrugated paper. Then, ready-made tulips made of sweets, made by hand as a gift to a loved one, are collected in a bouquet, decorated with leaves, curly ribbons and a net for flowers.
Fancy candy gifts
An interesting option for crafts can be a cake made of chocolates, with sweets inside. You can perform this craft by imitating a bath gang. By the way, in such compositions from sweets you can hide a creative gift, which will be revealed only after all the sweets from the "gang" have been eaten.
The gentleman's set of offerings to the lady of the heart includes, in addition to flowers and sweets, wine. More often it is champagne. You can make jewelry out of sweets by turning the bottle into pineapple or christmas tree. Sweets are simply glued by the wrapper's tail to the glass or fixed with tape.
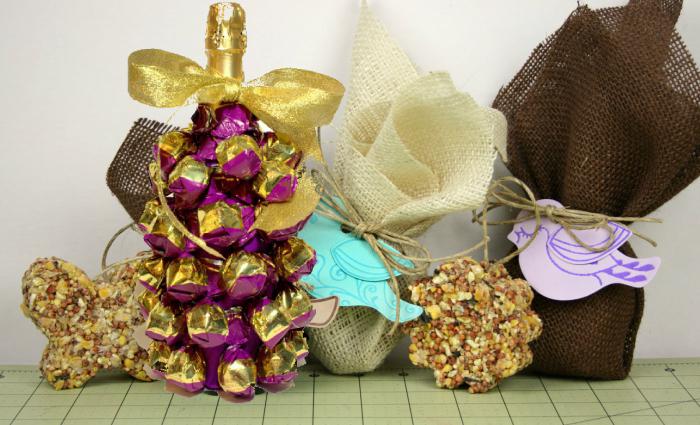
Champagne in the original way can be presented as a gift to both spouse and spouse by putting it on the shelf in the morning with the rest of the offerings prepared by relatives.
Do it yourself. But it turns out that sweets and other materials can be made amazing compositionsthat will be wonderful sweet gifts for your loved ones and will delight the eye.
Sweets will work for any occasion and everyone will like it: women, children, and men. We offer you several workshops on making the most popular candy compositions with your own hands. Knowing the basics, you can show a little imagination and come up with your own compositions.
DIY candy basket
Candy Basket - one of the simplest candy compositions, which is easy to make using a paper base. To get a neat basket, usually use candy in the form of long sticks.
For work you will need:
- Candy
Loose colored cardboard
Double sided tape
- scissors
Let's get to work:
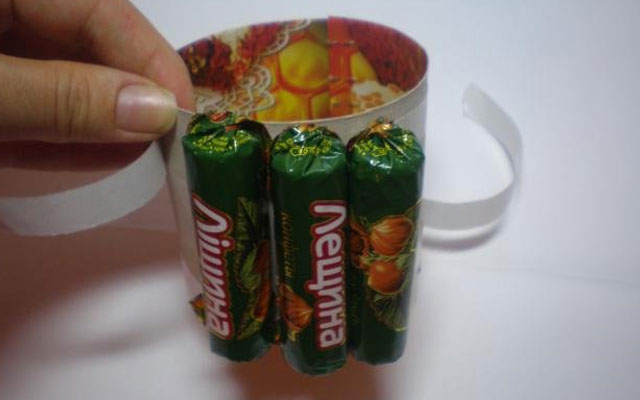
1) Long chocolates bend ponytailsby gluing them to the sides using double-sided tape.
2) For the basket you will need a cardboard base, which you can make yourself, or use the finished one. Measure the height of the candy and measure the rectangle on a piece of cardboard the width corresponding to the height of the candy, and the long, depending on the size of your future basket.
Fasten a sheet of paper into the shape cylinder and secure the edges with a stapler. On the 300 grams sweets turns a basket with a diameter 7-8 centimeters.
![]()
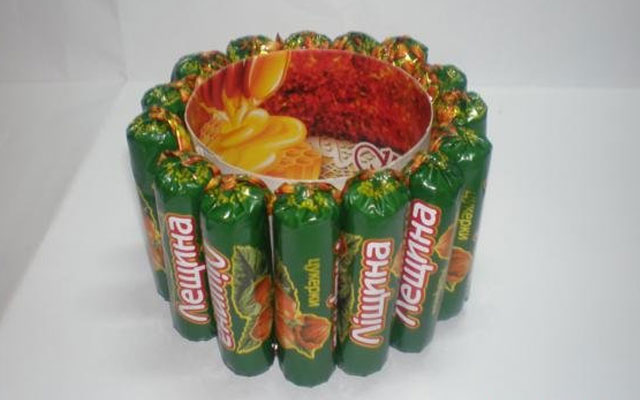
3) Glue to the bottom of the cylinder round bottom. To do this, you can use a circle of loose paper by bending the edges and gluing them with glue from the outside. Then glue on loose paper cardboard circlewhich corresponds to the diameter of the lower part of the cylinder.
4) Stick double sided tape strips in the upper and lower parts of the outside of the cylinder.
![]()
5) Then, one at a time, begin to fasten candy.
6) You should get this simple basket:
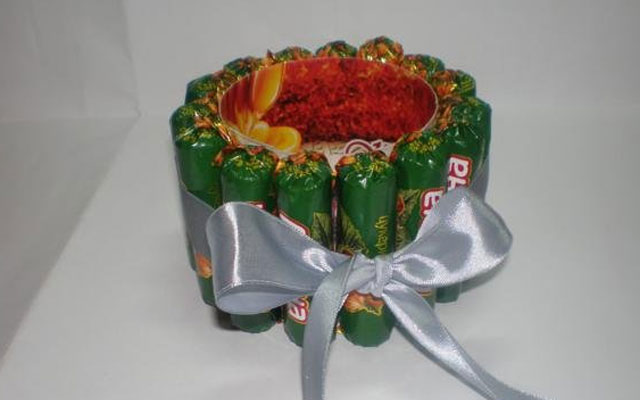
7) As a complement, decorate the basket bowbandaging a row of sweets. The basket is ready. Now you can put other candies in it or make some corrugated paper flowers.
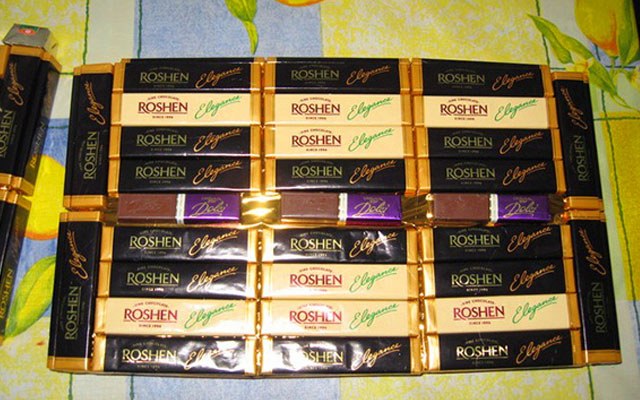
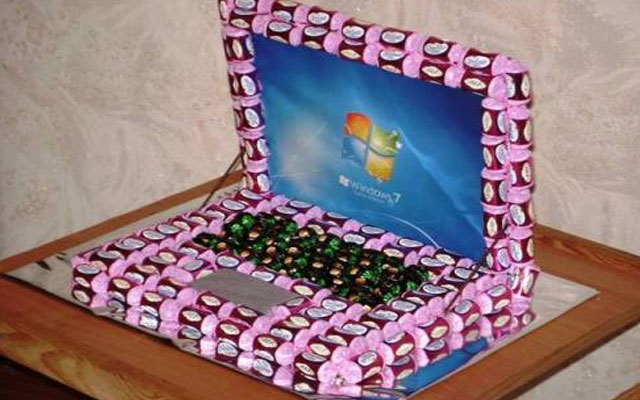
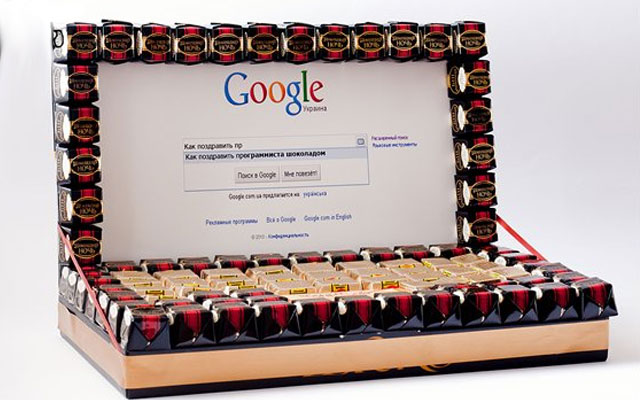
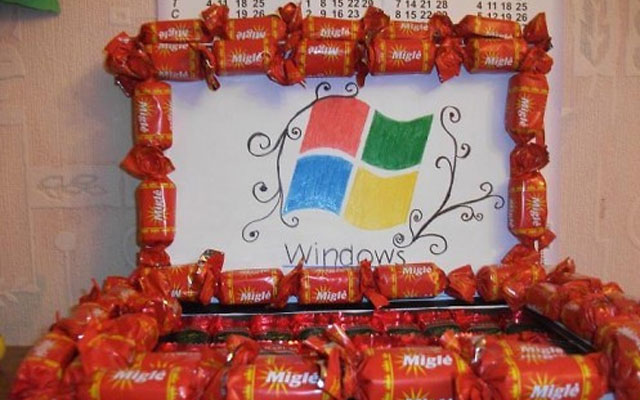
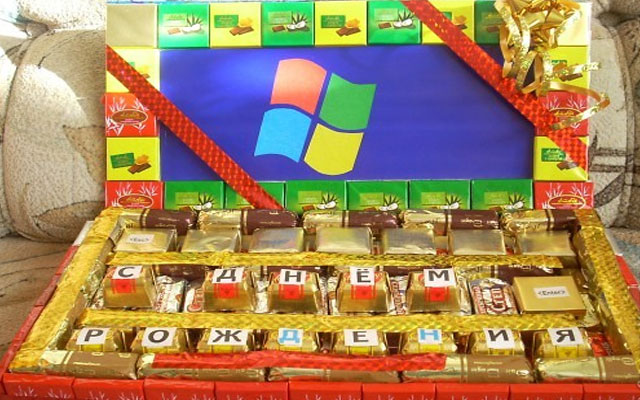
Notebook made of sweets
This original candy gift can be taken as the basis for many other compositions. Laptop can be easily made out of the box from sweetswhich is decorated with sweets from the outside. The box should have an opening and closing lid that will serve as a “monitor” of the laptop composition. If you do not find a suitable box, the basis of the product can be made from a piece of foam.
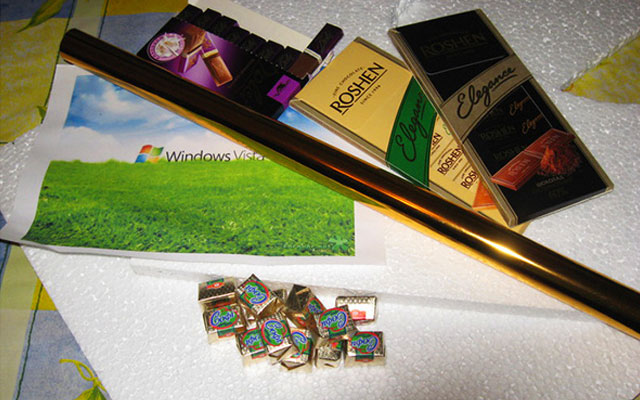
For work you will need:
- Sweets (flat and rectangular)
Polyfoam (thickness - 2 cm)
Shiny paper
Printed Windows Screensaver Page
Paper knife
Thick wire
- scissors
Let's get to work:
1) Lay out flat candies to get outline of the future laptop and circle the outline with the handle.
![]()
2) Cut out of Styrofoam two identical rectangles, then wrap each of them in shiny paper or foil. These will be the main details of the laptop - a monitor and keyboard.
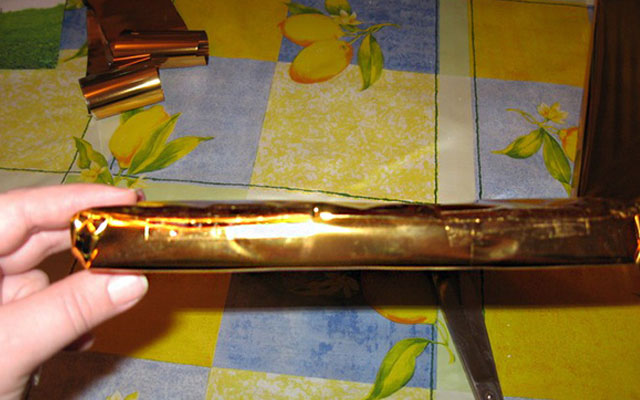
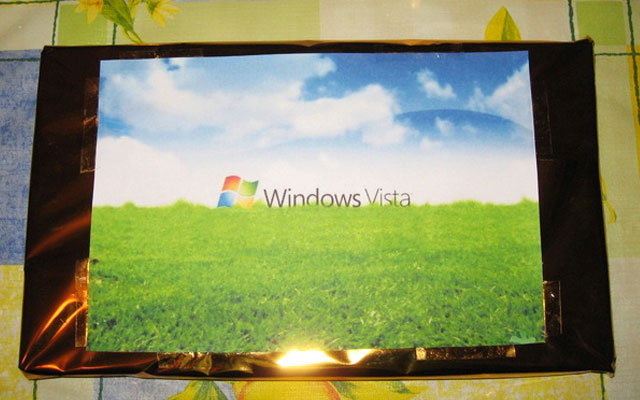
3) Take the first workpiece and glue in the center of it printout with a computer screen saver.
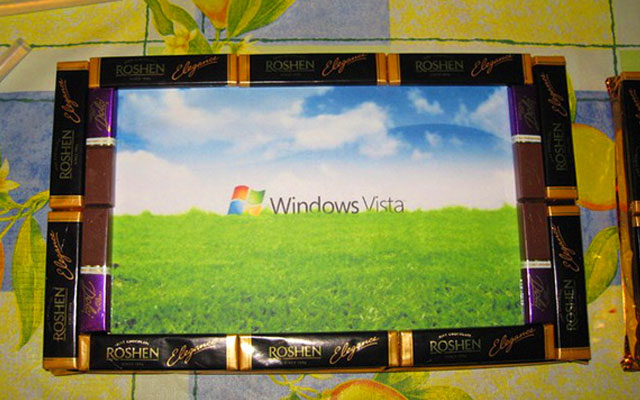
4) Lay out flat long candy from all sides of the picture.
5) Put the sweets and glue them to the second blank, which will be a keyboard. For example, like this, you can use more tall rectangular candiesto get the keys:

6) Glue the candies to the outside of the laptop.
7) Paste over sweets sides of workpieces, then only on three sides. The fourth side of each of them you will need for fastening. To do this, use a thick wire, sticking it into the end of the monitor.
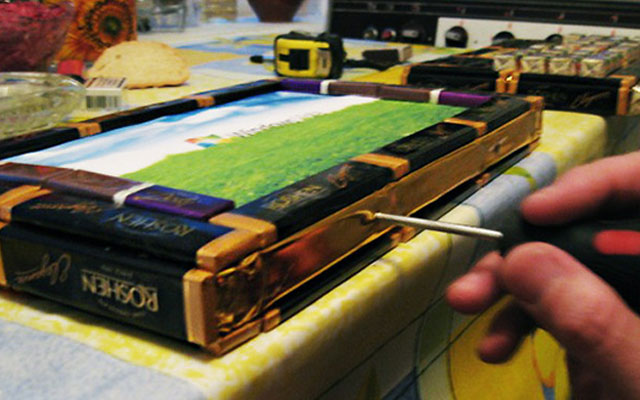
8) Bend wire at desired angle and insert the other end into the keyboard blank. To connect it to the monitor.
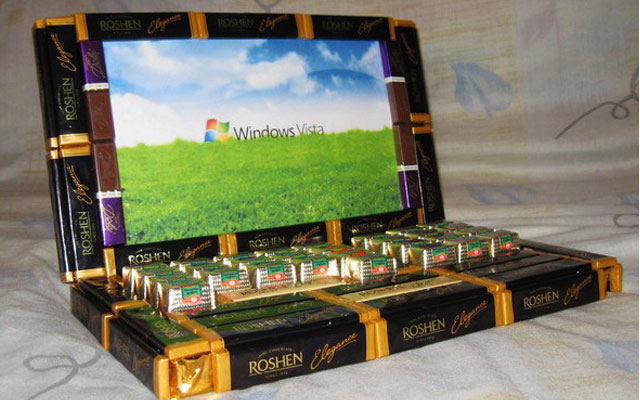
9) You will get an open laptop.
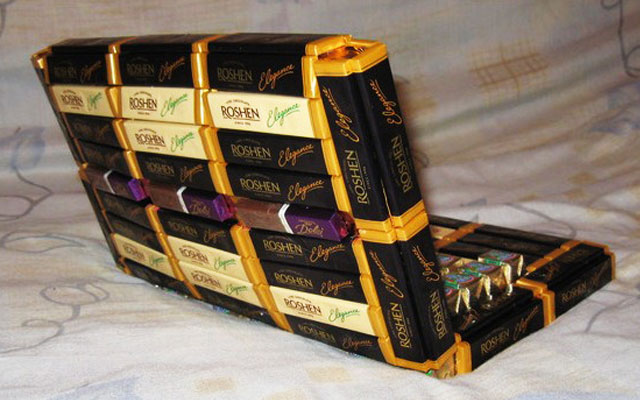
Here are some more options. notebook made of sweets, which will be a great gift for your beloved sweet tooth men:

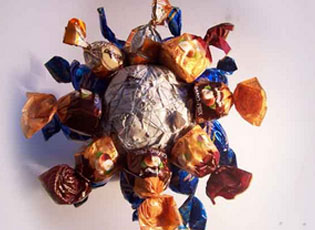
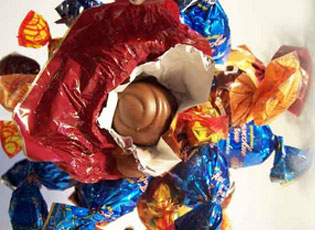
DIY candy tree
Very popular gifts for any special occasion - candy trees. There are several ways to make them, but there is one principle: a round base, a leg and a pot.
Option 1:
This candy tree option is the easiest. For the manufacture of crafts, it will take you no more than an hour. Based on this product, you can make a variety of trees. It all depends on your imagination.
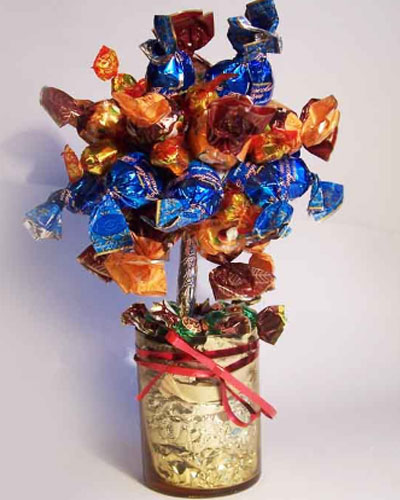
For work you will need:
- Candy different shapes (about 50 pieces)
Old newspapers
Wooden stick for barrel
Glass or vase
Decorations (ribbons, colored paper)
- scissors
Let's get to work:
1) Make from newspapers small ball of the desired diameter and wrap it with thread so that it does not unfold. From the bottom, stick a wooden stick that will serve as the trunk of your tree.
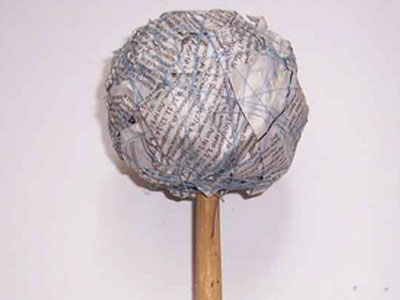
2) Insert the lower end of the stick into a glass or vase and strengthen somehowso that the trunk does not tilt. For example, you can fill the vase with the same newspapers or use a piece of polystyrene. The foundation for your tree is ready.
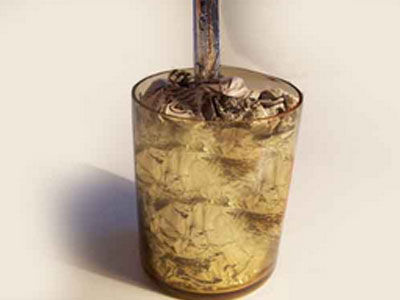
3) Make sure the trunk stood tight in a vase and did not fallwhen you will decorate your tree with sweets and other details. Start by sticking sweets. They can be glued with a glue gun. Better to use flat bottom candythen it will be easy for you to deploy them right there on the tree.
As a basis for trees, you can take other, more professional materials, for example, foam ball and plastic stick, which can be found in specialized stores for needlework:

As a basis, you can use liquid gypsumwhich, having hardened, will hold the trunk tightly.
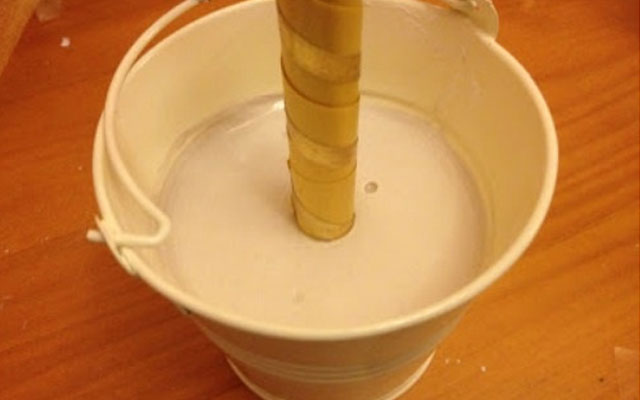
Working with gypsum will take a little longer, although such a tree will eventually work more stable and reliable.

Option 2:
Original trees can be made from sweets. "Chupa Chups" or others candy sticks. Moreover, these will not be simple candy trees: each such mini-tree will be a one candy.

For work you will need:
- Candy on sticks
Mastic (edible plasticine)
Cake Topper different color
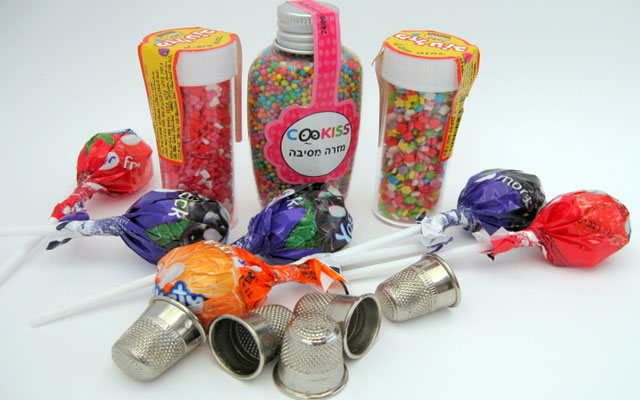
Thimbles
Jewelry for pots
Plaster or hardened plastic
- water
Let's get to work:
1) Insert the candy on the stick into the thimble and secure it with gypsum or any other materialwhich is suitable (e.g. clay or salt dough). Allow the base to harden.
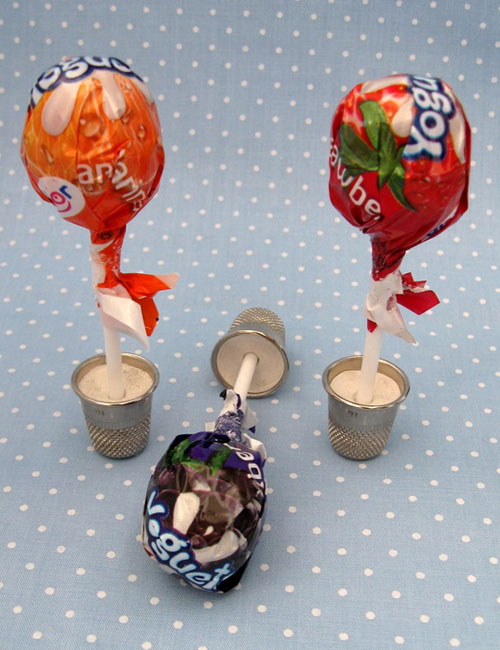
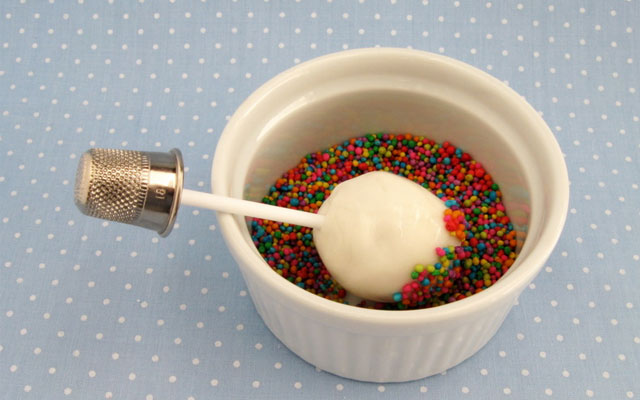
2) Expanding the candy, wrap it with mastic and form a ball the correct form.

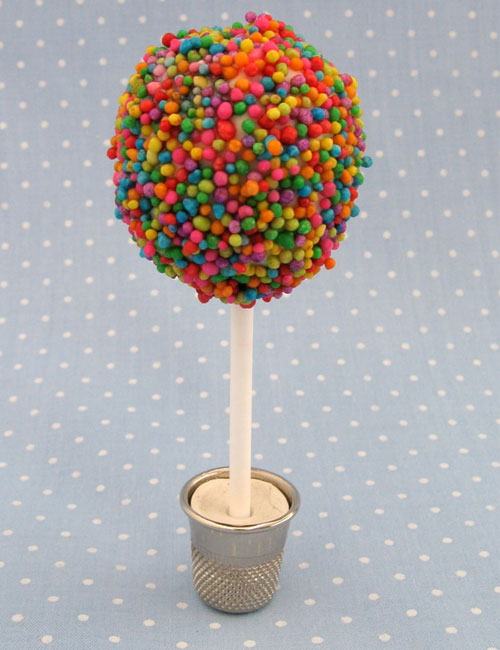
3) After wetting with water, dip the candy in a container with sprinkles and roll it so that small particles stuck to the tree.
4) Decorate a thimble with ribbons or wrap it with foil. Your candy tree is ready.
Similarly, you can do a big tree from round chewing gums.
![]()
A tree of sweets (master classes):
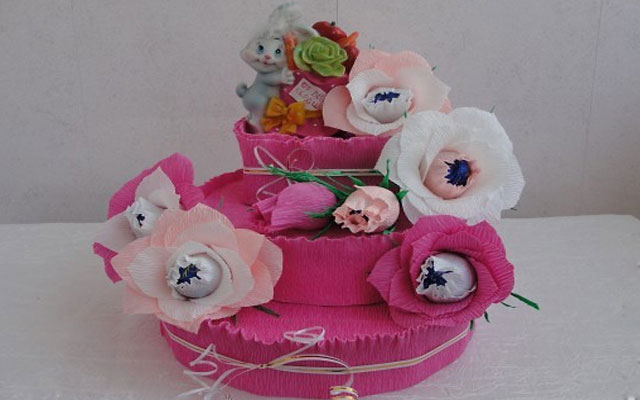
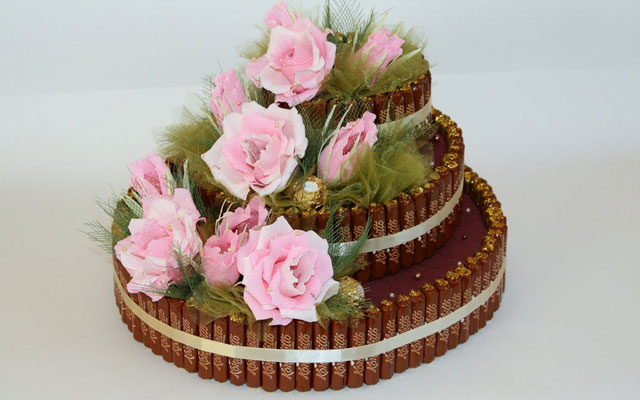
Do-it-yourself candy cake
Candy Cake - An original gift for a birthday or other holiday, as well as a beautiful craft that is easy to make. The composition is decorated candy flowerswhich can be made from corrugated paper. You can read more about candy colors.
For work you will need:
- Candy
Corrugated paper
Styrofoam
Ribbons for decoration
Cardboard box
- scissors
Let's get to work:
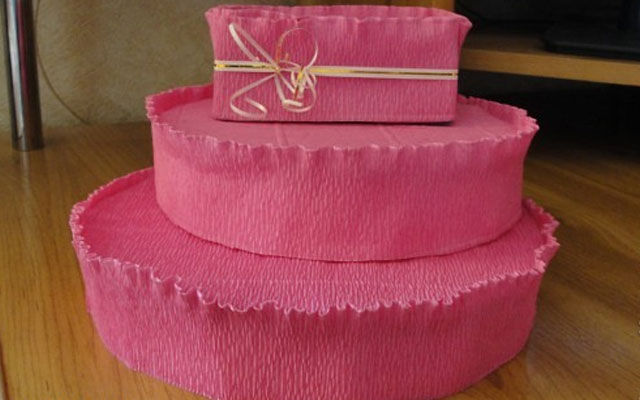
1) Cut cake blanks from thick foam sheets: one more, another less. The size of the cakes will be up to you. Glue the blanks corrugated paperleaving beautiful edges on top.
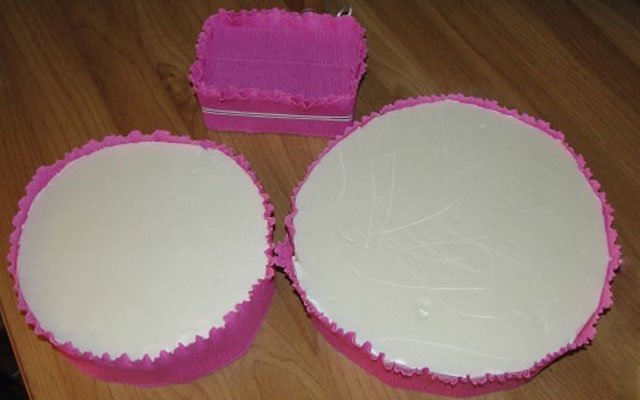
2) Also paste over with colored paper cardboard boxwhich you put at the highest level and in which you can put small gifts and toys.

3) Paste over the top of the foam blanks with the same paper and set all levels one on top of the otherfixing them well.
This is the basis for your future cake. Now you can decorate it with sweets. For example, you can place candy flowers and bouquets on top of it, or sweat over the sidesby putting sweets on glue or double-sided tape.
Here such a composition can be made from the same foam base, cutting it into a triangle. It will turn out piece of candy cake.
![]()
One-story candy cake from long and round sweets and paper flowers:
![]()
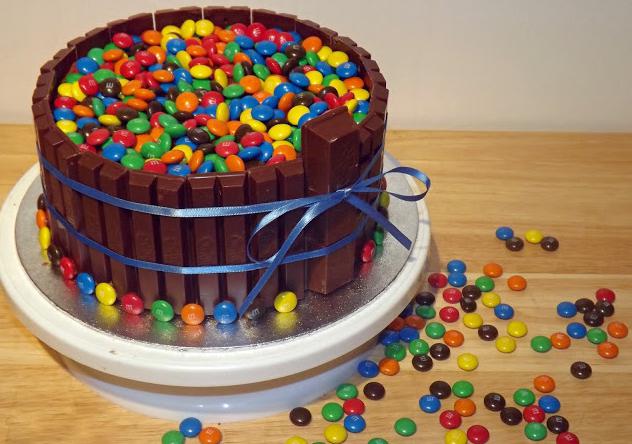
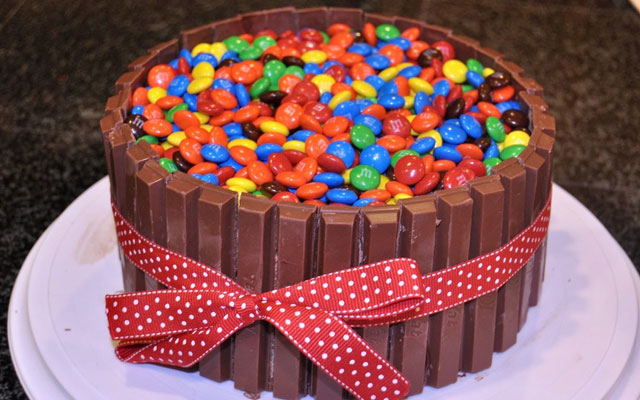
This original cake is made from broken chocolate bars. Kitkat and decorated on top of a dragee M&M "s. Not bad idea for children's party or birthday. Chocolate bars were probably used without a base, but kept together with the help of a ribbon.
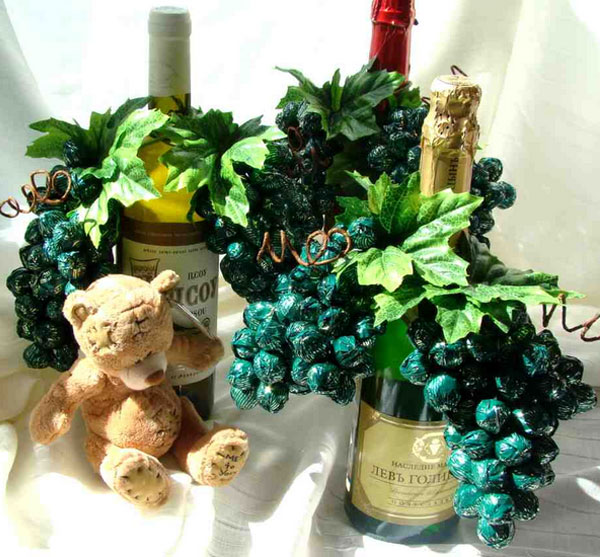
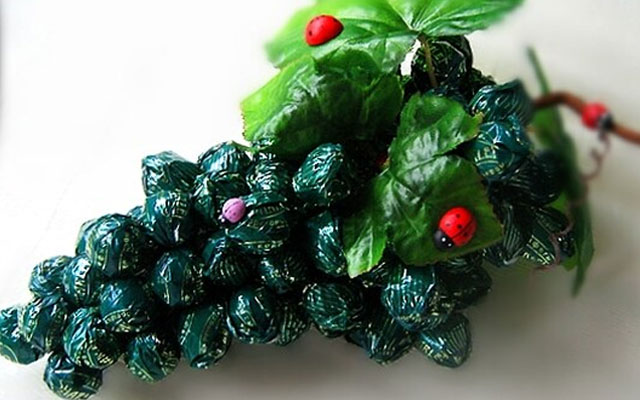
Grapes from sweets master class
Bunch of grapesmade of sweets is a great and very original gift for sweet tooth. It can be used as a separate gift, or decorate them with any composition: cake, bouquet and so on.
Option 1:
For work you will need:
- Round wrapped sweets
Wire for bouquets
Details for decoration - leaves, ribbons, ladybugs, etc.
- scissors
Let's get to work:
1) Make blanks for the bunch. To do this, to each candy using tape attach the wire.
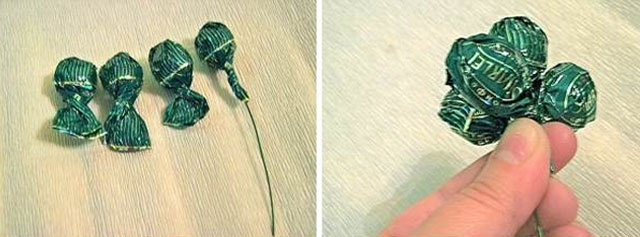
2) Then assemble several sweets (5-6 pieces) together and fasten with tape or tape. For example, you can use colored tape for the color of the wrapper, then the fasteners will not be visible.
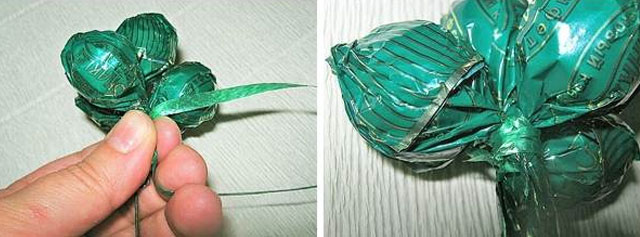
3) Make some small clusterswhich you will then attach to the thicker wire.
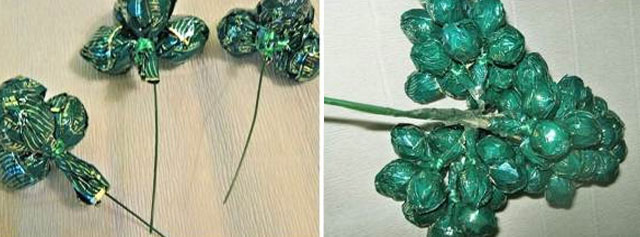
4) When the whole bunch is ready, decorate it with leaves, ribbons and other decorations.

With the help of such bunches you can decorate gift bottle of wine: