

One of the most exciting pages in the history of the Great Patriotic War was and remains the theme of military childhood. Children and adolescents worked on an equal footing with adults at enterprises and collective farms, volunteered for the front and became children of regiments, gave their savings to the USSR Defense Fund 1 and joined partisan detachments. And on the pages of newspapers, children tried to keep up with adults: for example, to the editorial office of the Pionerskaya Pravda newspaper, as well as a number of other publications for children and youth that continued their work during the war years, children sent drawings, poems about the war, and even cartoons in German soldier. Among the letters and drawings there are both childishly naive (see doc. N 2), and letters from schoolchildren who tried to write and draw "in an adult way." In particular, the guys mastered caricatures of the enemy - a satirical genre, characteristic primarily of "adult" Soviet newspapers.
One of the most popular newspapers among schoolchildren was Pionerskaya Pravda, the printed organ of the Central and Moscow Committees of the All-Union Leninist Young Communist League. With the beginning of the Great Patriotic War, the structure of the newspaper was rebuilt to take into account wartime. Since June 1941, several special wartime headings appeared on the pages of Pionerskaya Pravda: “From the Soviet Information Bureau”, “Pioneer piggy bank of scrap metal”, etc. Stories, feuilletons, poems, cartoons as employees of the newspaper were published in the satirical heading “On the Bayonet” And famous writers both poets and readers. We publish several children's cartoons and letters to them below.

Drawings are children's weapons
The students tried their best to participate in the activities. pioneer newspaper. Among the drawings you can find not too skillful, and quite professional. From the "adult" genre of caricatures to children's caricatures, also different in execution technique, one of the main principles passed - the image of an enemy with bestial features, more like an animal than a person. Soviet fighters and nurses in children's drawings were examples of heroism and selfless service to the Motherland.
In addition, schoolchildren responded vividly to stories about the exploits of Komsomol war heroes. So, in the drawing by V. Arkhipovsky "Death of "Tanya"", obviously, the execution of Zoya Kosmodemyanskaya, who was captured by the Germans while performing a combat mission in the village of Petrishchevo, is depicted. During interrogation, she called herself Tanya, and for the first time they learned about her feat from Peter Lidov's article "Tanya", published in the Pravda newspaper on January 27, 1942.
Children's cartoons and drawings about the war, published below, are part of a set of documents collected in wartime for display at the exhibition "Komsomol in the Patriotic War" in the State historical museum(GIM).

Exhibitions about heroism
At a meeting of the secretariat of the Central Committee of the All-Union Leninist Young Communist League on May 2, 1942, an official decision was made to organize an exhibition 2 that would highlight the heroism of Komsomol members and youth in the fight against the enemy at the front and in the rear. Initially, the opening of the exposition was scheduled for the anniversary of the start of the Great Patriotic War - June 22, 1942. In reality, the first exposition was deployed in 1943 in the State Historical Museum. About 40 artists and sculptors took part in the design of the exhibition. In 1944, the Central Committee of the All-Union Leninist Young Communist League decided that the exhibition should exhibit materials not only about the Komsomol, but also about Soviet youth in general, in connection with this, the exhibition became known as "Komsomol and Youth in the Patriotic War."
In January 1949, the exposition "Komsomol and Youth in the Patriotic War" was included in the exhibition prepared for the 30th anniversary of the Komsomol (November 1948). In September 1949, this exhibition was called "Lenin-Stalin Komsomol". In July 1953 the exhibition was closed. The material exhibits of the exhibition were mainly transferred to Moscow museums - Historical, Revolution, Soviet army. Documents and some material relics were transferred to the archive of the Central Committee of the All-Union Leninist Young Communist League. Later, the archival and museum collection of the Central Committee of the Komsomol was replenished with materials received from the participants in the events and their relatives. At present, the set of exhibition documents is fund M-7 "Documents of the Exhibition of the Central Committee of the Komsomol" Lenin-Stalin Komsomol "(1942-1953)" RGASPI. Separate materials of the exhibition are also included in fund N M-14 "Museum materials on the history of the youth movement in the USSR and Russia".
Published documents are stored in the fund M-7 RGASPI and reproduced with the preservation of spelling, punctuation and stylistic features of the texts.
The publication was prepared by Natalia Volkhonskaya, chief specialist of the department of scientific and information work and the scientific reference apparatus of the RGASPI.

Document No. 1.
Letter and cartoons by Oleg Tikhonov sent to the editorial office of the Pionerskaya Pravda newspaper
Dear editor!
I send you two of my cartoons, and ask you to write what is wrong in them (in the text). I live next to S. Sofronov, who sent you the cartoons. He is my friend. Before that, I lived in Moscow and was with you at the editorial office of Pionerskaya Pravda, I don’t remember what year, but I only remember that I was there when the play Gorky’s Childhood was being read. There were guys from the class in which I studied, namely: Yulia Rogova, Lenya Novobytov, Galya Osokina and me.
I would love to stay in Moscow, but circumstances developed in such a way that I had to go with my dad to the city of Kirov, where I am now.
I am 16 years old, I live on Karl Marx Street, house 8 sq. 9. Oleg Tikhonov. I'll send another cartoon soon.
With regards - Oleg.
RGASPI. F. M-7. Op. 1. D. 3545. L. 1-3.

Document no. 2.
Letter from Valya Razbezhkina to an artillery soldier with congratulations on the 25th anniversary of the Red Army, sent to the editors of the Pionerskaya Pravda newspaper
[February 1943]
Dear fighter!
I congratulate you on the 25th anniversary of the Red Army and wish you to defeat these reptiles as soon as possible and so that no ashes remain of them. I wish you to shoot down more Nazi planes and destroy all the tanks that are moving towards us to our beloved homeland with the fire of your cannons. Gram and grim the German invaders. I am a student of energy school No. 9. I ask you to defeat the enemy as soon as possible and come to our school. I firmly shake hands and wish you a speedy victory. From Razbezhkina Valya.
Dear Fighter
I congratulate you on the 25th anniversary of the Red Army. To the best gunner in your unit, please accept my modest gift.
Ufa, st. Volodarsky N 2
RUE N 9 1 [account] 30 groups
Razbezhkina Vali.
RGASPI. F. M-7. Op. 1. D. 3545. L. 7-7v.


1. "Defence Fund" - a special fund that received voluntary donations from citizens and organizations of the USSR for the needs of the front during the Great Patriotic War. Materials on donations by Soviet and foreign citizens and institutions to the USSR Defense Fund (1942-1946) are stored in the RGASPI (F. 628).
2. RGASPI. F. M-1. Op. 18. D. 1558. Personal file of Ezersky Isaac-Alexander Moiseevich. L. 14.
3. MYUD - International Youth Day - international holiday youth (1915-1945). Established by the decision of the Berne International Socialist Youth Conference in 1915 in order to mobilize young people to fight for peace. In 1916-1931. was celebrated on the first Sunday of September, and since 1932 - on September 1.
Drawing a soldier with a pencil will be quite difficult, like any person. After all, you need to know the proportions and exactly place the legs and other parts of the body. Therefore, we offer you this lesson, in which it is clearly and understandably shown.
Necessary materials:
- colored pencils in brown, black, orange and pink;
- simple pencil;
- black marker;
- eraser;
- ruler;
- paper.
Drawing steps:
1. First, using a ruler, draw a vertical line, and then divide it by nine equal parts. Of these parts, and will consist of a soldier.

2. The head will occupy the first segment, let's denote it schematically. We draw hair, ears and a headdress, which will go a little beyond the upper border.
From the bottom of the head draw the neck. To it we draw in the second segment the wide shoulders of the soldier. We draw from the edges of the shoulders one more line down to the fourth segment. This will be the waist, on which the belt will be depicted. From this point we draw straight lines to the fifth segment. We fix it with a horizontal line.

3. From the shoulders we draw down segments to the beginning of the fourth interval. We put small dots and draw straight lines until the beginning of the fifth gap. At the end of each line, draw small ovals. These will be the hands of a soldier.

4. Now let's move on to the legs and draw them in the form of straight lines. We finish drawing the legs on the last segment - the ninth. From their ends we will draw one small segment to draw the foot. A slight deviation from the boundaries is allowed.

5. We detail the upper part of the body of a soldier - we draw a collar, shoulder straps, shoulders and sleeves.

6. Instead of ovals, draw hands. We detail the legs and begin to draw the silhouette. We finish drawing high army boots on our feet.

7. Draw details on the face - eyes, eyebrows, nose and mouth. All this is done with a sharpened pencil.

8. Let's add small elements to the soldier's drawing.

9. Stroke with a black marker over the pencil lines.

10. Create a natural skin color on the hands and face of a soldier with a pink and brown pencil. We also color the hair with a brown pencil.

11. Let's decorate the soldier's boots in black.

In this lesson we will look at how to draw the Great Patriotic war(WWII) 1941-1945 in pencil in stages. This is the war of the USSR against Germany and its allies. The second one herself World War began on September 1, 1939, if you are interested in how it all began and what were the prerequisites for development, then read the Wikipedia article. But let's get down to drawing.
Draw the horizon - a horizontal line, it is located about 1/3 of the sheet from the top. Draw a country road below and place three soldiers, the further away, the smaller the scale. Click on the picture to enlarge.

We draw houses and a or hills on the horizon, then the farthest soldier, it should not be big. Click on the image to view the details.

We draw the second one with a weapon behind a hillock, his head and body are slightly larger than those of the previous one, about 1.5 times.

Draw a soldier with a weapon in the foreground.

Apply dark areas on the bodies of the soldiers and on the weapons, draw a little grass.

Fill in the grass, slopes, and field with strokes.

Now, in a lighter tone, we imitate smoke from fires, hatch the steppe part, in the foreground we highlight the hillock and trench. This is how you can draw.

How to draw a Cheburashka with a pencil step by step
Well, now let's get down to drawing ... Only five steps.
Step one
Let's start with the head. At the top of the sheet, in its center, draw a large circle. From left and from right side from her - ears. They are also rounded and quite large, but smaller than the head. Let's draw the body - this is a large oval. All that's left is arms and legs.

step two
We turn the outlined figures into body parts. Let's circle the head then the ears. One leg of the Cheburashka is hidden behind the back. Let's draw a T-shirt and legs.
 Step Three
Outline the outline of the head to get the face. Show two big eyes. High above them are small rounded eyebrows. It remains to outline a triangular nose and a small mouth. A finger reaches to the mouth.
Now let's look at the ears.
 Step Four
Let's draw the eyes, or rather the pupils. And now we will dress our Cheburashka in a fur coat. In this case, pay attention to the bangs and ears.
 Step five
On the T-shirt of our hero we will draw a small ornate pattern. Well, almost done. It remains to color.

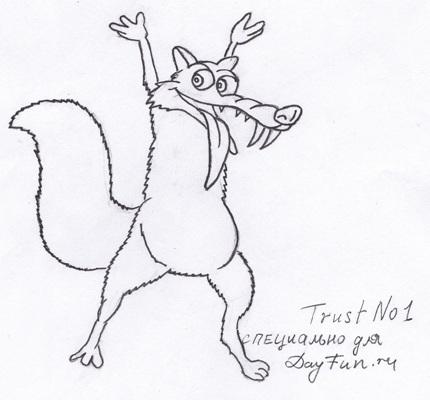
How to draw a squirrel with a pencil
Step one. We start as usual by drawing the position. We make a sketch of the position of the squirrel's body. We draw a circle that will indicate the stomach, after that we add two oval shapes from below to it and one large one from above, these are the legs and chest. And at the very top we draw another circle, but already smaller, this is naturally the head.

We step further. Draw raised paws up and add a ponytail. It must be fluffy. In shape, it resembles the tail of a mermaid, which we drew in the previous lesson. After that, draw the legs of the squirrel.

Step three. Let's make an elongated shape for the squirrel's muzzle. It is as easy to draw as the face of a tiger. On it draw the front sharp teeth. Add ears on the head.
 Step four. Moving on from sketching to drawing real shapes. We circle the kennels of wool around the tail and legs. On the muzzle we draw eyes, ears and nose like a smurf.
Step five. We continue in the same spirit with the rest of the body. Let's draw paws and fingers on them. The eyes of the squirrel are round, add black pupils. And draw the exposed tongue. Make some more teeth on the upper jaw.

Step six. Now we erase the auxiliary lines with an eraser and outline the outlines of the picture.
It remains to add a few details of the background. Let's draw a palm tree and a nut (or is it a coconut?) Which the squirrel holds in his hands. (How does he only hold it, is it obviously bigger and heavier than him?)

And finally, I also colored the drawing with colored pencils to make it more fun. Here's how it turned out:

How to draw the Barboskins with a pencil step by step


How to draw cartoons with a pencil
Step one. Determine the position of the head. It is quite big and wide. Moreover, you can draw a not very even oval. On the face, not in the center, but closer to the cheek, we draw an axial vertical line. With a short line we outline the level of the nose. And now you need to carefully, starting from the vertical auxiliary line, draw a mouth: first to the right, then to the left. The cat is half turned in our direction, so the mouth does not seem to be symmetrical. Now let's draw the body. We try to make it look like the picture. Draw two straight lines from the torso down - the legs. With an uneven line, we outline the bend of the tail. Let's draw two large shapeless oblong feet.
 Step two. First draw large oval eyes, and above them small rounded ears. Now let's round the cat's smile around the edges. At the already planned level, we will place a round spout. Hands folded on the chest: they are not easy to show. Let's draw three thumbs, and from under them we lead the second hand. We draw two lines along one axis of the leg, we get the leg. There are two curved stripes on the feet - toes.
 Step three. Inside the ears, draw a line along the edge, so we get the auricle. Under the already drawn hand, we will show the second peeking out hand: almost rounded, but uneven at the same time. Draw two lines along the second axis of the leg to represent the leg. Let's draw the feet. Let's draw a fluffy tail. Inside the large eye sockets, draw a horizontal line in the lower part, and under it a small pupil filled with a pencil.
 Step four. Draw the tail: draw the top line along the axis. Garfield is striped: draw parallel stripes, make the tip of the tail darker.
 Step five. Remove all auxiliary and center lines with the help of an eraser. The main outline of the cat can be circled and made brighter.
How to draw a motorcycle step by step

Step one
The first thing to do is to draw an axial horizontal line for the wheels. So we will immediately set the directions for our drawing. Now the wheels themselves. Let's outline the horizontal axes. The visual effect is such that we see them not quite round, but slightly elongated vertically. Moreover, the wheel closest to us is larger.

Above - the angular contour of the motorcycle.
Connect the visual of the ear with a horizontal line.
step two
Let's make the wheel closest to us voluminous. Let's show the width of the rubber of the rear wheel and its wide fork. On the motorcycle body itself, we will need to make a lot of straight reference lines, which we will need next. Look carefully at the picture and try to do the same.

Step Three
We continue to draw wide wheels. Above them are wide wings. Let's show the seat and front plumage.

Step Four
All the details of a two-wheeled friend need to be turned from angular into smooth and elegant. We carefully draw the details.

Step five
Outline the outline of the base, make it brighter. Here, our brainchild is already visible.

Step Six
There are a couple of barely noticeable inscriptions on the body. But we noticed them and draw them. Now you need to give a shadow to some details that are in depth, darkened. Well, it's done!

How to draw war with a pencil step by step

Step one
First, let's outline people in motion. Head, body position, arms, legs.

step two
Now let's think about what will be around our soldiers: this is a fence, stones, logs. Let's show their contours.

Step Three
We will dress our belligerents: helmets, pants, boots. Let's supply one of them with a bag. Draw the profile of the face closest to us. We wrap the fence with barbed wire.

Step Four
Let's add details: thorns on the wire, belts on people's clothes, a shoulder blade, etc.

Step five
Let's do the shading. There are darker areas on the clothes at the folds. Darken the areas on the pillars. Well, here are the soldiers against the backdrop of a military and completely non-picturesque landscape.

let's try draw Harley Quinn.
Step one.
Draw a circle in the center of the sheet. This will be the Harley head. On both sides of it we will draw a sketch of the harlequin's clothes.

Step two.
We draw eyes and folds on clothes.

Step three.
Then we draw a small neck, from it there are 3 lines, and on them a shoulder can be seen in a circle behind them, and under them the girl’s chest. Center line at the place of the hand. Next, draw a graceful posture.
 Step four.

How to draw a military soldier in the military uniform of the Soviet army for the Great Victory Day on May 9? Very simple, we will help you with step-by-step tips. In order for the soldier to be as similar as possible to the real one, we will depict him at attention and in a typical military uniform, while decorating him with colored pencils quite realistically.
To draw a picture of a soldier in military uniform by May 9 or February 23, you will need: pencils, a sheet of paper, an eraser, and a bit of patriotism! Let's get started.
Stage 1. Draw the proportions of the body soft pencil so that they can be erased later. We visually determine the size of the head, upper and lower parts of the body of a soldier in military uniform.


Stage 3. It's time to draw the paraphernalia of the military uniform. We draw tarpaulin boots as shown in our picture, then draw shoulder straps and a collar. Let's add some more elements. Your military will soon turn out like a real one!

Stage 4. We draw heads in a cap. A cap is one of the types of hats worn by the military, you can draw any hat you like.

Stage 5. Draw the facial features of a soldier in military uniform. They must be very restrained. We will also draw some elements on the form, a star on the belt.

Step 6. Add color and shadow to the picture. We color the military boots with a black pencil. And also circle all the necessary lines of the hero. Highlight them in dark or black.


Step 8. Paint the soldier's uniform green. And the drawing is almost ready! Don't forget to transfer the shadows to the drawings, coloring them more intensely and darkly in relation to the same parts of the drawing that are in the light.

The drawing is ready! We hope that it turned out as beautiful and natural for you as it was for us.