

Knitted hat helmet knitting decorated with buttons and pompoms
Knitted hat for boy, description and video
A chic model of knitting a hat hat for a kid, a detailed video will help you repeat the hat to any size.
Head circumference: 46 cm (how to tie a cap to another circle, watch the video).
Materials: YarnArtCharisma yarn (80% wool, 20% acrylic, 100 g / 200 m.) -1 skein, straight and circular needles 3.5 mm. (the length of the circular needles is 40 cm.).
Knitting density: 23 loops * 34 rows \u003d 10 * 10 cm. Elastic bands 2 * 2
Knitted hat for boy, description:
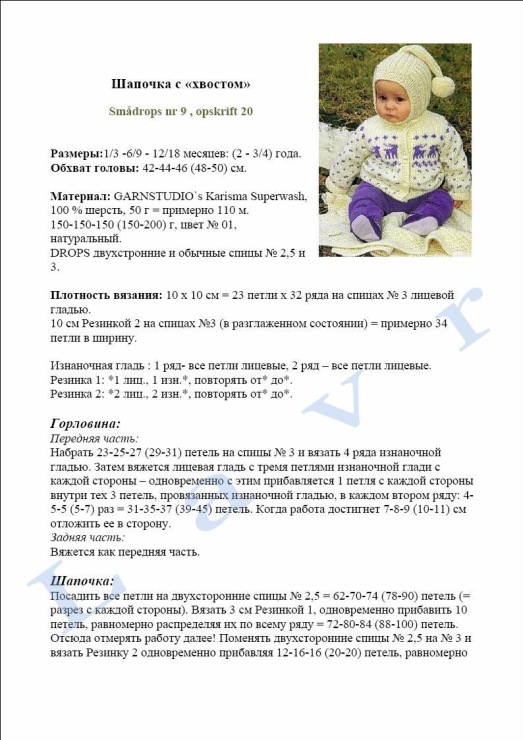
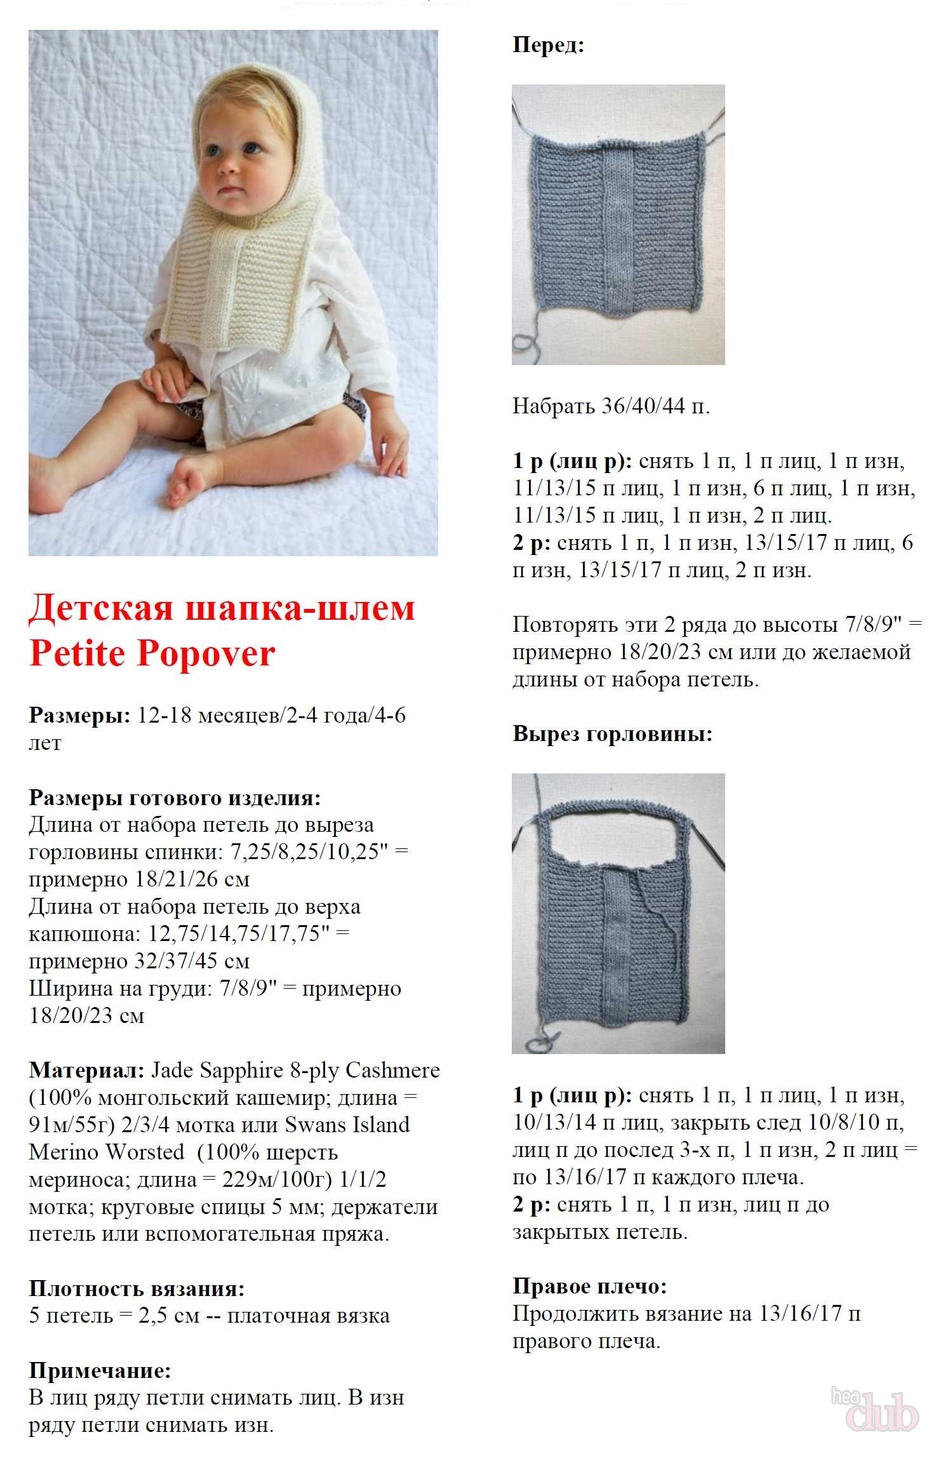
Dicky in front: cast on 60 loops.
Knit with an elastic band. way: chrome. loop, * 2 persons., 2 out., repeat from *, finish 2 persons., chrome. a loop.
Continue knitting with an elastic band - 24 rows.
At the same time, in the 7th row of the elastic, perform reductions: mark the central 2 loops of the work with a marker, knit with an elastic band until the last. 2 sts in front of center sts, 2 together out, 2 persons. (center loops), 2 together, end the row with elastic
Next, knit the loops according to the pattern.
Repeat decrements in 11m, 15m and 19 r. (i.e. in each 4th row - 4 times) \u003d 52 loops on the needles.
Tie up to the 24th row.
Cut the thread and set the part aside.
Backrest: cast on 60 loops.
Knit with a pattern of elastic bands as for the front, at the same time perform reductions as in the front in 13m, 17m, 21m and 25m rows.
In total, knit 30 rows of elastic.
Do not break the threads.
Dicky, connections: continue knitting the back loops together with the front loops on circular knitting needles.
Knit in a circle with an elastic band 2 persons., 2 out. - 3 cm (10 rows).
Cap: place the central 18 loops of the front part on the hinge holder.
Continue knitting in twisting rows, while closing on each side in every second row 2 loops - 5 times \u003d 66 loops.
Knit with a pattern of elastic bands to a height of 13 cm from the set loops (\u003d 44 rows).
Divide stitches into 3 parts: 21 sts, marker, 24 sts, marker, and 21 sts.
Track. row (front side): knit 21 loops with an elastic band to the marker, reshoot the marker, knit with an elastic band. 23 loops (1 loop in front of the marker), remove the loop, 1 person., Throw the removed loop over the knitted one, turn the work.
Track. row (out side): remove the loop, knit 22 loops with an elastic band, 2 together out. (remove the marker), turn the work.
Track. row (front side): remove the loop, knit 22 loops with an elastic band, remove the loop, 1 person., throw the removed loop over the knitted one, turn the work.
Track. row (out side): remove the loop, knit 22 loops with an elastic band, 2 together out, turn the work.
Rep 1-2 rows until all side stitches have been removed \u003d 24 stitches per needle.
Track. row: knit 24 loops with an elastic band, raise 25 loops evenly along the side of the cap, knit loops from the loop holder as * 1 out., 1 persons. repeat from * for all 18 loops, lift 25 loops evenly along the second side of the cap \u003d 92 loops.
Continue knitting in a circle with an elastic band 1 person. / 1 \u200b\u200bout. - 8 rows.
Close the loops with an elastic band (how to close the loops with an elastic band, watch the video).
How to sew the lining:
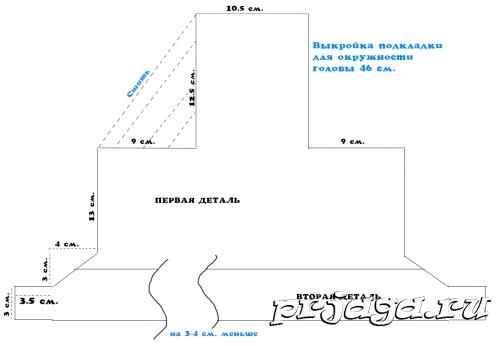
We carry out a pattern of a hat of your size in full size (we use a pattern that we drew when knitting a hat, we convert the number of loops and rows into centimeters using the knitting density).
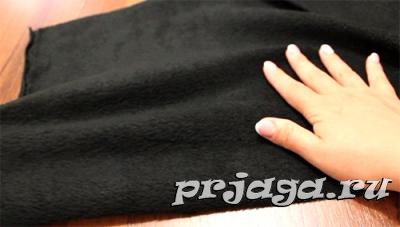
We take the fabric - fleece. We check which side is stretching (it should stretch in the width of the cap).
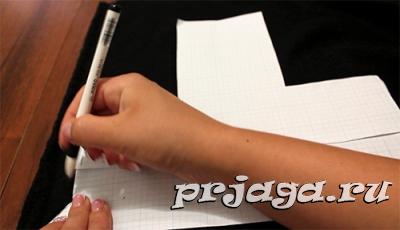
We transfer the pattern to the fabric, cut it out.
Sew two seams on the tops of the cap (see the pattern), in order to sew the short and long sides, I pulled the short side to the size of the long one, secured with pins and sewed.
Any mother wants to reliably protect her baby from wind and cold. And here comes to the rescue knitted hat-helmet. It will provide reliable protection for your baby while walking. This option is suitable for both boys and girls.
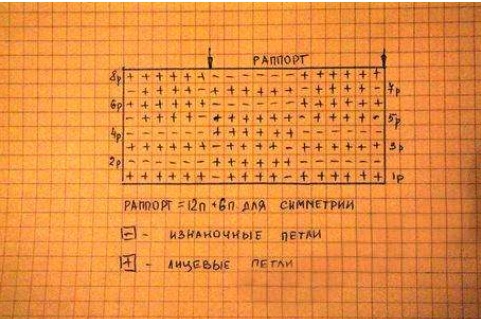
The pattern of knitting hats can be different. So let's take a look at a master class on how knit a hat-helmet for kids, and also talk about how to make a hat for a real knight. The diagram presented in the article will help you understand the pattern.
We knit a hat-helmet for a boy
Photo MK knitting hat-helmet with jacquard pattern
Let's see how a knitted hat-helmet for a boy is made. To repeat this master class, you will need yarn of two colors: blue and a little white with a density of 150 m in 100 g. Only about 150 g of the first and 50 g of the second.
The hat is suitable for a child of 1-2 years old. The height of the elastic is about 4 cm. The side square of the cap has a side of 12 cm. To knit a smaller product, you need to reduce the length of the side of this square. Then your hat will fit a newborn. This master class involves knitting with knitting needles No. 3 circular type.
You can decorate with pompoms or tassels, or leave it as it is. That's ready for the boy
helmet. It remains only to steam using gauze.
Video: Helmet with jacquard pattern
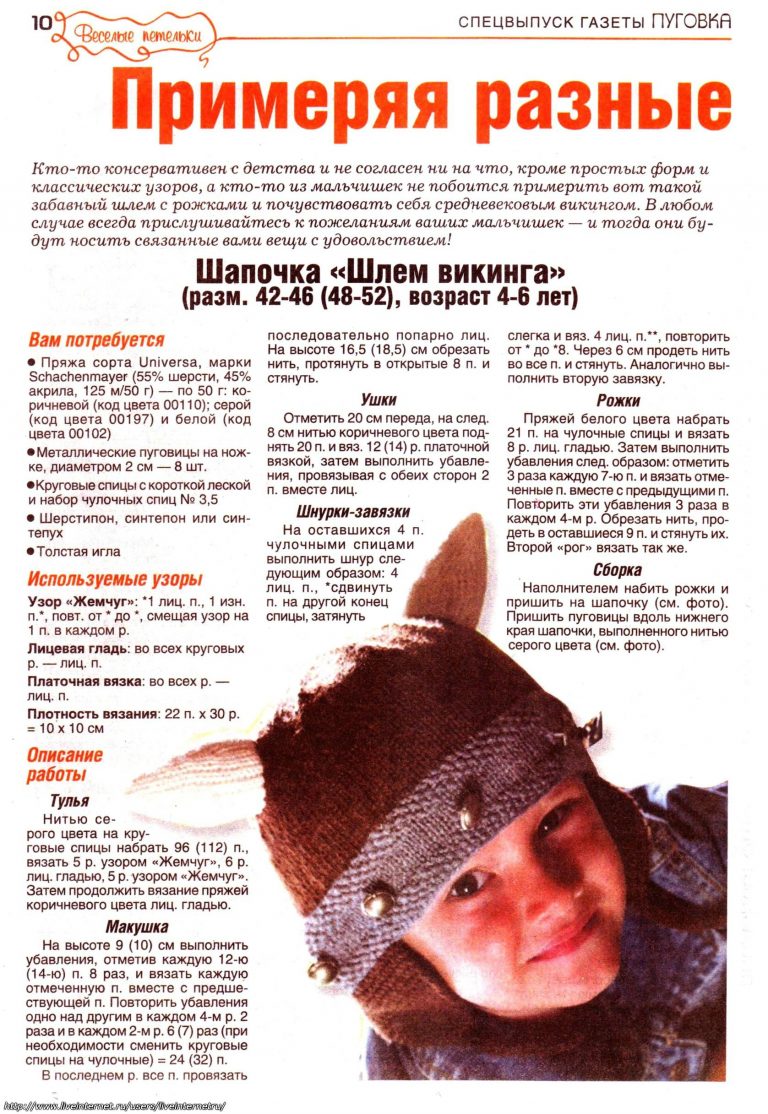
We knit a knight's hat-helmet
As a result of this master class, you will get a hat-helmet for a knight. So you will not only warm, but also please your child, because a rare little boy does not dream of being like a knight. This model is suitable for boys up to two years old with a head volume of 45 to 48 cm. 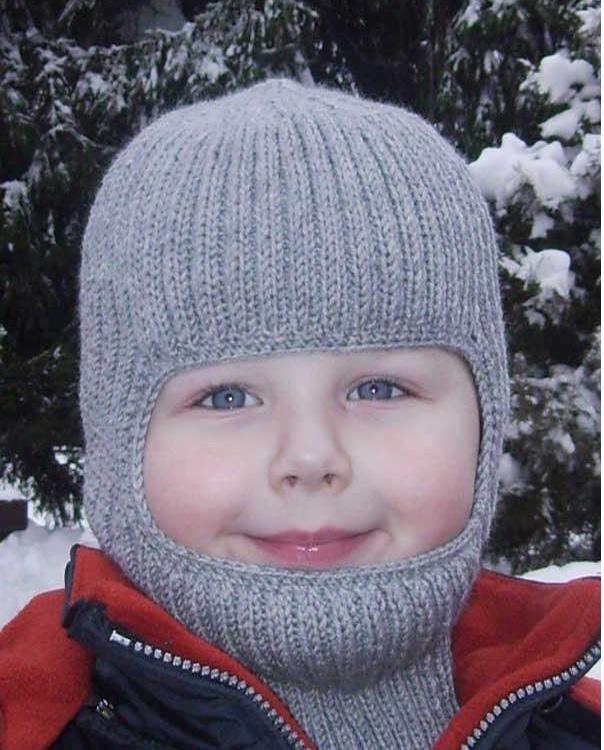
- We start with those parts that go to the back and in front, typing 50 loops for each. Tie them with an elastic band, alternating 2 through 2. Approximately 30 rows.
- Next, we combine them into one knitting and continue in the same way, in a circle, adding about 12 cm to the desired height so that the neck goes over the chin.
- We begin the design of the front oval and for this we close the central elements in the amount of 18 and then remove in odd circles 5 times by 2. Although now
our knitting no longer goes in a circle, but back and forth. - We reach the required height (about 10 cm) and divide everything into three groups. The principle is similar to knitting a heel on toes. And also we reduce the loops, knitting together 1 from the central and 1 from the side, until only those in the middle remain.
- We knit another 4 or 5 cm, choosing new loops from the edging on the "cheeks".
A boy in such a hat will look very much like a knight and will never freeze.
Video: Hat with embossed pattern
We knit a hat-helmet for girls
As mentioned earlier, you may well be knitted a hat-helmet for a girl.
We also decorate with pom-poms, tassels or ears. And you can make an imitation of braids.
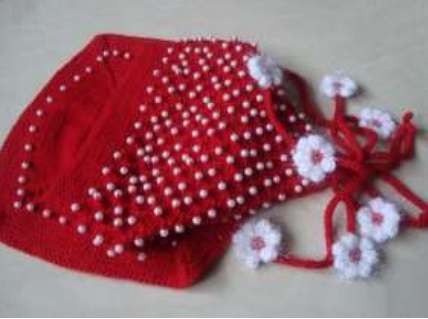

Use different motives or add beads to knitting. After all, a hat-helmet should be distinguished by brightness, elegance and unusualness. Especially because it is intended for a girl.
Video: Knitted and crocheted hat
Schemes with descriptions and knitting of different models of hat-helmets

Perfect for little kids in mid-season weather, and if knitted from woolen yarn, then for the winter season. Such hats are good because they do not require additional use of a scarf and the wind does not blow anywhere.
For work we need:
- Yarn Adelia "Mirray" 72 gr, ≈140 m (in a skein 95 ± 6 m, 50 gr, 50% wool / 50% acrylic)
- Hook number 4
- Detachable marker
Legend:
- Art. b / n - single crochet;
- vp - air loop;
- s.s. - connecting post;
- The increase is 2 tbsp. b / n in one loop of the previous row.
Video master class on crocheting a hat-helmet:
Description of the knitting process of a children's hat-helmet:
In order to determine what size to knit a hat for your child, you need to measure the volume of his head, divide it by the number Pi (3.14) and you will get the size of the bottom. In our hat for a volume of 42 cm, you need to make the bottom size ≈13.5 cm, with the thickness of the yarn we have chosen - this is 11 rows.
- 1 row: make a lasso and knit 6 tbsp. b / n. [\u003d 6 tbsp. b / n]. Then knit in a circle.
- 2nd row: * increase *. Repeat * 6 times [\u003d 12 tbsp. b / n].
- 3rd row: * increase, 1 tbsp. b / n * [\u003d 18 tbsp. b / n].
- 4th row: 2 tbsp. b / n * increase, 2 tbsp. b / n * [\u003d 24 st. b / n].
- 5 row: * increase, 3 tbsp. b / n * [\u003d 30 st. b / n].
- 6 row: 2 tbsp. b / n * increase, 4 tbsp. b / n * [\u003d 36 st. b / n].
- 7 row: 4 tbsp. b / n * increase, 5 tbsp. b / n * [\u003d 42 st. b / n].
- 8 row: 6 tbsp. b / n * increase, 6 tbsp. b / n * [\u003d 48 st. b / n].
- 9 row: * increase, 7 tbsp. b / n * [\u003d 54 st. b / n].
- 10 row: 2 tbsp. b / n * increase, 8 tbsp. b / n * [\u003d 60 st. b / n].
- 11 row: 4 tbsp. b / n * increase, 9 tbsp. b / n * [\u003d 66 st. b / n].
We leave the loops of the face (22 sts) un-tied, we knit the working loops with a cloth. And you can make an approximate calculation without measuring on the child, divide the number of loops in the circle by 3, just the face is about one third, total 66/3 \u003d 22 p. Having knitted 7 rows, we expand the canvas. A total of 33 rows are obtained.
To expand the working loops (44 sts), we divide by 3, I got ≈15 and every 15th loop is doubled in this way - st. b / n * b.p. * st. b / n, total is obtained 2 times in a row. We knit the required length to the chin. I have 3 rows. In the first row, you make an increase in 15 loop, and in all the rest the increase is done in vp. increases in the previous row. A total of 36 rows are obtained.
We collect several air loops, in my case 11, and connect the product in a circle. Next, we knit in a circle 3 rows without additions [\u003d 63 st. b / n]. From the next row, we begin to make increments in the way higher in the places where the chain of vp begins and ends, when the two sides are connected, i.e. 2 times. We knit to the required length, I knitted up to 44 rows inclusively with additions.
I knit 45 row without additions and knit the next row with s.s., as well as the notch for the face.
Crochet pattern for baby hat-helmet:
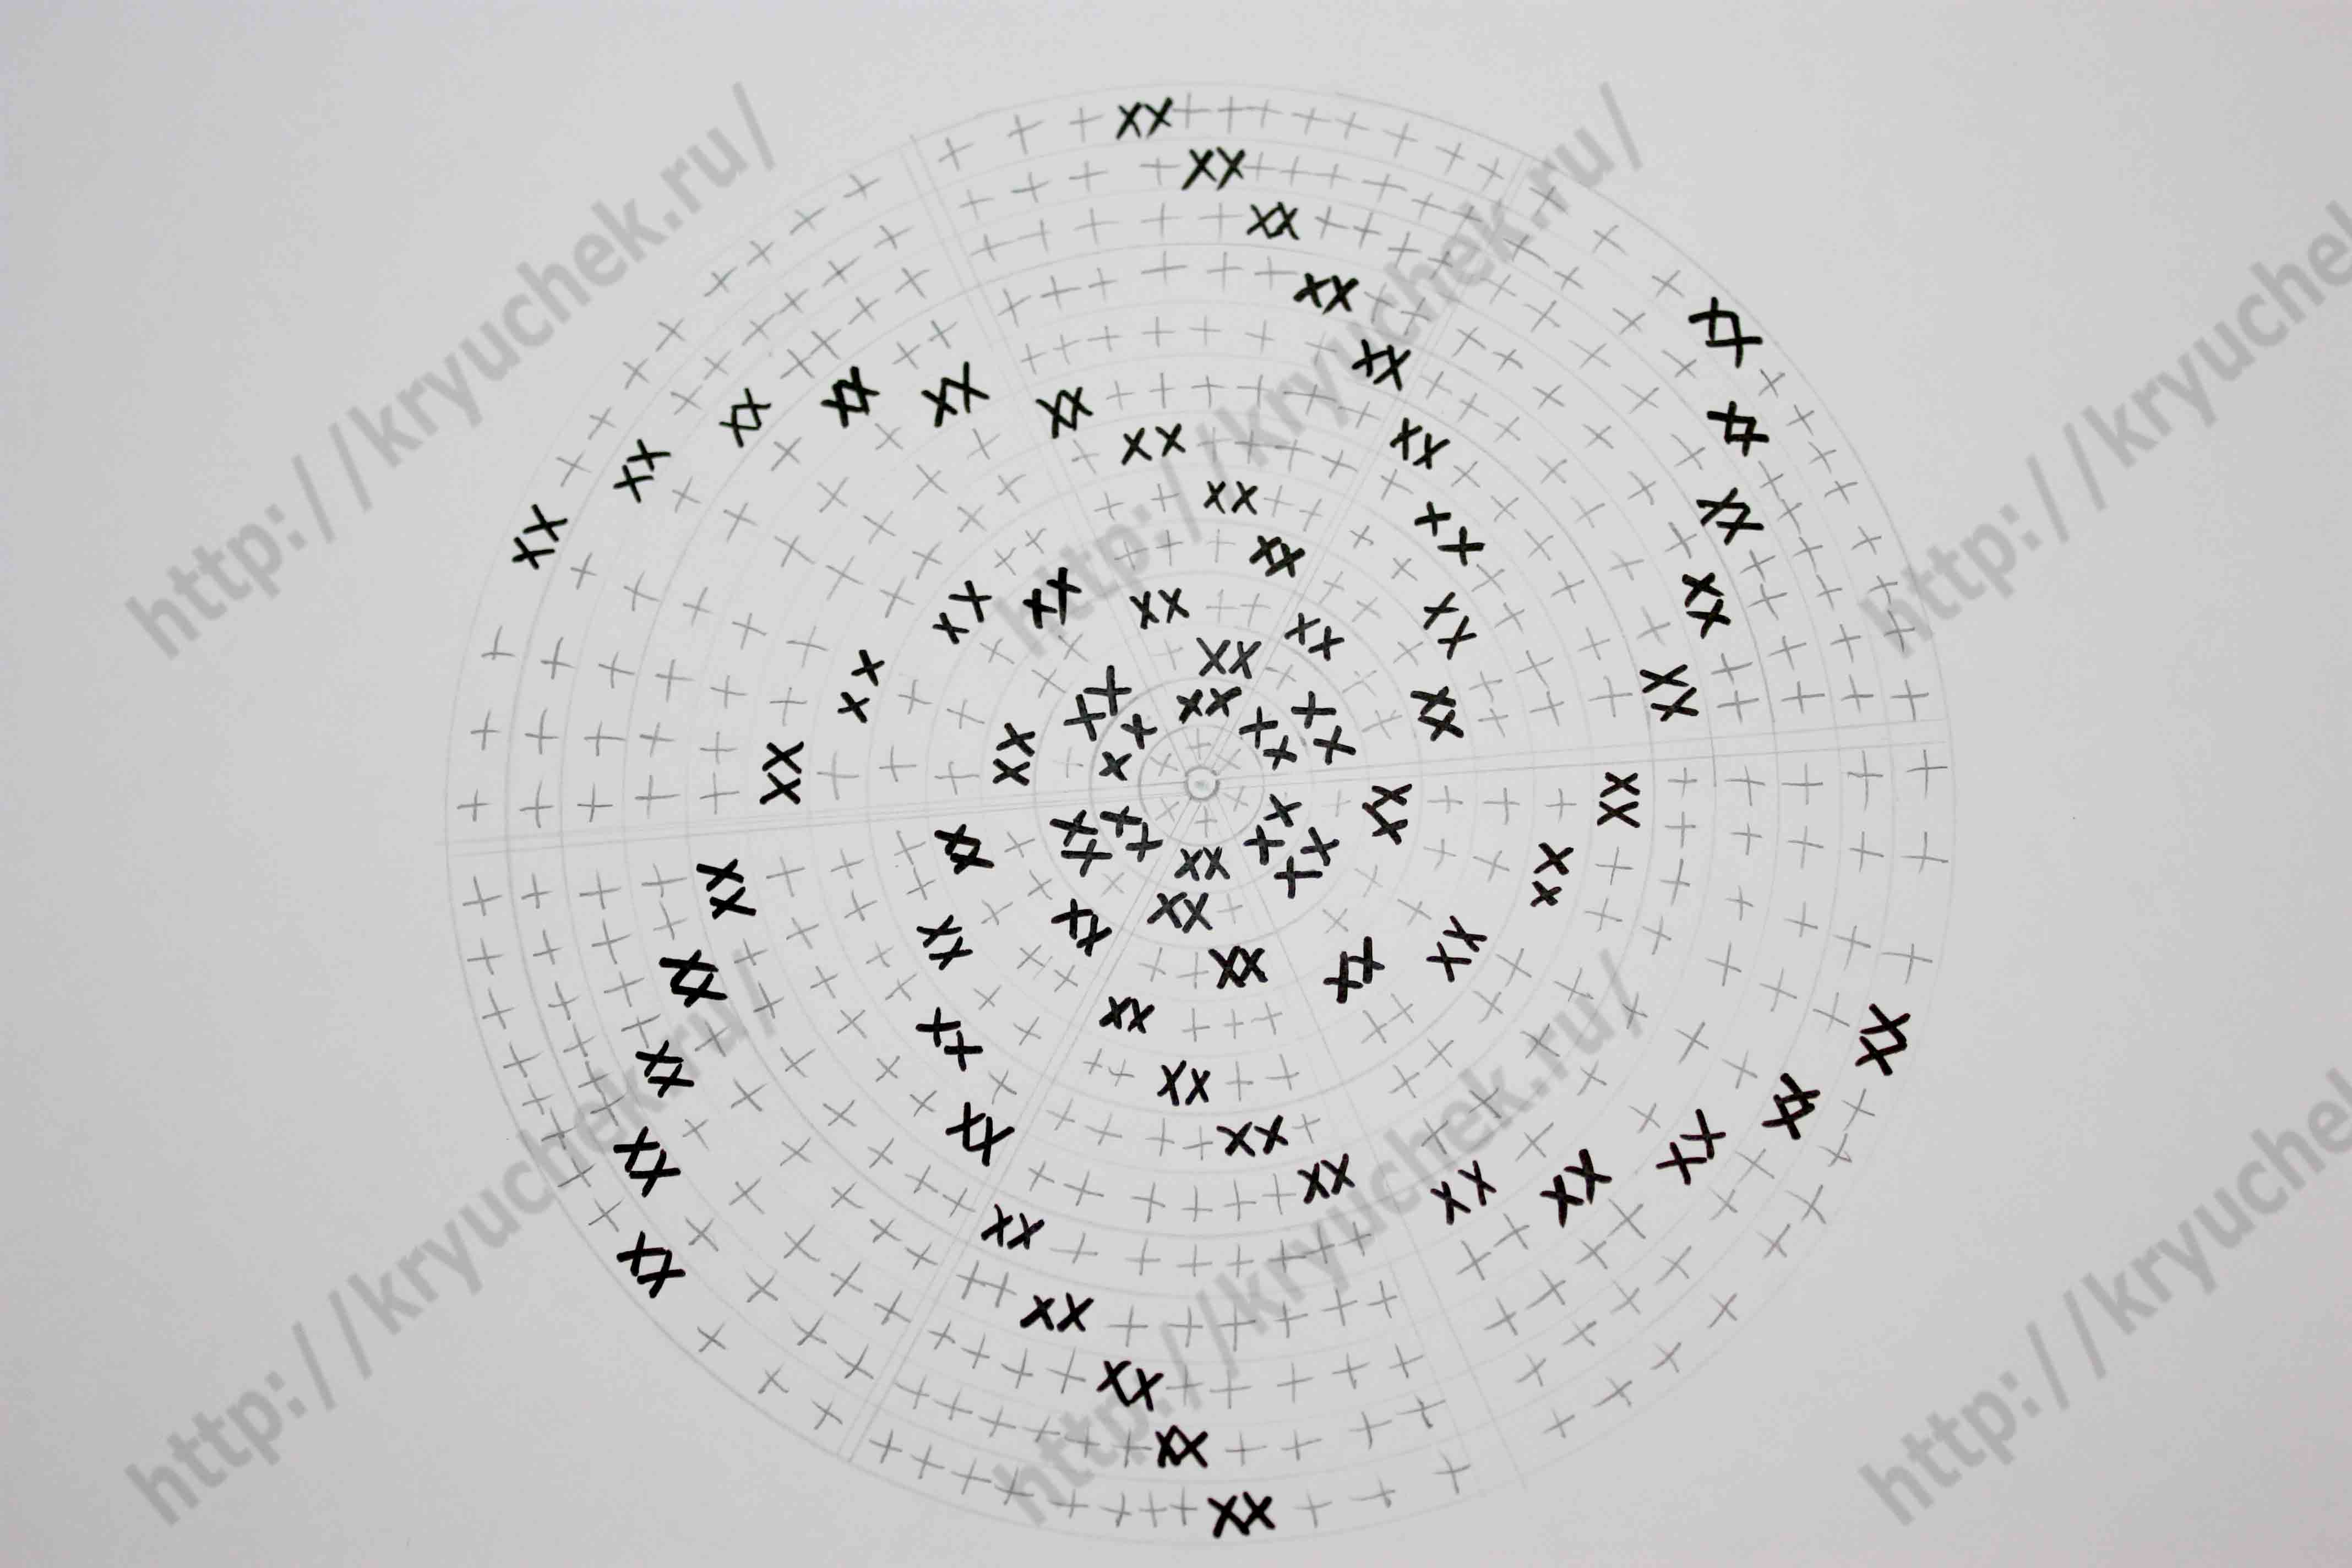
Your helmet hat is ready!
We hope you did it too.
Share your result with us and leave comments.
Author Tatiana